

If you love to do work related to DIY or woodworking, then you definitely know the importance of a well-organized and accessible storage solution for it. Well, we are here with the solution called “Lumber Rack.”
A lumber rack not only keeps your workspace tidy but also ensures that your valuable wood materials are properly stored and protected. To put the cherry on the cake, you can create a functional and sturdy lumber rack using basic 2x4s and some simple tools. This will help keep the wood in good shape, and you will be able to find the required wood easily when needed.
Stay tuned to this blog, where we are going to present to you and guide you through 12 of the easiest DIY lumber rack designs that you can easily build yourself.
Let’s start by exploring all the ideas briefly as we go along!
1. Wall-Mounted Vertical Rack
In this type of design, you can vertically store lumber up against a wall. Using this arrangement, which is ideal for tiny workshops or garages with limited space, and has a restricted floor size or limited capacity in the room.
To implement this idea, follow these simple steps:
- Measure and mark the desired height for your rack on the wall.
- Ensure that the vertical 2x4s are level and securely connected to one another before adhering them with screws to the wall studs.
- Install horizontal supports between the vertical 2x4s at regular intervals to create shelves for your lumber.
2. Adjustable Lumber Storage
Building a portable lumber rack will allow you to create a flexible storage solution. In this type of setting, you can use different sizes and lengths of lumber that can be accommodated through adjustable shelves or supports.
To put this concept into practice, simply undertake these easy steps:
- Create adjustable shelves for your lumber by using movable metal brackets or shelf supports.
- You can modify the shelf heights and alter them as necessary by securing the brackets to vertical 2x4s.
- To give the lumber appropriate stability, think about making the shelf surface out of plywood or slats.
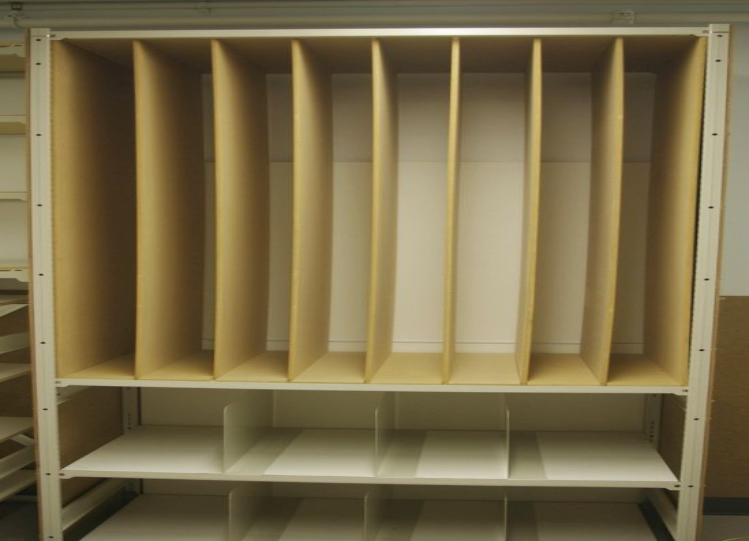
3. Plywood Storage Rack
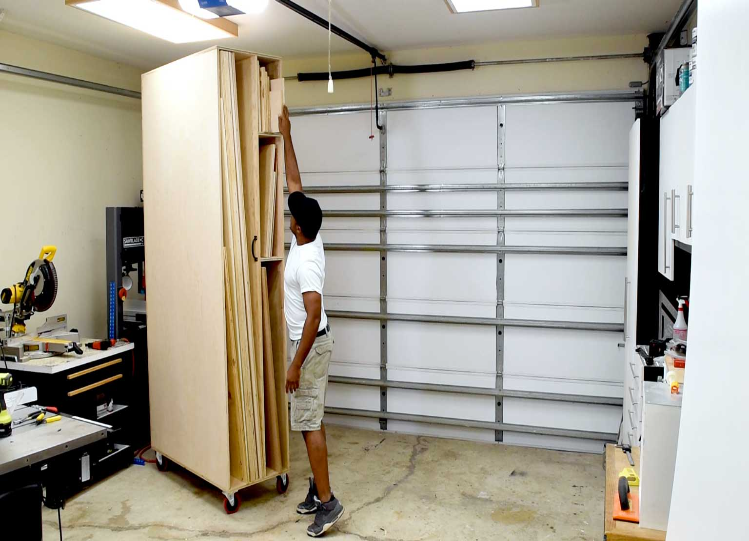
Plywood sheets are very important, so don’t forget them. Build a dedicated rack to store your plywood vertically, preserving its organization and avoiding warping.
Follow the following easy instructions in order to put this idea into practice:
- In order for the rack’s vertical supports to accommodate full-length plywood sheets, they must be accurately measured and cut to the appropriate height.
- Attach horizontal supports between the vertical posts by creating slots or compartments for the plywood.
- For stability and to prevent the rack from tipping over, firmly secure the rack to the wall or the ground.
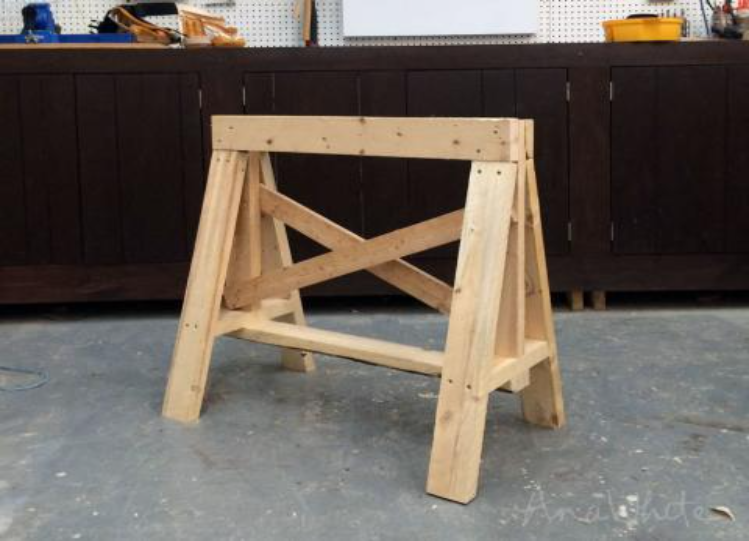
4. Free-Standing A-Frame Rack
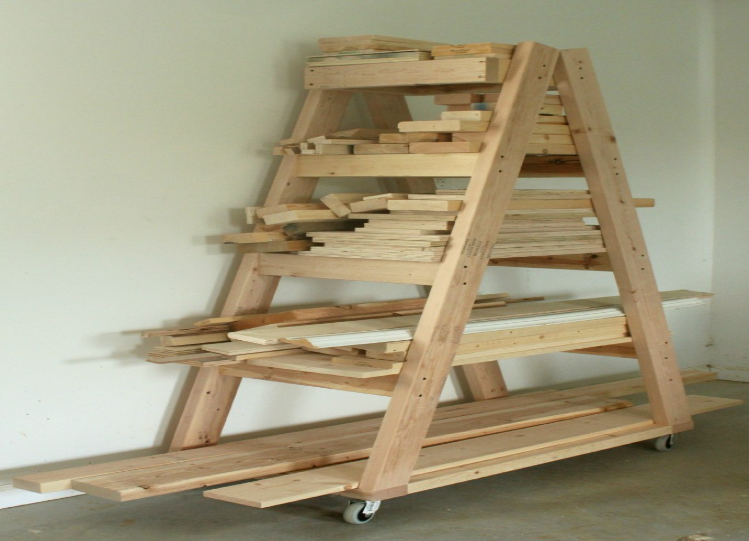
A top solution with a unique design for the best freestanding rack is an ideal option for larger workshops or open areas.
To put the concept into reality, just follow these easy steps:
- The A-frame design provides excellent stability and allows for easy access to your lumber.
- To create the A-frame legs, cut two 2x4s to the required height.
- Connect the legs at the top with a horizontal crossbeam.
- To increase stability, use diagonal braces.
- Create the shelves by securing horizontal supports across the legs.
5. Mobile Lumber Rack
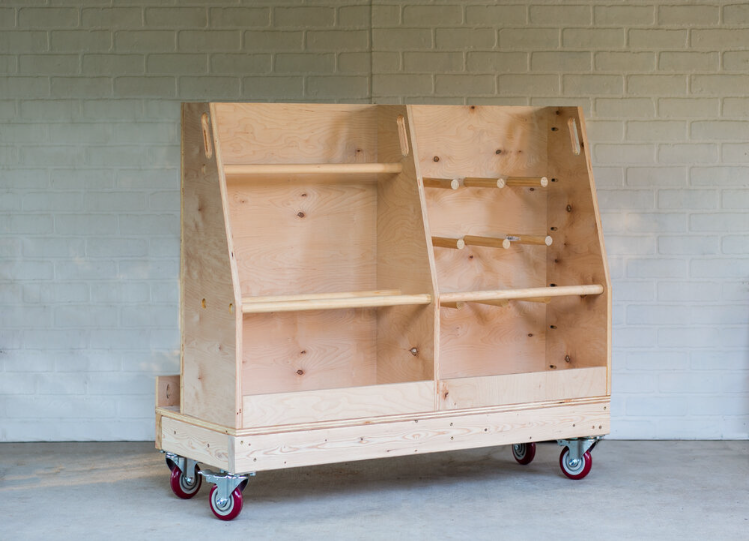
Who doesn’t want a solution that is much more convenient because it is flexible and mobile, so you can easily locate it from one place to another? So here we are asking you that. Need mobility and flexibility in your storage solution? Then don’t look at anything else and blindly go for this option.
For this, construct a mobile lumber rack with sturdy wheels, allowing you to move your wood collection wherever you need it.
Implementing this concept is easy. Just do these:
- Build a strong base out of 2x4s, then add heavy-duty casters for mobility.
- On top of the base, build shelves and vertical supports.
- Make sure the casters are firmly secured and can support the weight of the lumber.
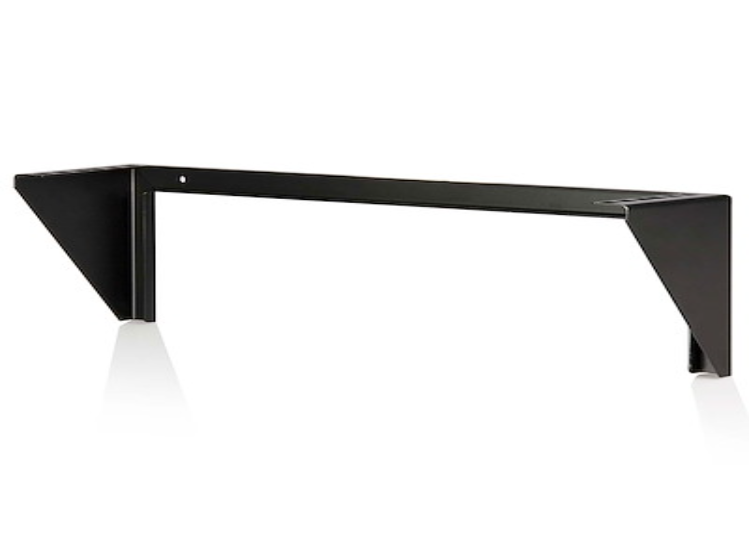
6. Ceiling-Mounted Overhead Rack
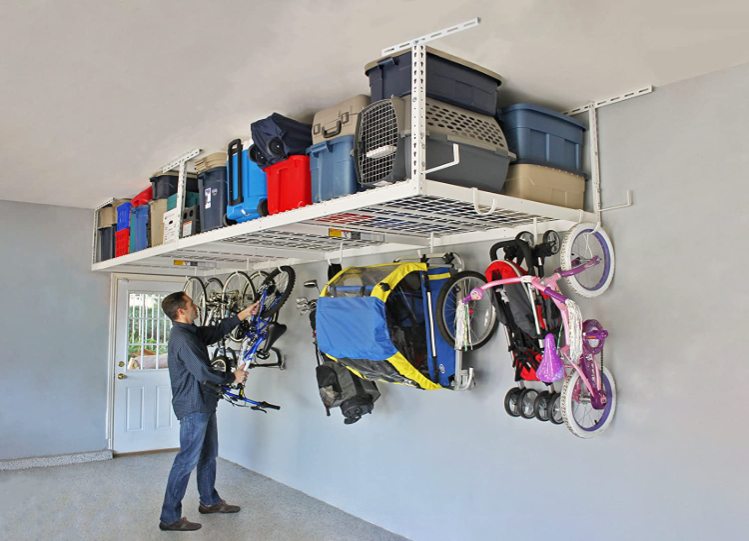
Just be careful while going up because the space above your head is going to be used for something very important. Yes, a ceiling-mounted overhead rack utilizes the space above your head by installing a ceiling-mounted lumber rack. This design keeps your lumber out of the way while still being easily accessible.
Based on the amount of ceiling space available, choose the size and location of your rack.
Follow the simple directions below for implementing this notion into reality:
- Install strong hooks or eye bolts into the ceiling joists.
- Make sure the 2x4s are level and securely secured before attaching them to the hooks horizontally.
- If you require more stability, use additional vertical supports.
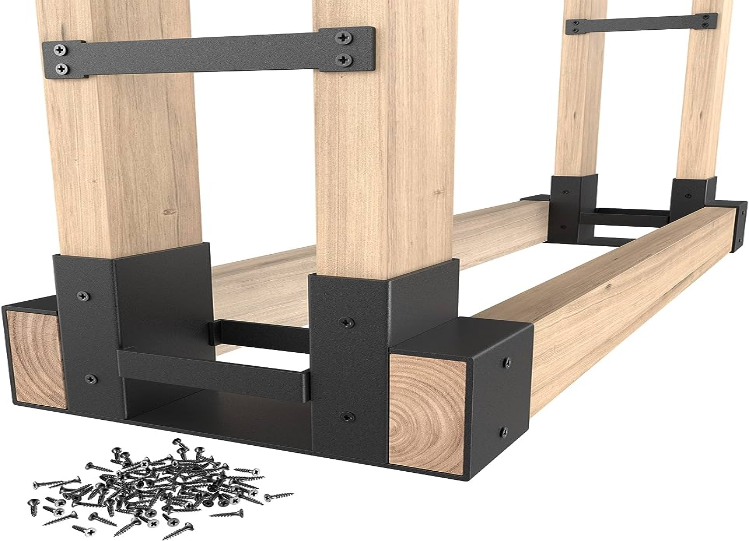
7. Scrap Wood Storage Rack

By constructing a special rack for scrap wood, you can keep your workshop organized. Even the smallest pieces of lumber are neatly organized and easily accessible because of this rack for upcoming construction projects.
To implement this idea, follow these simple steps:
- The size and quantity of compartments needed for your scrap wood storage must be assessed.
- Create separators or shelves within an effective frame by using 2x4s.
- For simple access and mobility, position the frame against a wall or on casters.
8. Rolling Lumber Cart
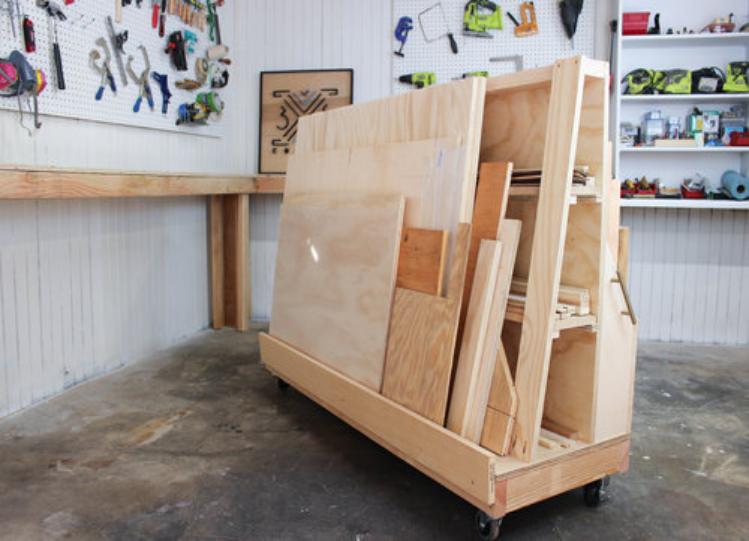
If you frequently move your lumber around, a rolling cart is a great option. This design allows you to transport your wood materials with ease and provides additional storage for smaller scraps and tools.
To put this concept into practice, simply undertake these easy steps:
- Build the base and sides of the cart’s frame out of 2x4s in order to guarantee its durability.
- Install fixed casters on one end and swivel casters on the other to allow movement.
- To organize small wood scraps and tools, add shelves or dividers inside the frame.
- Make sure the cart can support the weight of your timber and is appropriately balanced.
9. Wall-Mounted Swing-Out Rack
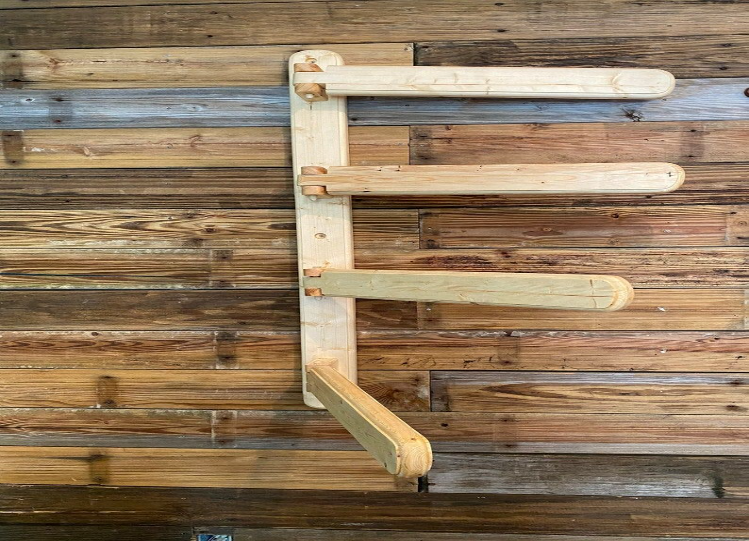
Who doesn’t want the convenience of having space when needed and taking it out when not? But don’t worry. We are not talking about repeatedly taking the lumber rack in and out but with a unique design. Swing-out arms where you can securely hold the lumber against the wall, and when not in use, you can swing it in, so it saves space and offers convenience.
Follow the following easy instructions in order to put this idea into practice:
- Vertical 2x4s are required to be evenly spaced apart and attached to the wall.
- Install swing-out horizontal arms or brackets that are attached to the wall.
- Make sure the vertical 2x4s are strong enough to carry the weight of the lumber before securely connecting the arms or brackets to them.
10. Corner Lumber Rack
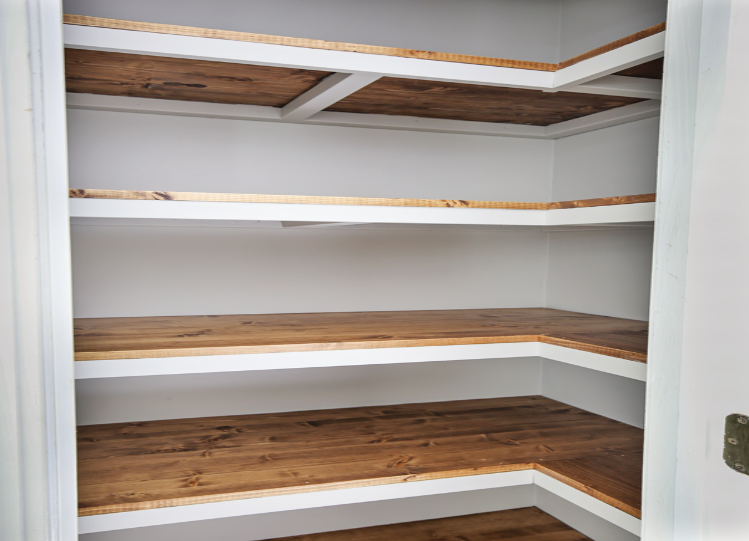
Have you ever thought about your corners getting converted into the storage space you need? Yes, with this idea, take advantage of the corners in your workshop to make the most of your space. To store your wood commodities professionally without taking up significant floor space
To put the concept into reality, just follow these easy steps:
- For an ideal arrangement in your workshop space, measure and cut vertical supports.
- Build shelves for your lumber by installing horizontal supports between the vertical supports.
- In order to maintain stability, make sure the rack is securely attached to the walls.
11. Sawhorse Lumber Rack
Create a storage solution that serves two purposes by combining the capabilities of a sawhorse with a lumber rack. With this layout, you can complete your projects while keeping your woodworking supplies nearby.
Implementing this concept is easy. Just do these:
- Making use of 2x4s, build two sawhorses that correspond to the conventional structure.
- Create shelves for your lumber by connecting horizontal supports over the top of the sawhorses.
- For easier access to your wood supplies, ensure that the sawhorses are stable and well-placed.
12. Simple Vertical Rack with Dividers
To organize various types of lumber, design a simple vertical rack with separators for an inexpensive and efficient solution. This design provides high storage capacity and is simple to assemble.
Follow the simple directions below for implementing this notion into reality:
- Attach vertical 2x4s to the wall, leaving enough space between them for your lumber.
- Install horizontal dividers or shelves within the spaces created.
Now that you’ve reviewed all the options, feel free to decide on your choices and let us know which one best suits what you are looking for.
Do’s and Don’ts Of DIY Lumbar Racks
Do’s
- Do plan and measure carefully before starting your project to ensure the lumber rack fits your space and meets your storage needs.
- Do use high-quality and sturdy materials, such as pressure-treated 2x4s, to ensure the durability and longevity of your lumber rack.
- Do use proper safety equipment, including gloves, safety goggles, and hearing protection, when cutting and assembling the lumber rack.
- Do follow the manufacturer’s instructions when using power tools, and always use them responsibly and safely.
- Do consider adding labels or organizing systems to your lumber rack to identify and access different types of wood easily.
- Do periodically check and reinforce the stability of your lumber rack to prevent accidents or collapse.
Don’ts
- Don’t overlook the importance of properly anchoring your lumber rack to the wall or floor for stability and safety.
- Don’t overload your lumber rack beyond its weight-bearing capacity. Be mindful of the weight and distribution of the wood materials you store.
- Don’t neglect regular maintenance and cleaning of your lumber rack to prevent dust buildup or potential damage.
- Don’t rush the construction process. Take your time to ensure accurate measurements and secure assembly for a sturdy and reliable lumber rack.
- Don’t forget to consider any specific safety regulations or guidelines that may apply in your region or workspace.
Final Thoughts
We hope you enjoyed reading this and discovered the perfect solution for yourself and your workshop to get started. As a short reminder, let’s quickly wrap up the blog for you.
You can make an exceptional storage solution that meets your space and woodworking needs by making your own lumber rack from modest 2x4s. For every workshop, regardless of how big or small, these 12 DIY lumber rack designs offer a variety of alternatives.
You can create an efficient and organized area to store and access your valuable lumber with a little time, work, and the right tools for the job.
Prepare to set up your workshop and effortlessly start your next woodworking project!

![12 DIY Strawberry Planter [with plans!]](https://waterbuckpump.com/wp-content/uploads/2023/08/12-DIY-Strawberry-Planter-with-plans-150x150.jpg)