![12 DIY Strawberry Planter [with plans!]](https://waterbuckpump.com/wp-content/uploads/2023/08/12-DIY-Strawberry-Planter-with-plans.jpg "12 DIY Strawberry Planter Designs for Easy Gardening")
Tired of buying packed berries or afraid of the preservatives the tins contain? Not sure if your supermarket provides you with the freshness you desire?
Well, we are here for your rescue, and that, too, with a tint of creativity! Strawberries are praised for their neverending benefits could be the reason why other fruits get jealous of them. Jokes apart, strawberries not only make everyone’s face blush red but are so rich in antioxidants to cure many diseases.
These lobes of freshness do not demand very high maintenance. With the right moisture and sunlight, these miniatures can grow in almost all pits and holes.
Imagine the joy of plucking ripe, sun-kissed strawberries from your rooftop or garden each morning, indulging in their succulent sweetness, be it in a beloved smoothie or atop fluffy pancakes. It’s an instant ticket to heavenly bliss.
Scroll down below to explore 12 amazing DIY strawberry planters with easy steps!
1. Berry Tower
Not just lovely and functional, but these strawberry skyscrapers are just the right choice for your garden or roof area.
Collect the Items
Instructions
- Clean all the tires and paint them creatively.
- Stack one tire on another. Make sure to do it in ascending order.
- Pierce 2-3 holes in each tire at an even distance with a hole saw.
- Cover the bottom with landscape fabric and fill them with soil and compost.
- Now, plant the strawberry seed in each layer.
- Place old logs, branches, and grass inside the tire before filling it with compost as you would normally.
- To fill the center of the tire stack with soil, one can use a 6-inch PVC pipe, a bit taller than the stack itself, with a ¼ inch hole cut in the side to water it easily.
- At the bottom of the PVC pipe, close the end to make all the water seep into the tire stacks through the holes.
- And finally, sow strawberry seeds into the soil and watch them grow red and beautiful.
2. Laundry Baskets: Not for Clothes but For Berries
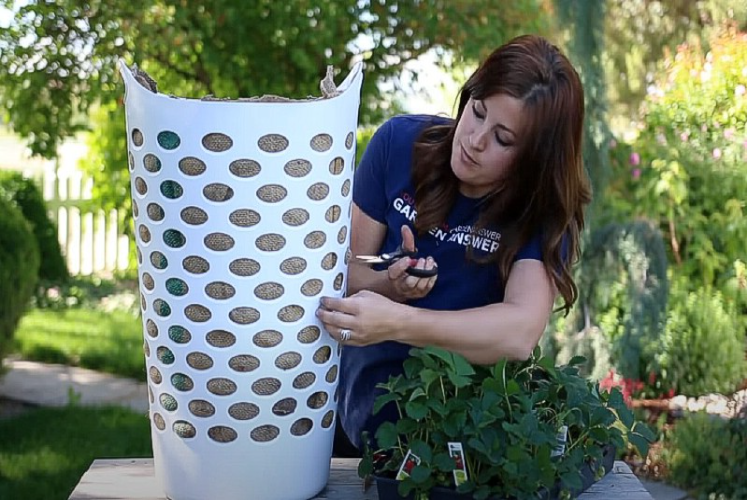
In need of something quick, quirky, and cost-efficient? It’s time to turn your old plastic laundry baskets into bounties. Do you know what they say about plastics? Reuse, reduce, and recycle.
Collect the Items
- Tall laundry baskets with holes
- Landscape fabrics or newspapers
- Compost and soil
- PVC pipes of 6 inches with ¼ inch holes in the sides
Instructions
- Clean the baskets and let them dry.
- Spread newspapers or landscape fabric at the bottom
- At one corner of the basket, put PVC pipe inside and close the bottom end of the pipe with a cap. This will help to water the plants at every step of the basket.
- Now fill the basket with soil and compost, and make sure the soil is moist enough not to be flowed off from the holes.
- Plant your strawberries from each hole of the basket.
- The uppermost layer of the open soil can also be used to plant more strawberries.
- There it goes, a little basket with red bulbs lightening the beauty of the garden.
3. Gutterly Gorgeous
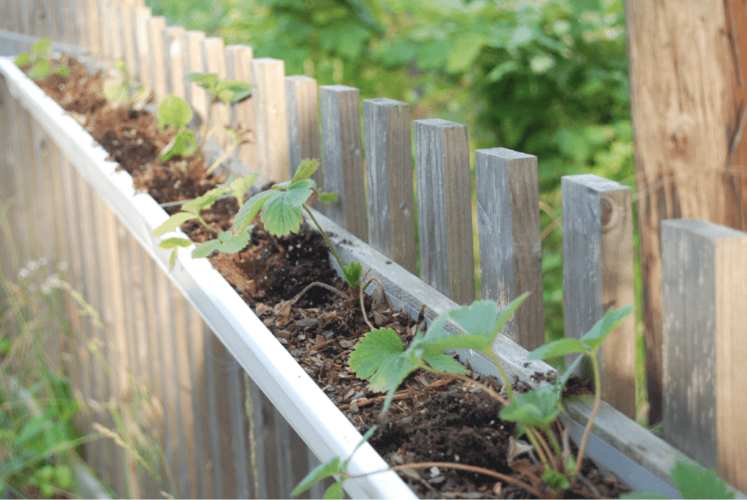
That yucky feeling is about to pass away with the click of this beautiful berry idea. Yes, even stinky gutter pipes can treat your red delights well while keeping a check on your pocket.
Collect the Items
- Gutter pipes (6 inches wide)
- Soil and compost
- Strawberry seeds
- Hole saw
- Metal wires
Instructions
- Take clean gutter pipes and make holes in them at an even distance for planting the strawberries evenly.
- Place the gutter pipes over the head to form a roof-like structure. Make sure to place them at an equal distance and let them give a dense look.
- Tie the pipes with metal wire to attach them securely.
- Fill in the pipes with soil and compost and plant the strawberries.
- Choose 6-inch wide pipes as that is the minimum length for strawberry plants, and hence the strawberry planter would encourage its growth.
- Water them evenly through the holes and make sure the pipe is not leaking from anywhere.
The roof covered with lush green leaves and sunlight straining through the pipes would give a wonderful experience. It’s an ideal strawberry planter as the plants would be in direct sunlight, appropriate enough for the plants.
4. Old Rain Boots to Strawberry Planter
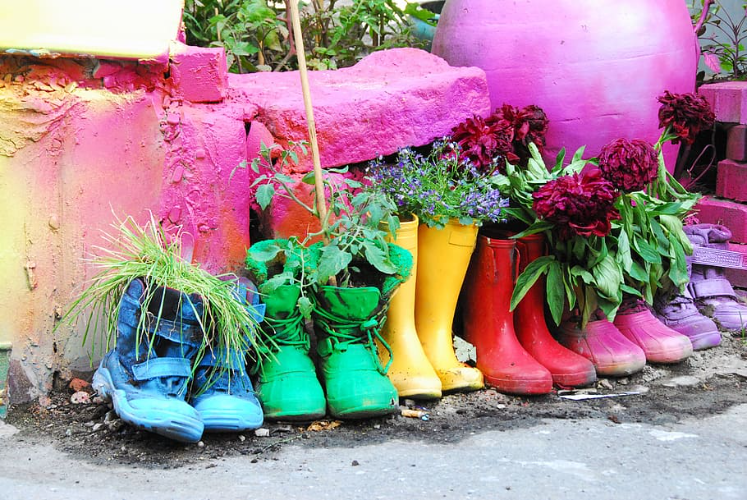
Ever watched ‘Puss in Boots?’ Well, it’s time for ‘Strawberries in Boots’ and Oh Boy! Don’t they look just gorgeous!
Collect the Items
- Big sized Rain boots
- Hole saw
- Paints
- Hooks
- Soil and compost
- Strawberry seeds
Instructions
- Clean the rain boots and let them dry.
- Paint them with bright colors.
- Now, make holes at even distances through hole saws.
- Attach hooks on the back of the boots.
- Fill them with soil and compost, and plant the strawberry seeds through each hole.
- Hang them on a sunny spot to get most of the sunlight.
- Soon the boots will be covered in green leaves looking like a walking plant.
There, the old boots got a purpose to be an efficient strawberry planter rather than getting under piles of dust.
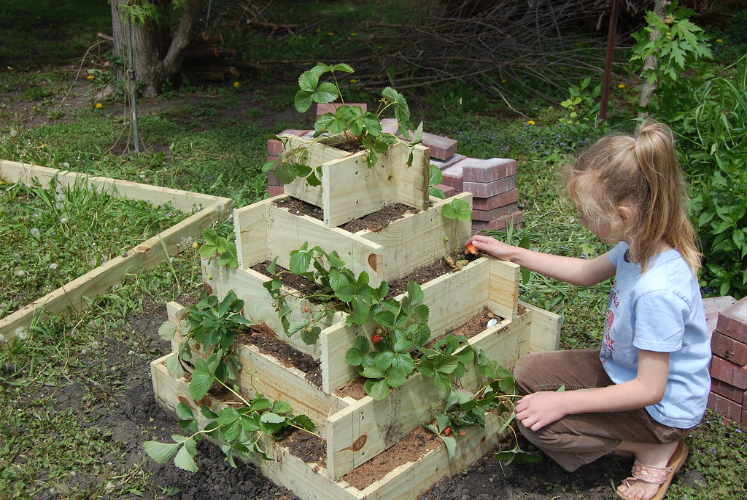
5. Garden Pallets: Vertical Strawberry Holders
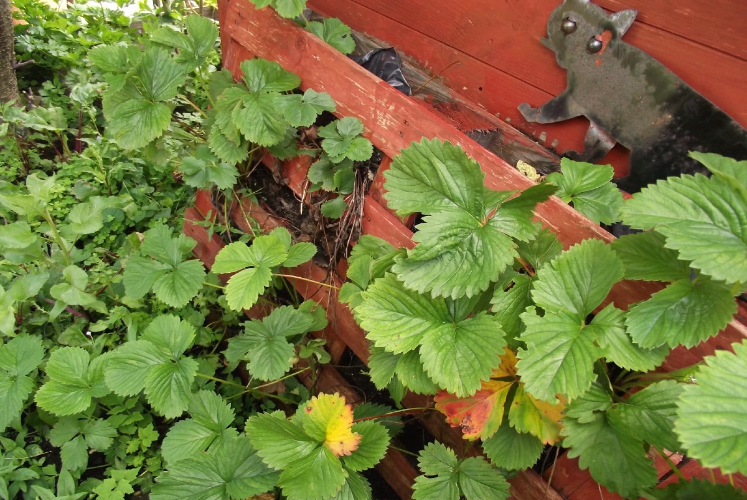
If you are a planter, then you must know what a garden pallet is. Ever wondered how these pallets would look if they went vertical? Interesting? It’s time we explore it on our own.
Collect the Items
- Garden pallet
- Nail and hammer
- Landscape papers
- Soil and compost
- Hole saw
- Hooks
Instructions
- Place the garden platter vertically on a wall where sunlight falls most.
- Attach the platter with hooks and nail the corners of the platter with a hammer.
- Make even holes on each stack of the platter for distributing the water flow.
- Staple landscape fabric inside the platter.
Some gardeners only cover the open bottom with landscape fabrics and leave them flat on the ground for several days, which takes a lot of time. Instead, it is advised to cover the bottom from both sides.
- Fill the pallet with soil and compost.
- If the pallet has been covered with landscape fabric from both sides, cut the fabric at 6-inch distances and make holes.
- Now sow strawberry seeds in those holes.
That’s all. The simplest strawberry planter with outstanding results is ready.
6. Strawberries Out of Hanging Bags
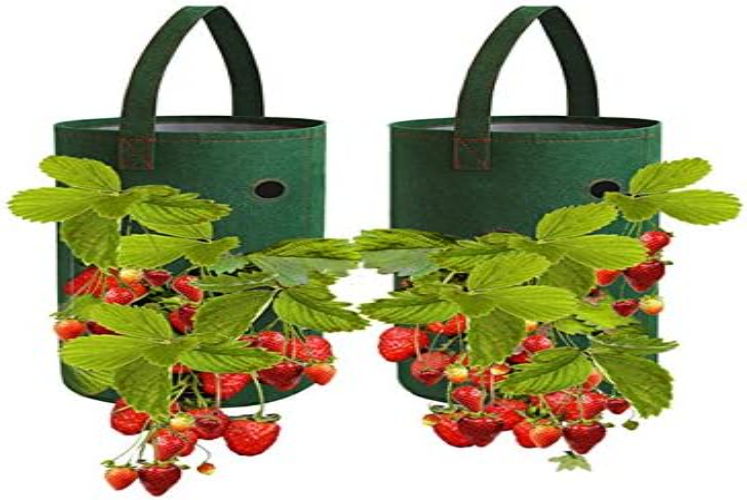
Yes, you heard it right. Red berries hanging out of colorful bags are not just an aesthetic appeal but are too healthy to bite. It’s time to bring the best into action.
Collect the Items
- Hanging bags (made from fabric materials)
- Soil and compost
- Hooks to hang
Instructions
- Take the upside-down hanging baskets, which are meant for planting purposes.
- Hang them in a sunny area and fill them with soil and compost.
- Sow the strawberry seeds in different holes.
- It is advised to water each plant separately through the holes given.
That’s it. The most durable strawberry planter giving out red bulbs like strawberries stacked together from the bottom is what every garden requires.
7. Hanging PVCs

Lying here, lying there, these PVC pipes are available in every nook and corner of any and every locality. Got one lying in your corner too? It’s time to make the best of them.
Collect the items
- PVC pipes 9”
- Strong ropes
- Wood cutting machine
- Soil and compost
- Drilling machine
Instructions
- First, cut the PVC pipes in half (horizontally) with a wood-cutting machine.
- Drill out holes at even distances in the pipes.
- Tie the corner of each pipe strongly with ropes and then tie the ropes from both ends vertically to have a hanging structure.
- Attach the hook to the end of the rope and hang it on the wall.
- Now, fill the pipes with soil and compost and sow strawberry seeds.
- Water each plant slowly.
A moving wall hanging filled with strawberries is ready to satisfy instant cravings.
8. Window – View Strawberries
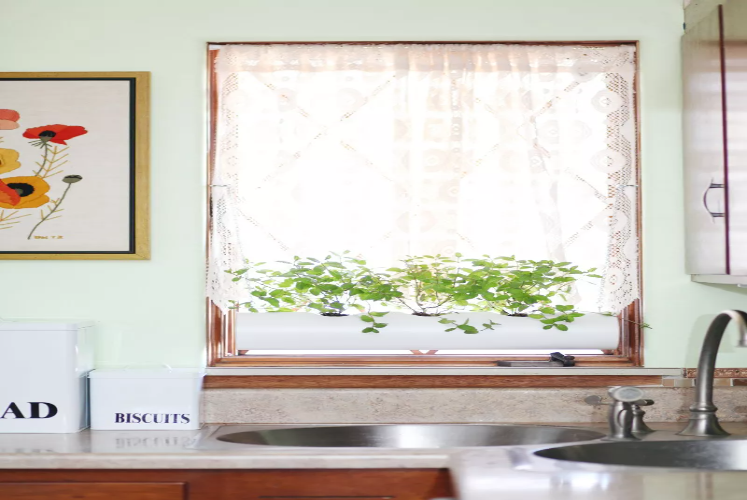
Imagine opening your window and sniffing the fresh and fruity smell of just-grown strawberries. Well, it’s time to turn the domestic dream into a song by Cinderella. Waste no time and get set going.
Collect the Items
- 4″ PVC pipe
- 2* 4″ knock-out plugs
- 2 small eye hooks
- 2 larger eye hooks
- 4 small S-hooks
- 2 12″ lengths of #16 chain
- Power drill
- Drill bits (just a tiny bit smaller than the eye hooks)
- 3″ hole saw (for cutting door knobs)
Instructions
- Drill holes in the PVC pipes and make sure they are directly across each other. Attach the eye hooks to them.
- Mark the center point where the plants have to be grown. They must be on the same line as the hooks.
- Drill out holes from the marked points using a hole saw.
- Clean the dust from pipes and pop in the knock-out plugs on the ends of the pipe. These will fit tightly, which is great for keeping the soil and water inside the planter.
- Fill in some small pebbles in the strawberry planter to avoid water clogging the bottom.
- Measure the dimensions of the window and drill pilot holes into the millwork framing the windows, then screw in the larger eye hooks.
- Fill in the pipe with soil and compost and plant strawberries in them.
And opening the window would feel so refreshing that one could not resist applying it to all the windows. Cherish the heart with the sweet smell of herbs and eye-pleasing greenery.
9. Wired up Berries
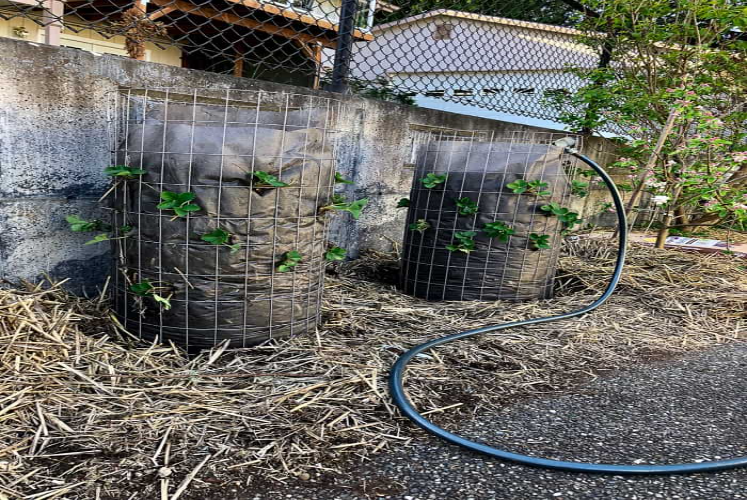
Need more creativity around your garden? Well, it is time to build your own wirey meshy strawberry planter in no time.
Collect the Items
- Wire mesh garden fence
- Wire cutter
- Landscape fabric
- Straw
- garden soil
- Box knife/razor blade
Instructions
- Decide the length and width of the strawberry planter.
- Decide how many columns wide to make the planter, measure each column and cut the wire through a wire cutter.
- Create a cylinder with the fencing and bend the exposed horizontal wires over the joined edges of the tower.
- Measure the landscape fabric slightly larger than the wire mesh and place it inside the structure.
- Fill 30 percent of the planter with soil and cut slits of 2-3 inches on the landscape fabric at each column.
- Plant strawberry stems in each slit and repeat the step again until the strawberry planter is full of soil.
- That’s how an easy-to-make strawberry planter embraces the beauty of your garden. It also helps the plant to be protected from pests because of its vertical structure.
10. Shoe Organizer to Strawberry Organizer

Willing to replace an old and weary shoe organizer with a brand new one you just wishlist? Well, it’s time to turn your old shoe organizer into gold. Want to know how? Read along.
Collect the Items
- Shoe organizer( fabric material)
- Attaching hooks
- Sharp scissors
- Soil and compost
- Strawberry seeds
- Landscape fabric
Instructions
- Clean up the shoe organizer. Make sure it is of fabricated material for better breathing of plants.
- Pierce holes at the bottom of each organizer so that there’s no water clogging at the bottom.
- Clever the bottom of the organizer with a landscape cloth to avoid mess.
- Pour down soil and compost in each organizer.
- Soe the strawberry seeds and wait for the magic.
- Either hang the organizers on the wall through hooks or place them on the ground in proper sunlight (recommended).
- The strawberry planters could be made out of anything. It’s just how efficiently the brain is used, and when he does that, brilliant ideas such as repurposing shoe organizers can decorate gardens.
11. Cinder Block to Strawberry Planter
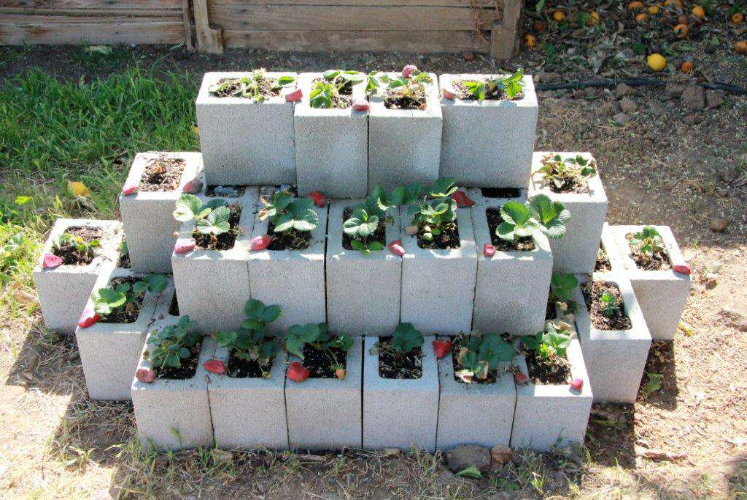
Convert the lying cinder blocks to strawberry planters by placing seeds on them. This way, your blocks will be helpful for the environment as well.
Collect the items
- Cinder blocks (min 6 max 24)
- Landscape cloth
- Soil and compost
Instructions
- Arrange the cinder blocks in square or rectangle patterns. Do not leave gaps between the two of them.
- Put landscape fabric at the base and fill it with soil and compost.
- To make it tiered, arrange more cinder blocks alternately over the first ones, leaving enough gaps in between them for the growth of the plants.
- Put landscape fabric at the bottom and fill it with soil and compost.
- Grow strawberries in them.
- A perfect permanent strawberry planter with the least effort is ready. It will give an aesthetic yet professional look to the garden. The cinder blocks will surely be a piece of conversation for all plant enthusiasts.
12. Straw Bale Growing Straw Berries
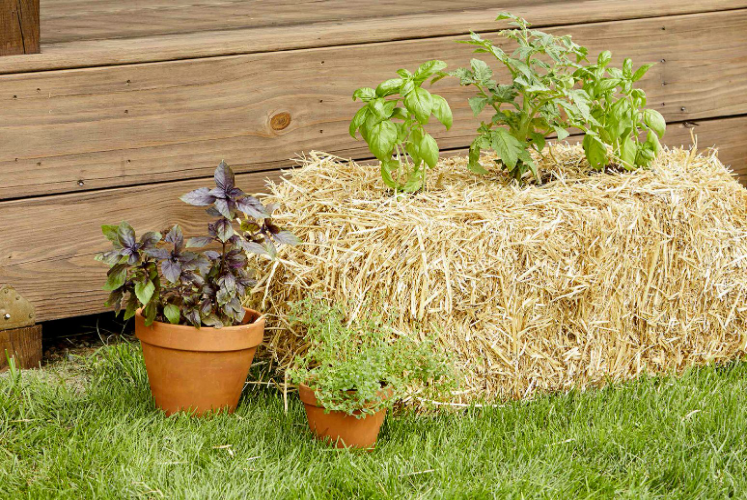
The name may not spark the kind of intrigue you were looking for, but your berry best friend sure is aesthetic and amazing. Not sure how? Well, read along to know more.
Collect the Items
- Straw bale sheets
- Strawberry seeds
Instructions
- Use the straw bales with the cut side facing upwards.
- Make the bales wet to begin the breaking down process for almost 2 weeks.
- Once the bales have begun to decompose, pierce holes in them evenly.
- Plant the strawberry seed at the end and place them in an open sunny area.
That is how an eco-friendly strawberry planter is made with 2 materials. The bale’s breaking down process would provide a nutrient-rich environment for the strawberry plants. These planters are supernatural and suppress the growth of weeds around the strawberry plants.
Final Thoughts
Strawberries, with their easy plantation techniques, shower the blessing of both health and deliciousness at the same time. With these 12 brilliant DIY strawberry planter ideas, one can not only beautify their garden or balcony aesthetically but can use a handful of natural benefits.
From classic pots to repurposed materials, each idea offers a unique way to cultivate juicy, homegrown berries, and they all are designed in such a manner that they can easily be fitted to a compact area without much effort and money.
To read more such hacks and DIY tricks, keep checking our blog section and learn the ways to beautify your home, both indoors and outdoors. We aim to bring the best and only the best for you!
Frequently Asked Questions
What Kinds of Strawberries Are Best for DIY Strawberry Planters?
Strawberries of trailing varieties are best suited for DIY planters. These can be from Alpine strawberries (Fragaria vesca), Everbearing strawberries (Fragaria x ananassa), and Day-neutral strawberries (Fragaria x ananassa).
How Often Do Strawberry Plants Require Water?
The strawberry plants require consistent moisture, so water them regularly and more often than usual. It must water the first inch of soil and is suggested for better growth.
How to Protect Strawberries from Pests and Weeds in DIY Strawberry Planters?
Cover the strawberry planters with metal mesh to avoid encounters with birds and squirrels. Inspect the plants for signs of common pests like aphids, slugs, or snails. Treat them promptly with organic insecticides or natural pest control methods.