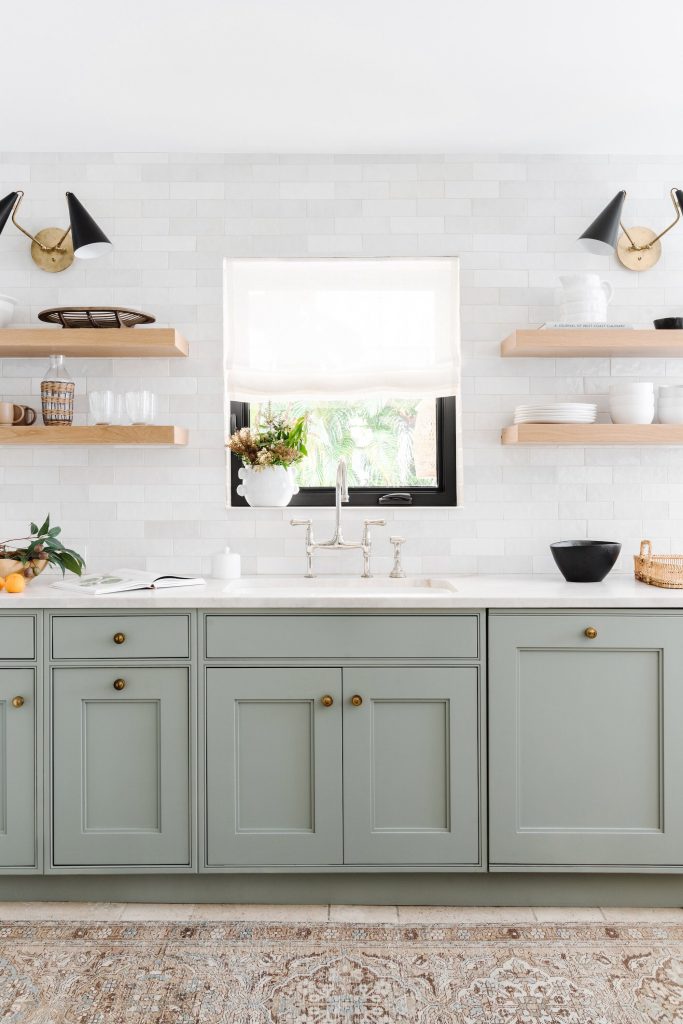
If you want to revamp your laminate kitchen cabinets, changing them altogether might be expensive. But one easy and fun solution is painting them so they look new.
Laminates are a thin material (sometimes made of plastic) to any furniture so that they become more durable, easy to clean, and affordable. They can be placed on any material and often come in different colors, finishes (matte or glossy), textures, and even look like wood! Actual wood might absorb some of the paint or stains, but laminate will not, and this is why laminate cabinets are easy to clean as well.
Therefore, they need to be painted differently and require different materials. It can be confusing to figure out how painting laminate cabinets works. But don’t worry. We have you covered.
Here’s everything you need to know to paint laminate cabinets and love the results!
Materials Required to Paint Laminate Cabinets
- Safety equipment – Safety comes first when doing any home decor projects and so you need to have safety glasses, gloves, and protective clothing. You can consider wearing a mask as you will be painting and sanding the cabinets.
- Detergent/cleaning agent – Before you start the project, make sure to clean the cabinets so that you paint on clean surfaces.
- Fine-grit sandpaper – A good sandpaper for painting laminate cabinets is 120-grit sandpaper. If the grit is higher, then the sandpaper will be smoother, and this can be used for fine sanding purposes. Lower-grit sandpaper can be used for heavy sanding purposes, but since laminate cabinets have only small imperfections, 80 to 120-grit sandpaper will work well. When you sand them again, you can try using higher grit sandpaper.
- Tack cloth – These are made of sticky material that will remove any dust or debris left after sanding. Even if you don’t visibly see anything, it is best to use a tack cloth to get a smooth finish. So this should be used before you start applying the primer and start to paint.
- Primer – You need to choose a strong bonding primer that is of good quality. Otherwise, the paint will not adhere as well because laminate cabinets are different from wooden ones.
- Laminate paint – Try to buy paint that is formulated for laminate cabinets because these will be strongly adhesive and will work well on laminate than normal paints. The paint chosen should dry quickly, be easy to clean, and shouldn’t easily chip, as most of these cabinets will be in the kitchen and will be used on a daily basis. So don’t compromise on the quality of the paint!
- Paintbrush/ Roller brush – You can apply the primer using the paintbrush and use the roller for the actual paint. This way, your paint will not have brush marks and will be applied more evenly and quickly. You can use a roller for primers as well if there are several cabinets.
Steps to Painting Laminate Cabinets
Painting laminate cabinets can be slightly difficult because it is not made of a material ideal for painting. However, with the right materials, steps, and preparation, you can easily finish this project in under 8-10 hours though it may take longer to dry. It is also inexpensive, costing around 100 dollars, and compared to changing entire cabinets, this is way cheaper. And you don’t have to be an expert to finish this project successfully. So let’s get started!
Step 1: Remove the Doors, Hardware, and Hinges
You can do this using a screwdriver, and you need to examine these for cracks, chips, or any damage so that you can fix them before you start painting. After you are done examining and fixing the damages, you need to clean it well. Then using a tack cloth, remove any dust that may be present. Note that if you add paint to chipping laminate, then it will not adhere well to it. So you need to apply the paint to surfaces that are fixed or undamaged.
You need to stay organized even after you remove all these parts, as if you mix them up, it will be difficult to find the exact sets again. Therefore, you can use plastic bags, sticky notes or simply place those that go together in different regions so that you can differentiate easily. Keep track of which goes where and make sure not to lose any screws or hinges!
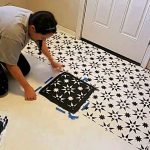
Step 2: Sanding the Cabinets
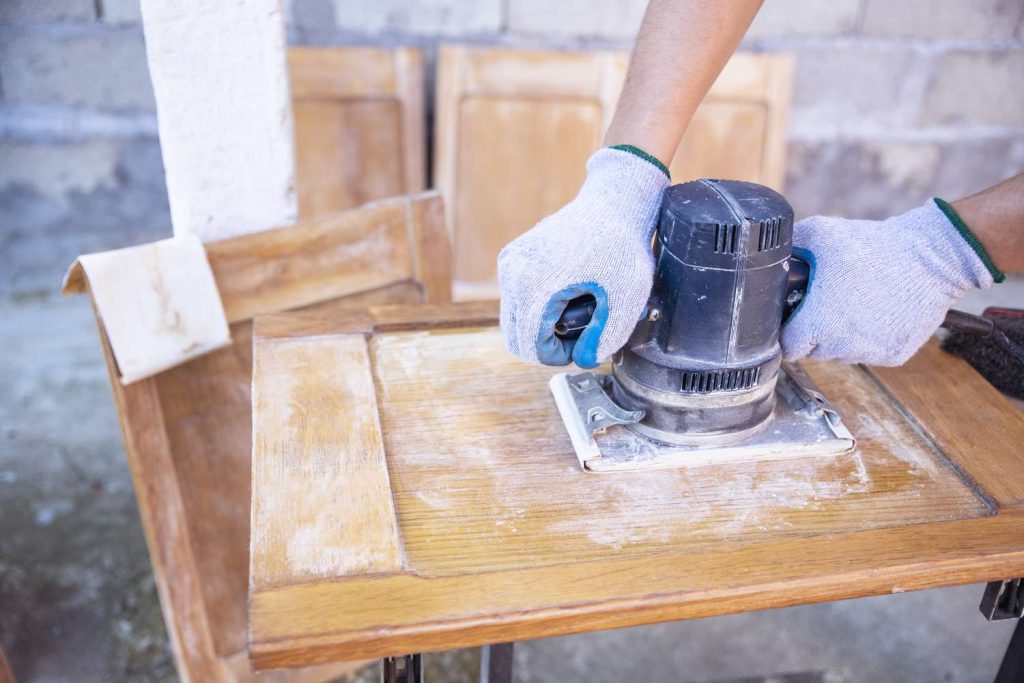
Use sandpaper to sand the surface of the laminate cabinets, but do it lightly because laminates are usually thin, and they may be destroyed if you sand too much. Therefore, be careful while you sand. This step is essential to ensure that the paint sticks onto the laminate surface better. After you are done, use a tack cloth to remove any dust that may still be present.
Step 3: Applying Primer
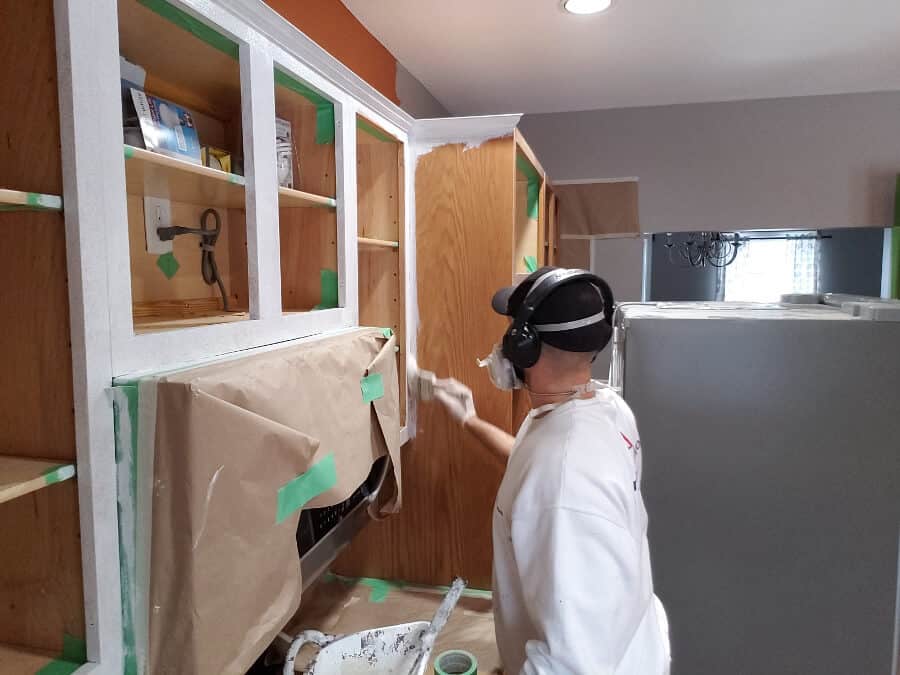
Don’t forget to add the drop cloth wherever you don’t want the paint to get on. Using a roller brush or paintbrush, apply the primer evenly. It will help to use the roller brush on larger surfaces and paint brushes on smaller difficult areas. This step is important because this will ensure that the paint adheres well to the laminate surface. If you choose to skip this step, the paint may peel or chip off quickly. After the primer has dried, you can use a higher grit sandpaper to very lightly sand again. Do this gently because you don’t want to remove the freshly applied primer.
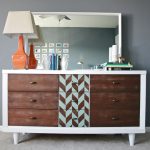
Step 4: Let’s Start Painting
You can try applying the paint to a small, hidden region to check if the paint is sticking well to the laminate. If it is, then proceed with painting. Otherwise, try sanding lightly again. Check beforehand if the color of the paint you have bought goes well with the rest of the decor. Paint it once or give it two coats, depending on how it looks. After it has completely dried, you can reinstall the doors slowly or you can consider adding molding.
Step 5: Add Molding
You can choose one of the many different types of molding available (Crown molding for the top of the cabinet, riser molding – To increase the height of the cabinet before adding crown molding, etc.). You can follow the steps mentioned for adding the molding as well. After you are done painting, you can attach them using wood glue or screw them on, depending on the type of molding used.
An Alternative to Sanding
Sanding may not be the best choice for everyone because it can be a difficult job, it can cause allergies due to the small particles present, it is very messy, etc. But this shouldn’t stop you from painting laminate cabinets. For this reason, you can try this alternative which works perfectly well!
You will need chalky paint and satin enamel paint, where the first will be used as a primer, and the latter will be the top coat. You must apply the chalky paint carefully because it is quite thick and may pool up in places. You need to clean these as you go, or you can quickly sand these small spots using sandpaper after they have dried. One advantage of using chalk paint is that it is relatively easy to apply and it dries quickly also.
Once the chalky paint has dried, you can apply one or two coats of satin enamel paint to get that smooth, beautiful finish! Don’t start using the cabinets the next day itself, and give it a day or two for the paint to cure so that it strongly adheres to the surface.
To Summarize
You can redo your laminate kitchen cabinets because they have started to chip, look old, or simply change how it looks. Since changing the entire cabinet is expensive, you can consider an affordable alternative where you can easily paint over it.
Painting laminate cabinets requires you to check for imperfections in the cabinets and fix them, gently sand them using 120-grit sandpaper, apply a layer of primer so that it adheres to the surface well, and finally, paint the desired color.
Alternatively, if you are someone who hates sanding, you can apply a coat of chalky paint first instead of sanding and then start painting. If you have redone your kitchen cabinet using these simple steps, share the results with us!
Frequently Asked Questions
Do I Need to Add a Primer Before I Start Painting Laminate Cabinets?
Primers are added to the surfaces before the paint is applied. These are used to hide any stains and provide a more solid base for the paint to be applied. In addition, they allow the color of the paint to shine through. For laminate cabinets specifically, the surface itself is not an ideal one to paint, so you need to add primer so that the paint can stick better to the surface. If you don’t add primers, there is a high chance that the paint may chip easily.
Even if I Don’t Use Sandpaper, Can I Still Paint My Laminate Cabinets?
Yes absolutely. Sandpapers are not for everyone because they produce dust, are physically demanding, and are messy. Since kitchen cabinets occupy a large space, it may not be easy to sand them. You can choose to apply chalk paints before applying the actual paint formulated for laminate. This will also act as a primer and make sure that the paint is adhesive and sticks to the laminate properly.