If you are a beginner, learning the art of painting without ruining your hands and clothes with the paint is tough. You struggle with finding the easy paintings you can easily draw. What’s worse is when you find easy paintings but have no idea about their tutorials and a step-by-step process to complete them within a few minutes. You don’t have the right guidance to start your painting journey. No worries.
In this post, you will learn step by step process from where to start the painting to how to give the finishing touch to three-dimensional paintings. We have covered the easiest painting of the sky, home, leaf, scraped paint, door, and much more.
We curated this list of 21 cute easy paintings for beginners like you to help kick-start your painting journey.
1. Easy Paintings of Sky
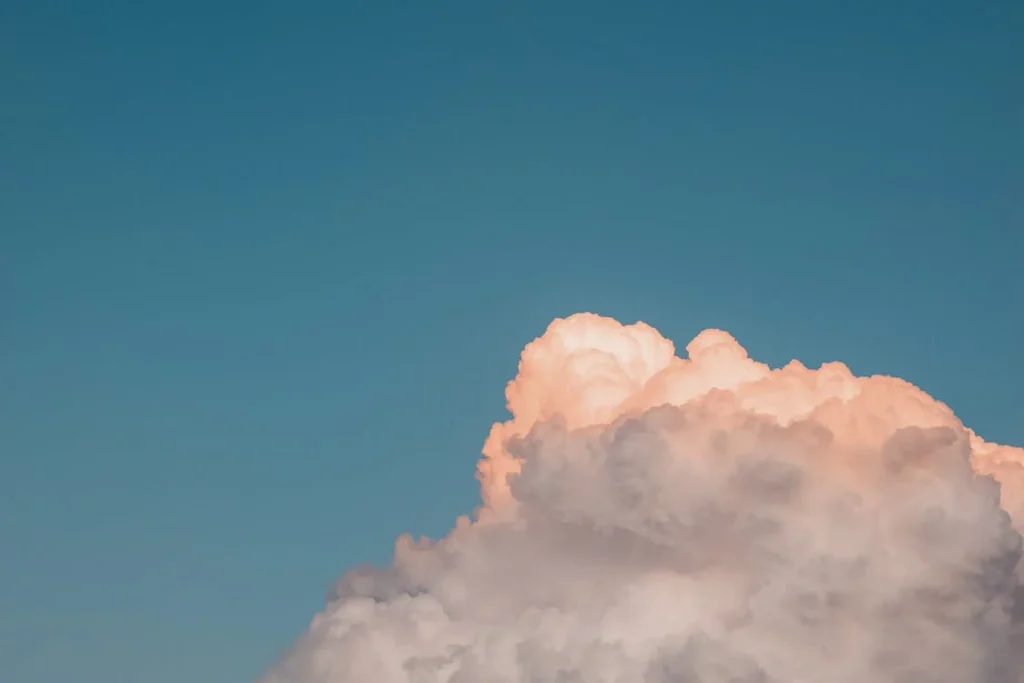
The simplest, easy painting for beginners is the sky. You will need three colors white, blue, and pink, and a thick paintbrush. Create a horizontal curved line to create the look of clouds in the sky.
Paint the area below this line with white color and add a few strokes of pink for the finishing touch. Paint the above area blue and near the curved line pink. Use white to paint the stars with small dots and the moon with a large dot for a finishing touch.
2. Sunflower

If you want to prepare bright sunflowers, use acrylic paint color to make easy paintings. Draw the outlines lightly with the help of a pencil. Start from the center of the flower by drawing a rough circle or alphabet O in a great shape. Then draw the petals of flowers around the center circle in the freestyle oval shape.
Complete the flower with a stem and two or three leaves coming out beneath the petals and from the stem. Now paint it with the colors. Start painting the lines you have drawn with the thick brush of yellow color. Use orange in the thin brush to make the outlines of petals and create different natural shades.
Paint the flower leaves with green color with a thick brush, and the stems with a thin brush. Use the thin brush for the finishing strokes to create dark and light shades by mixing various colors.
3. Holly Berries
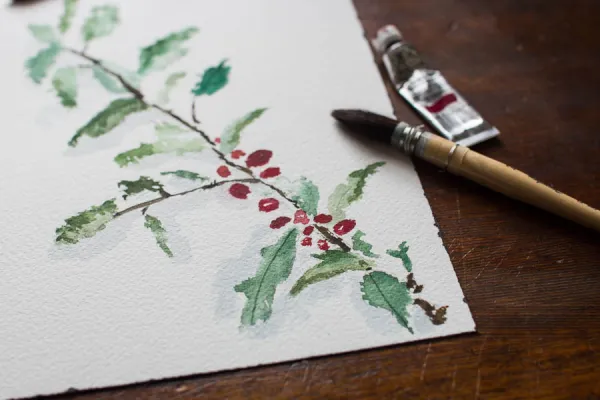
You will need thin and thick brushes to draw and paint the holly berries. First, dip the thin brush in the light green color. Draw a curved vertical line to create the stem, then draw small horizontal curved lines attached to this stem as branches. Take the thick brush and dip it in the red color. Create the dots around the end of thin branches to create the berries.
Now take the thick brush and dip it in the dark green-blue color to create the holly berry leaves. Create the leaves with a vertical line opposite to the berries. For the finishing touch, use the black color in the thin brush to create the top of the berries by marking a small dot on each. And your holly berries painting will be ready.
4. Plant Leaf
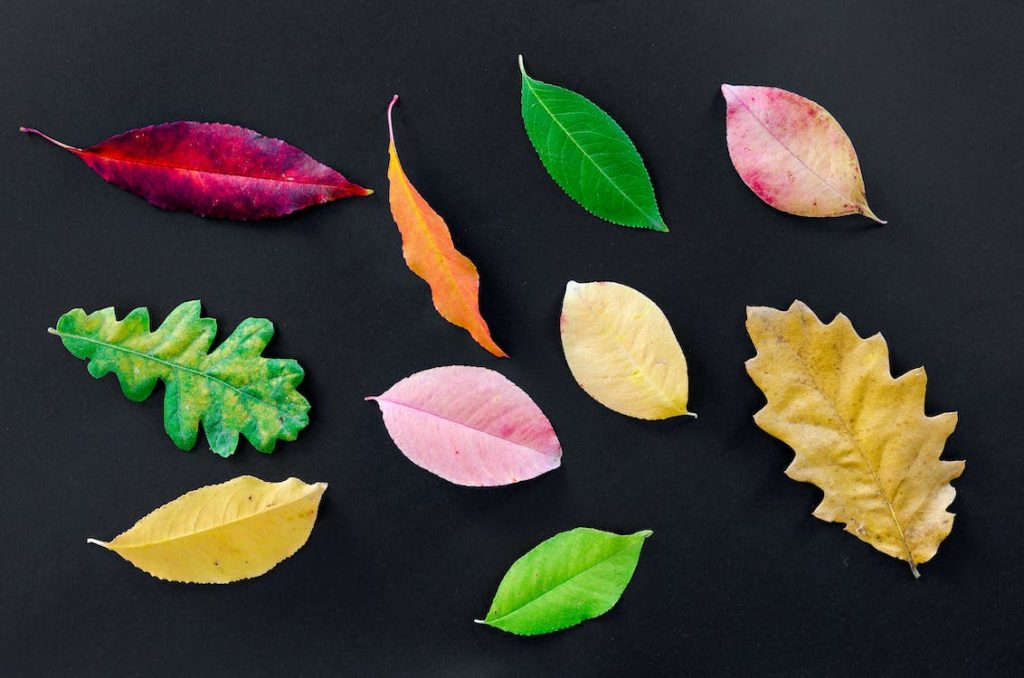
Take a pencil to draw the outlines of the leaf. Draw a vertical line as the leaf rod. Then create the shape of a long semi-oval on both sides of this vertical line facing towards each other. Use light green or yellow color in a thick paintbrush, depending on whether you want to create a plant or fall leaf.
In the case of a green plant leaf, use light green to paint it. Use dark green with a thin brush to paint the central vertical line and create the small strokes emerging out from this vertical line and sub-curvy horizontal lines reaching towards the outline of the leaf. Your green leaf is ready. For the fall leaf, paint the main vertical leaf line and other sublines with a red color. Paint the leaf yellow, then use the orange, red, and green colors to create a colorful leaf that seems slowly drying.
5. Easy Paintings of Mountains
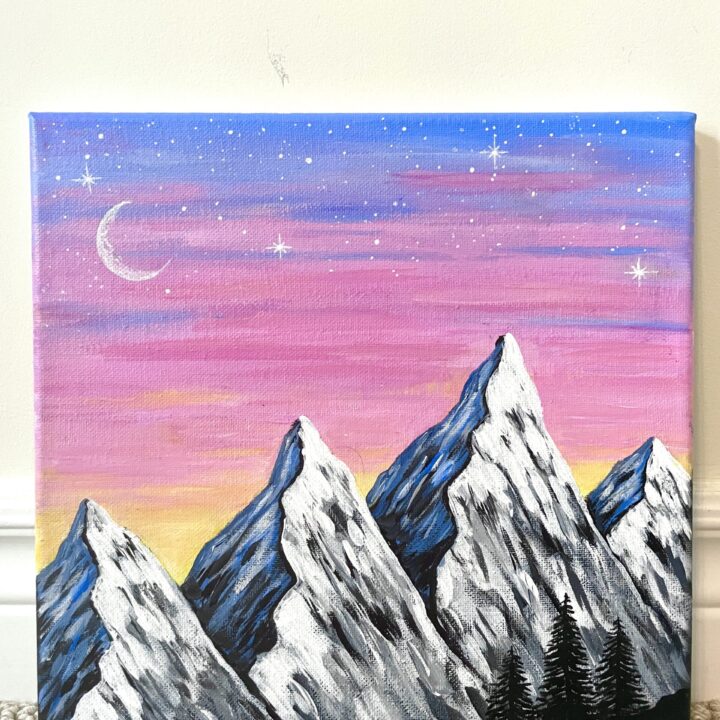
Take a thick brush, dip it in gray or brown color, and create a zig-zag pattern in the center of the painting sheet. Paint the lower area with green and blue colors and the lowest area with gray colors. Paint the upper areas in a zig-zag pattern with multiple colors like blue, orange, and yellow to fill the background with a colorful sky.
Now for the area under the zig-zag, extend the lines falling towards the right hand to create the triangle shapes. Create the curved lines from the top tip of these triangles downwards to create the three-dimensional shape of mountains. Use black color and paint a few slope strokes to create the texture of the mountain. In one bottom corner, paint with black color to create the landscape area and use green color to paint long triangle shapes as an illusion of trees.
6. Different Types of Christmas Trees
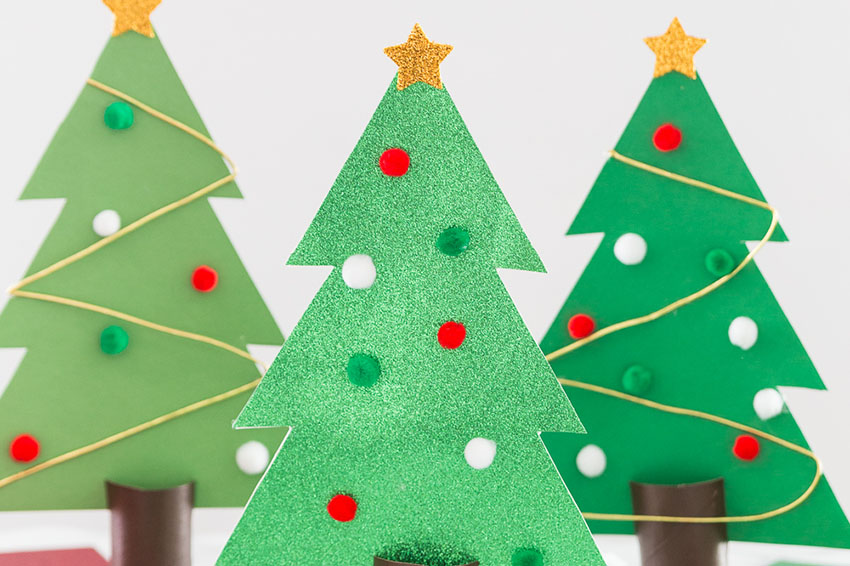
You can paint different types of trees by changing the shapes and sizes of leaves, tree tops, structures, and barks. Paint the canvas with the desired background color, except the green color, with a thick brush. Then create a triangle and paint it with a thick brush in green color. Use the thin brush to create the shape of a Christmas tree with the help of strokes.
Use the medium brush to create the design on the Christmas tree by leaving several random dots. You can paint the dots with white, red, orange, yellow, or pink colors to make them colorful. Ensure you don’t leave the dots on the background area. Keep them only on the Christmas tree. You can give shades to the final look by adding light and dark color tones and textures in the background to make it realistic.
7. Butterfly
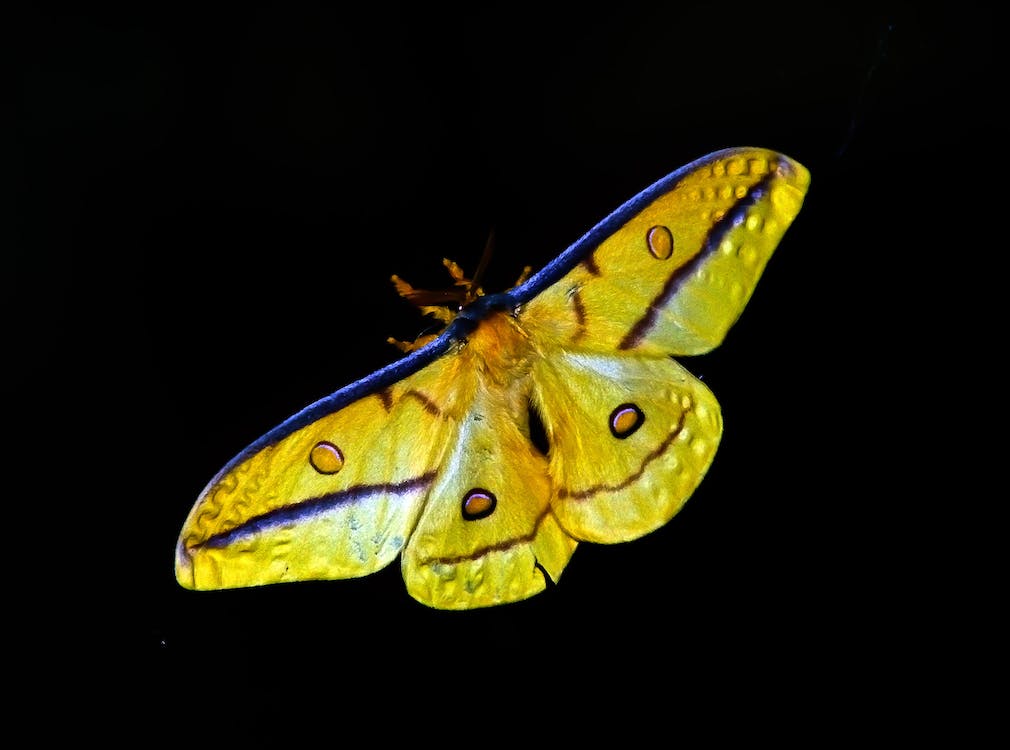
To draw and paint the butterfly, select two colors: red and orange or pink and purple. Take the thin brush, dip in the darker color among the selected, prepare the long vertical oval as the base of the butterfly, and mark two small lines on the top. Draw the butterfly’s wings with the numerical letter three on the right side attached to the base.
Draw the mirror shape of three on the left side. Now paint the butterfly with a thick brush, dipping in orange or pink. Take the thin brush to draw the veins of the butterfly to make it real. Use red or purple to draw the center lines in each wing and create small lines attached to the main line in opposite directions. Use black or other dark shades that match the butterfly color to give the finishing touch. Highlight the outer lines of the wings with this dark color taken in the thin brush. Mark a few dots with the same thin brush and dip in a darker shade to make it creative and beautiful.
8. Easy Paintings of Scrape
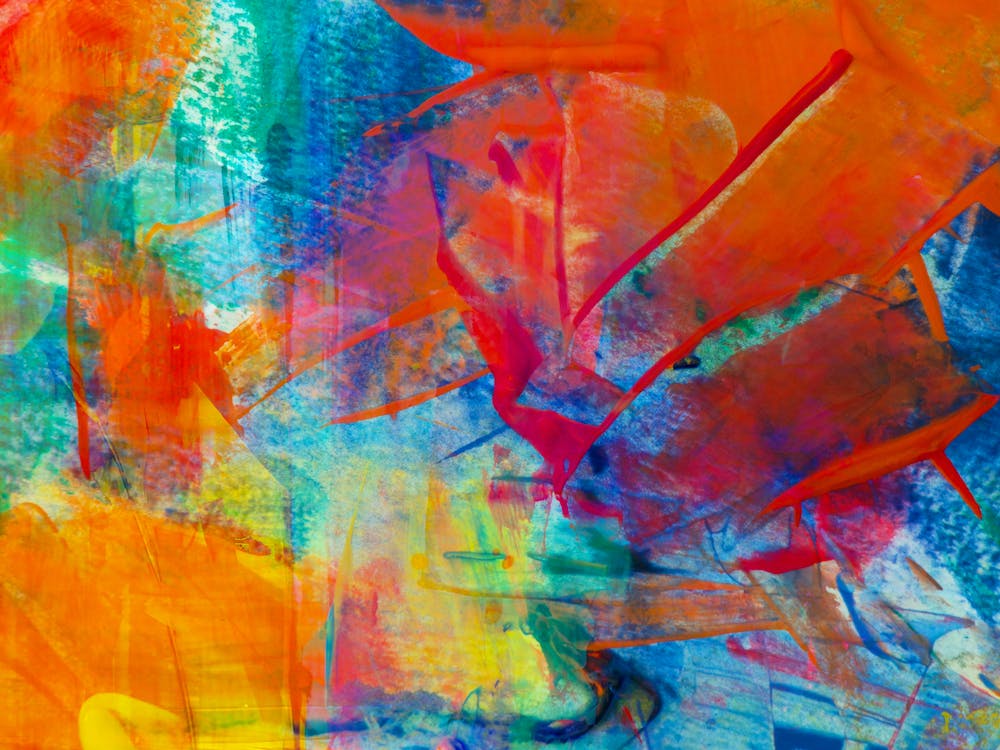
You can create a beautiful, colorful abstract that looks sophisticated with freestyle. Try the reverse Canva frame using multiple colors and thick brushes. Leave enough space for the boundary. You can keep it white or paint it gray or black. Paint freely over the canvas with two to three strokes from a single color.
Repeat the activity with other colors you want to use in the scarp painting. Ensure that you paint every corner with colors and there are no white spaces on the canvas, Inside the frame. Your scrape painting is ready.
9. Lady Bug
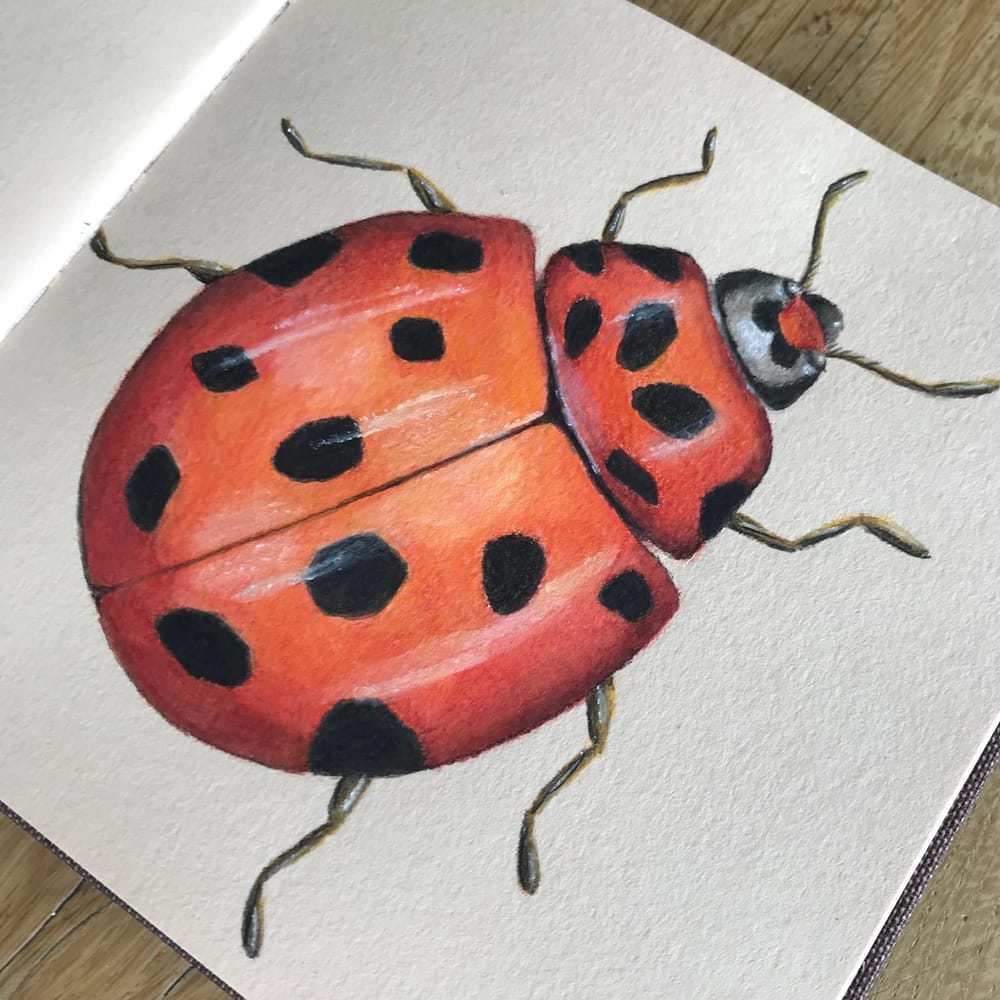
Start with creating an oval shape with a light orange or red shade with a thick brush. Then draw a black cap on top and one smaller one above it. Draw the stings and legs with the help of a thin brush dip in the black color. Draw two lines on top of the black cap with the black paint as the strings.
Draw two front legs by drawing curved lines on both sides and the two behind legs by drawing curved lines backward. The outer structure is ready. Now paint the light red color shade with dark red. Create a few spots on it with the help of black color. Draw a vertical white line in the middle of the painting to make it three-dimensional, and your ladybug painting will be ready.
10. Watercolor Half Strawberry
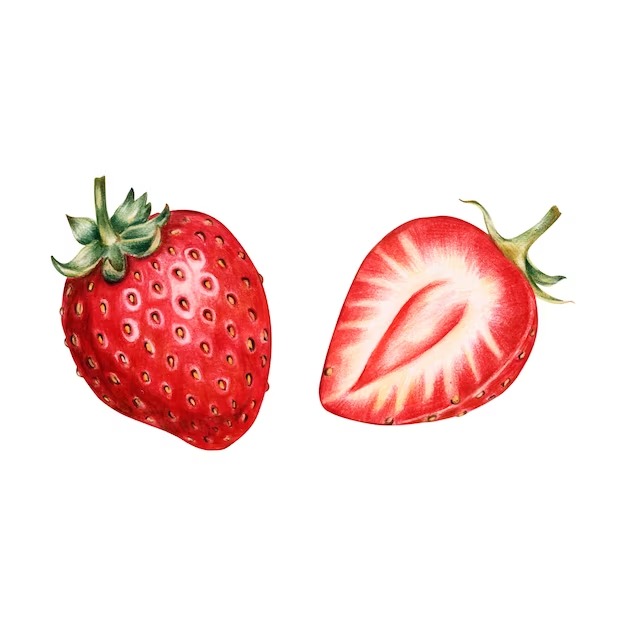
To prepare the half strawberry, create a heart shape with the paintbrush and red color. Draw a smaller heart in the center and middle with light color. Then draw four to five leaves on the top emerging from the top center of the heart. Give them light and dark green shades to make them dimensional. Paint the strawberry with the thick brush carefully from the outer heart towards the inner smaller heart.
Leave some white space between the two hearts to create the illusion of pulp in half strawberry. You can paint the whiter part with a fainter shade of red or orange to make it three-dimensional and healthy strawberry.
11. Watermelon Piece
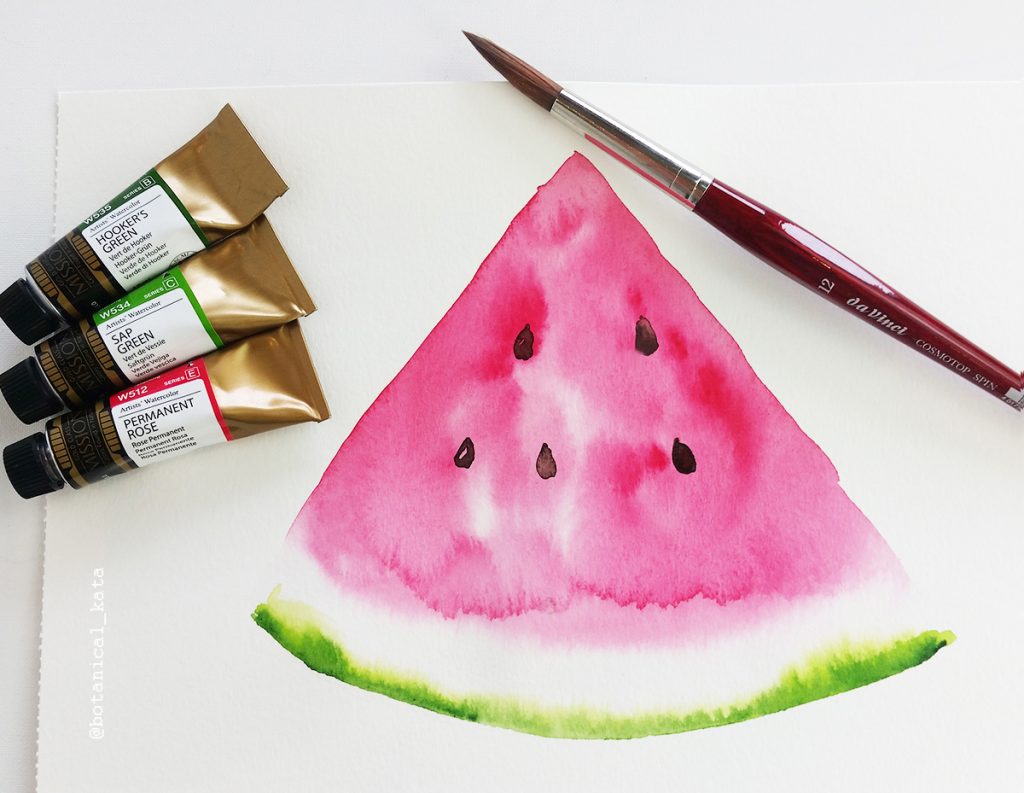
Take the thick brush, dip it in red or pink color with the faintest shade, and paint a triangle. Paint the parallel stroke to one side of the triangle to create a three-dimensional triangle. Now take the green color in a thick brush and paint the green stroke thick line to create the watermelon base.
Paint the faint red color with bright red to give a finishing look to the watermelon pulp. Create the dark green paint strokes in the base to make it like the real watermelon outer layer. Use black to create the seed in the red pulp by leaving a few dots for the finishing touch of the watermelon painting.
12. Easy Paintings of Cactus
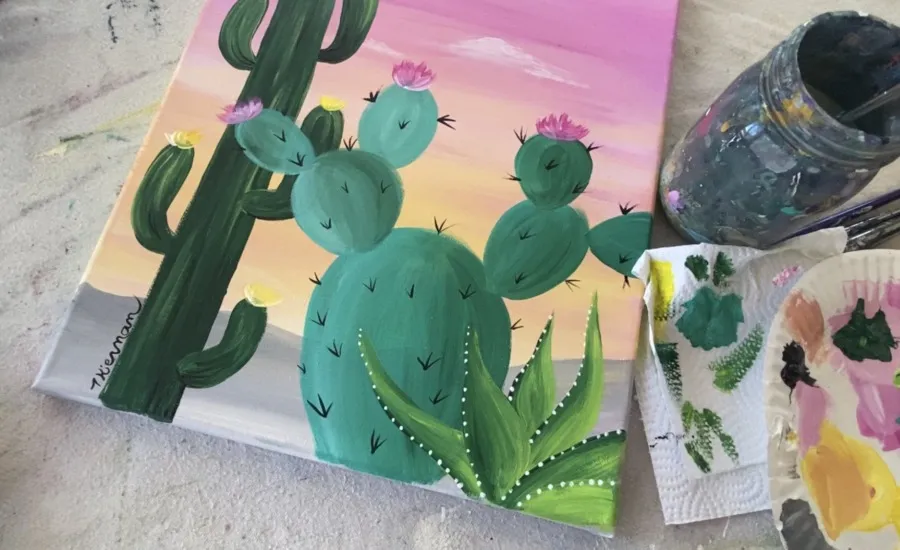
Cacti are simple to draw; you will need a thin brush to paint the final look. Pick up the thick paintbrush and paint a vertical stroke from the upward to the downward side with a dark green color. Draw L shape and reverse L Shape cacti branches attached to it. Pick up the red or pink color with a thick brush. Keep it gently on the painting sheet until the brush hairs spread fully, and drag it downwards to create the shape of a budding flower over the top of the cactus.
Finally, use black color and a thin paintbrush to create the spines. Draw small strokes like the spine or thorn on green for the finishing cactus look. You can leave the background empty or paint with a complementary color. Your cactus painting is ready.
13. Rainbow Swirly Tree
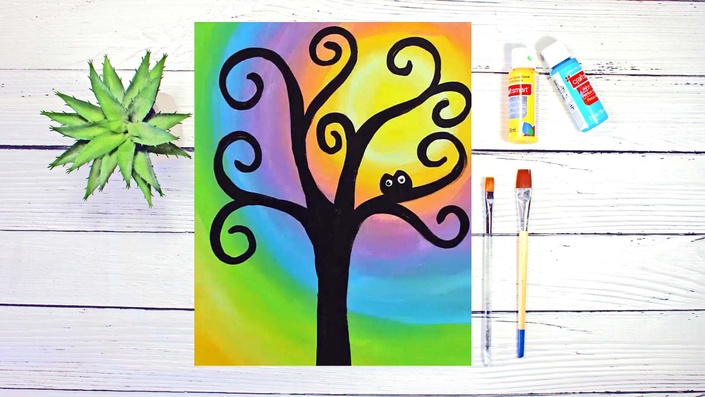
The swirling trees are colorful and easy paintings for beginners. You will need a set of rainbow colors and black and white colors to create the final look. Paint the background with rainbow colors to create a rainbow layer by layer. Paint a rough circle or dot with the help of red color and a thick brush in the top right corner to create the shape of a sun. Create the outer layer with an orange color. Paint with yellow color to create the shine of the full sun.
Then paint with the rest of the colors one by one, creating the outer layers of the previous layers. Such as green around the yellow, then a thick double layer of blue color, and a violet layer. Cover half the blue layer with violet to create the left rainbow shade. Now use the black color in a thick brush to prepare the trunk of a tree and its branches. Use the thin brush in black to give the finishing touch to the swirling tree by painting the branches of the trunk swirlingly. Your final rainbow-swirling tree is ready.
14. Easy Paintings of Birds
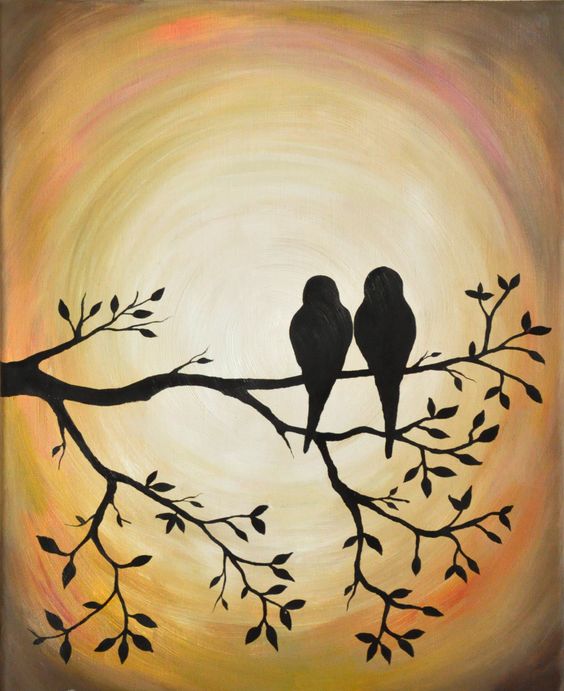
If you want to draw romantic paintings, consider drawing a couple of birds sitting on a tree branch in the sunset or moonlight. Dip a thick brush in white paint to create the moon by moving it around to draw a rough circle. Use orange and brown colors to fill the background. Paint orange around the moon sky to create a full moon night view, and paint brown in the remaining background outside the orange layers.
Now you will need a thin brush and black color to paint the tree branch and birds. Draw a small, thick, horizontal tree branch and create several thin sub-branches. Paint the leaves by drawing multiple small shapes of the V alphabet on the sub-branches. Paint small kite shapes with black color together on the top sub-branch. Paint a round head shape on the top of these two kite shapes to create the illusion of birds sitting together. Your bird painting is ready.
15. Wooden Door
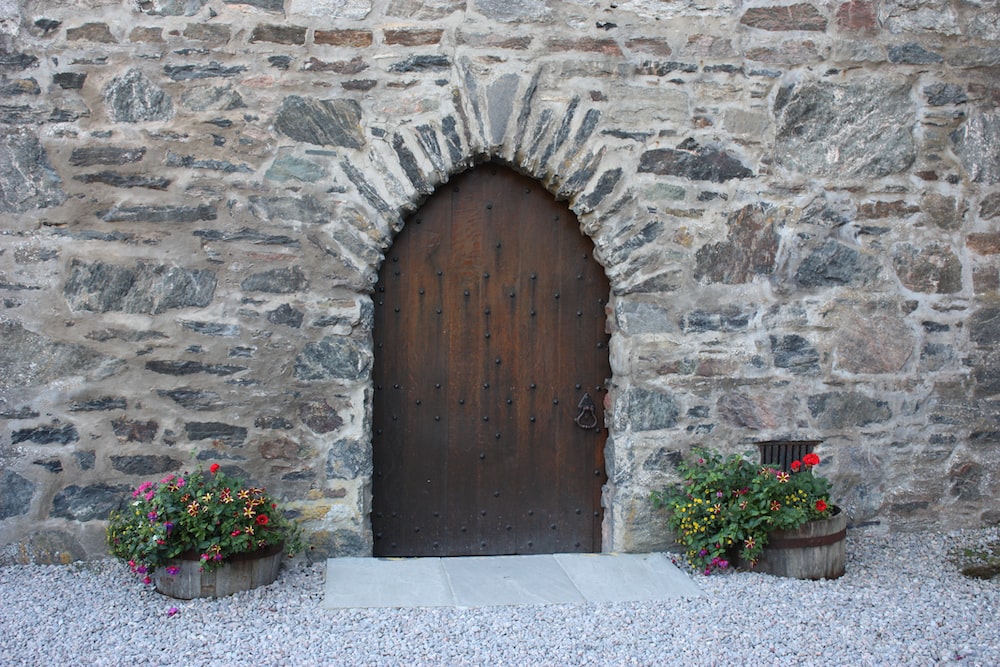
You can draw and paint two types of doors, simple and textured. You will need a ruler to draw straight lines and a compass to create the semicircle. Draw two vertical parallel lines. Draw a line below them as a base of the floor horizontally. For the top, create a semicircular shape. Do this all with the light strokes of the pencil. Draw two or three small pots in the front of the door to give a three-dimensional look.
Now start painting it with the help of brown color or pick any one of its different shades. Paint the door area with a thick brush to highlight it separately. Use the thin brush and ruler to create the wooden door finishing touch. Use white on a thin brush and draw parallel vertical lines inside the door to create the illusion of wooden slates and the minute open gaps between them.
16. Abstract Oil Painting
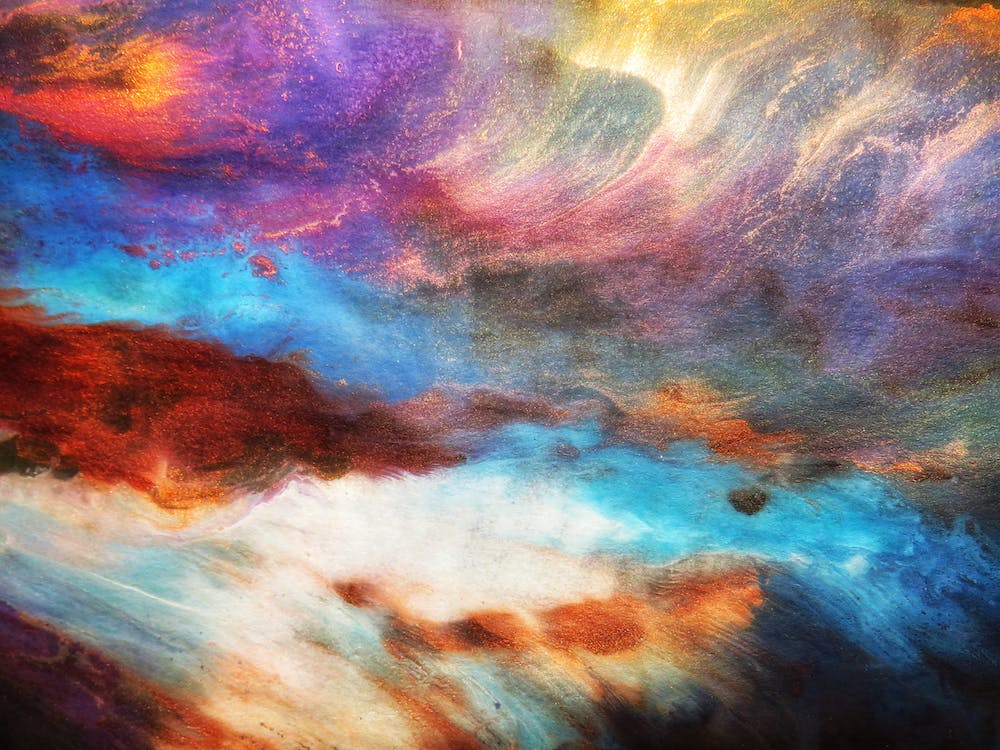
An abstract is the easiest painting, suitable for kids and beginners. All you need is a set of multiple colors and thick brushes. Pick a particular color, like blue, place the brush on the painting sheet, spread the brush hairs, and drag it downwards or sideways to create the texture in the same color.
Repeat this activity with different colors until your painting sheet is full of abstract colors. Give the finishing touch by taking white color in a thin brush and painting a few small thin lines on some areas to create shine, and your final abstract oil painting is ready.
17. Acrylic Bookmarks
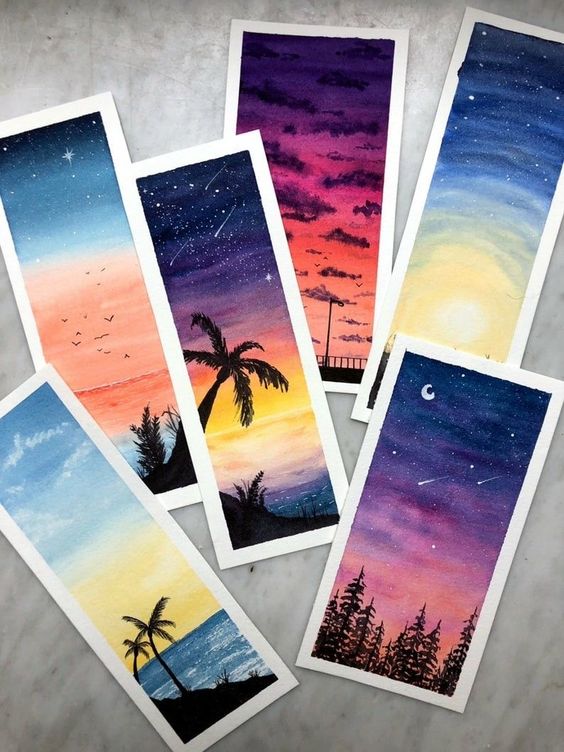
If you want to work on a smaller canvas with a wonderful finishing touch, acrylic paint bookmarks are great. Use tape or additional material to create and cover the boundaries so you don’t paint them and get clear, smooth white boundaries. You can select a particular color, like orange or blue, and paint the remaining canvas inside the boundaries with this color.
Then take up another color, like brown or black, in the thin brush and create a tree trunk. Use the thinner brush to prepare the leaves with stokes like palm or pine tree shapes. Create a sun or moon in the sky with the help of a thick brush and take white or yellow color in it. Paint a few big dots on the canvas with a thick brush. Use the thin brush to draw the birds by leaving the mark of the V alphabet freely, whether at sunrise or sunset. If it’s the night scene, you can draw the base with grass beds.
18. Easy Paintings of a Sunset
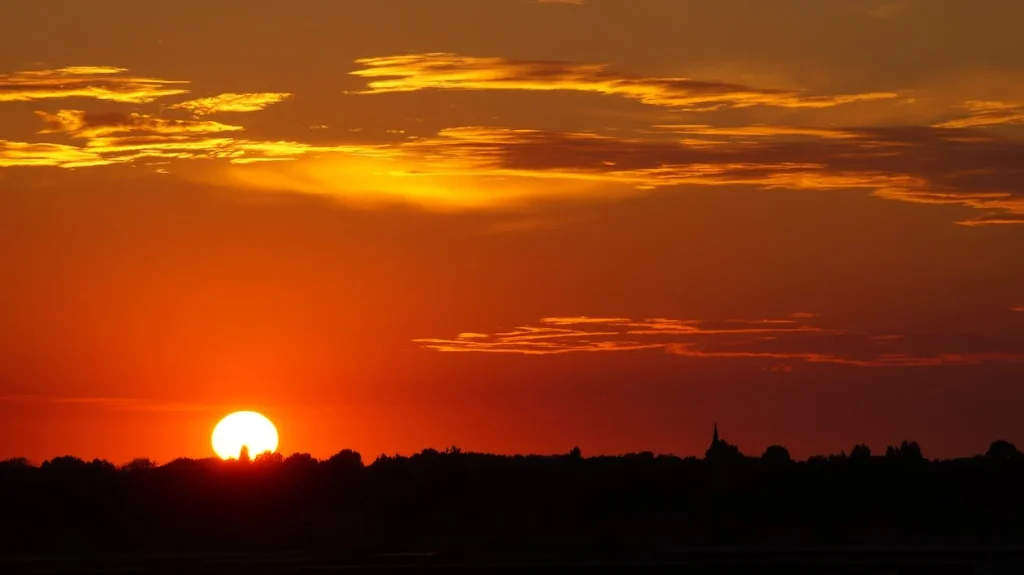
Painting a sunset scene is easier than drawing it. You will need different thick brushes and a thin brush to give the finishing touch. Use colors of yellow, orange, red, brown, black, and white. Paint the sun orange and draw a thin white outline around it to highlight it in the sky. Now paint the area near the sun with a red color.
Below the sun, use darker shades like brown and black to paint the bottom-most part of the scene. Use the orange color a few centimeters above the sun and the yellow color to paint the clouds and add different shades to your sunset for the final scene.
19. Easy Paintings of House
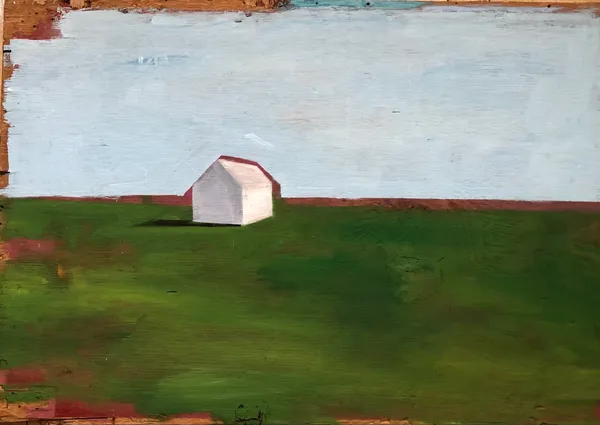
To prepare for the easy painting of a house, you will need to create the sky, landscape, and the house as primary elements. Mark a line in the middle of the painting sheet to create the partition.’Paint the sky area blue and add a few strokes of white to make it real.
Paint the landscape area with green color with a thick paintbrush. Use white or orange color to create the house. Paint a small rectangle stroke to create the house’s base and a white triangle stroke to create the house’s roof.
To make it a three-dimensional painting, you can focus on highlighting the sharp edges of the house with the help of a ruler and a thin paintbrush. Take brown or white color in a thin brush to create the curved path in front of the house. To create the illusion of a house or windows, use black to paint the door and windows with small rectangles and dots for the finishing touch.
20. Easy Paintings of Balloons
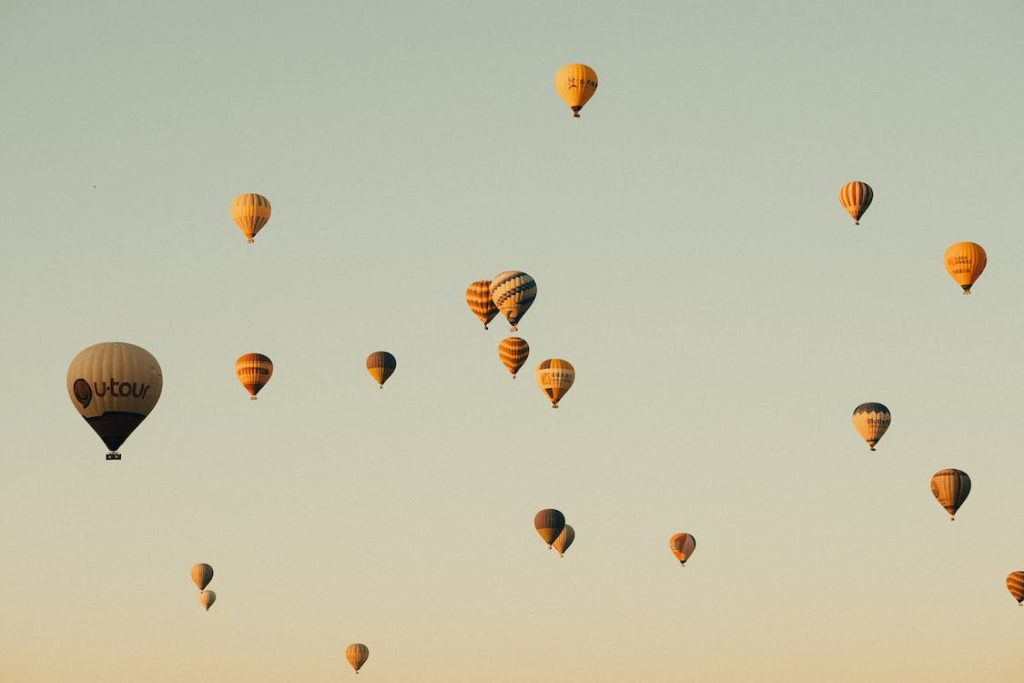
Before you start painting the balloons, you have to think about what type of balloons you want to paint, the hot air balloons or the ones with which kids play. Once sure, you can start the painting. For instance, here are steps to paint hot air balloons.
You will need thick brushes and blue and white colors to paint the background for the sky. Use red or complementary colors to paint the balloons. Paint a few small oval shapes to create the balloons. Use the black color in a thin brush to paint thin curved lines beneath the balloons for the finishing touch in the easy paintings of balloons. You can also give the finishing touch by altering the sky color with the shade of yellow and orange to make it the view of a few minutes before the sunset painting.
Final Thoughts
Everybody wants to learn the basic art of easy paintings to bring that inner child outside, even in their young days. And learning the step-by-step process is the way to get there. This post showed you 21 cute and easy paintings with step-by-step processes for the finishing touch.
This post covers drawing water strawberries to paint with acrylic colors like bookmarks. This post has also covered using different brushes and strokes for the finishing touch and drawing small things such as birds, leaves, and the structure of trees. In the beginning, practicing more with easy paintings is the way to learn the art of painting better. But once you get better, you can try more intricate designs and upskill your painting skills.
Painting is one of the ways to express your artistic side, so let your inner voice takes charge and create a masterpiece!