DIY home decor has become an integral part of today’s interior design. If you are looking for creative ways to give your kitchen or bathrooms a brand-new look, you will fall in love with these amazing DIY countertop ideas.
Our experts believe when modernizing your home or giving it a new look, you do not necessarily need to spend big bucks. All you need is the patience and creativity to create something beautiful that gives your home a personal touch, something that makes your home represent you.
And renovating these most-used parts of the home is an essential part of maintenance. You should indulge in DIY countertops for two main reasons: they are cost-effective, and the results will blow your minds. We have put together several ideas to choose from.
Feel free to go crazy with creativity.
DIY Countertop Ideas for The Lovers of Uniqueness
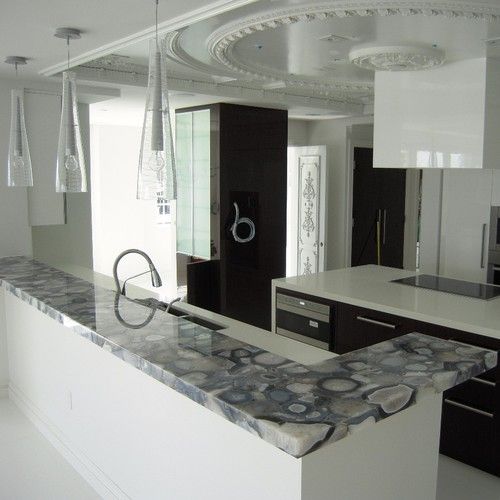
1. Faux Granite
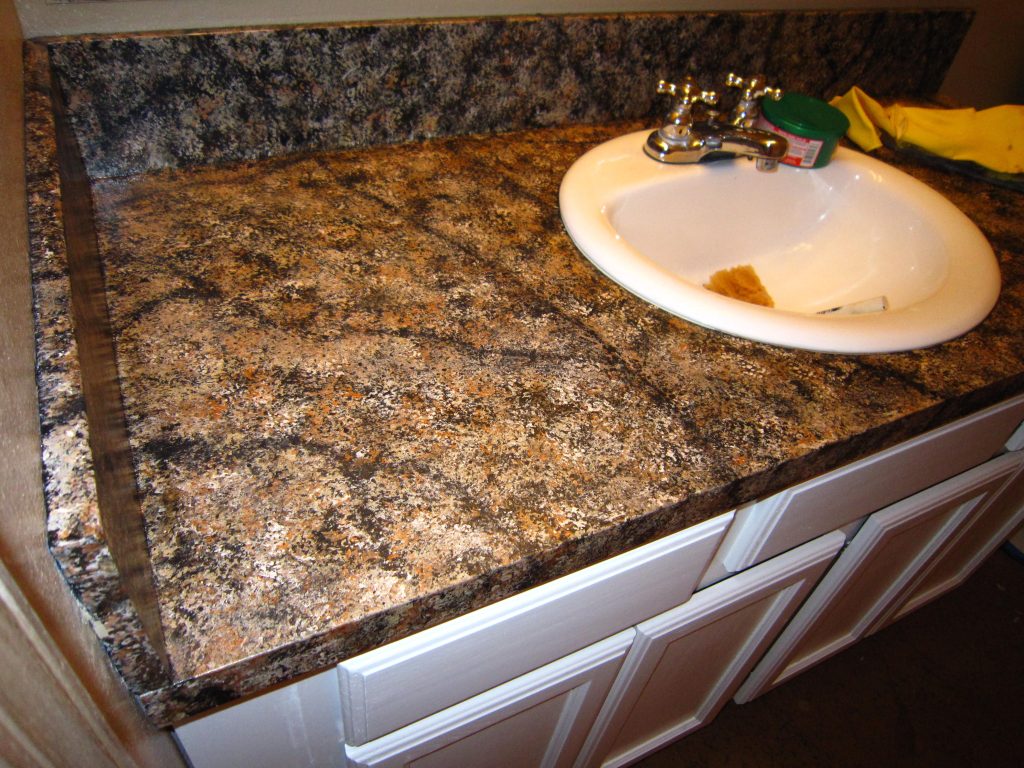
Does your countertop look old, worn out, and dingy? Instead of getting rid of it entirely and spending a lot on remodeling, here’s a great DIY countertop idea that will serve the purpose. If you are someone who is in love with natural stones, you can convince the look of fake granite with a simple hack. Try three shades of paint between black to gray and dab it with a sea sponge. The only cost you have to incur is that of the paints. If you want to take it to the next level, try using specialized kits that mimic the texture and patterns of granite impeccably. A sleek and modern look or a traditional one – the faux granite wallpaper hack will do it all! A simple way to add elegance, isn’t it?
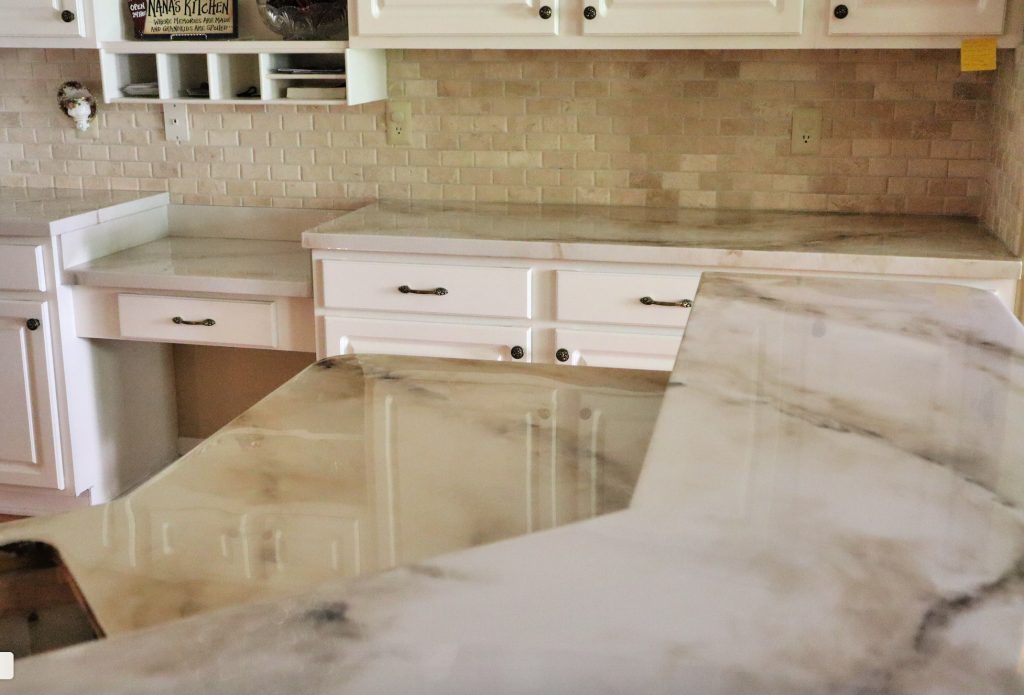
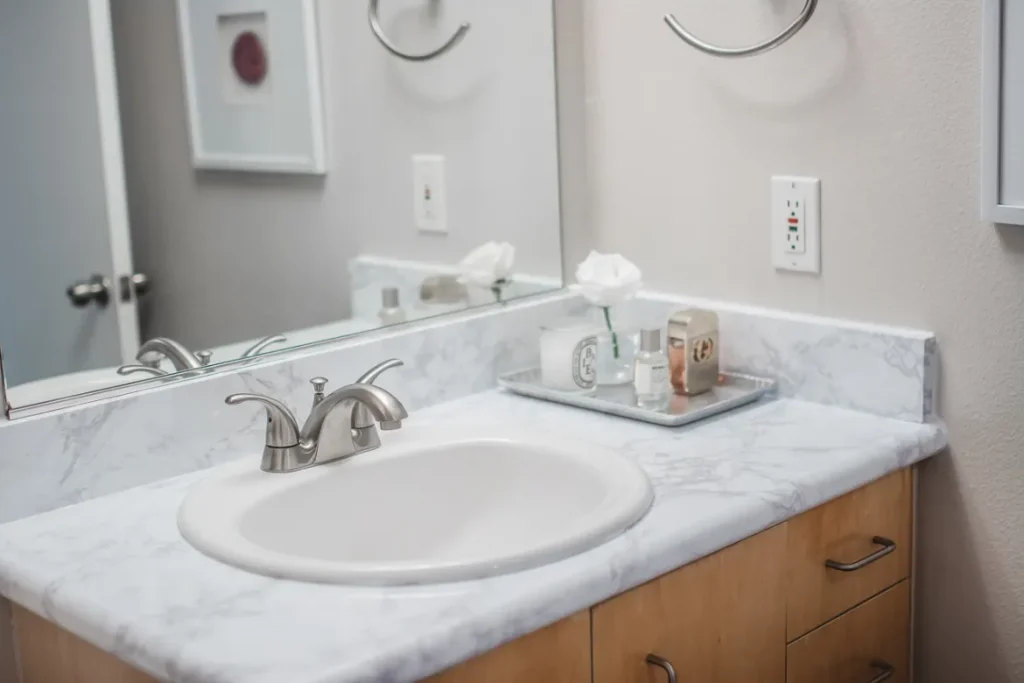
2. Painted Marble
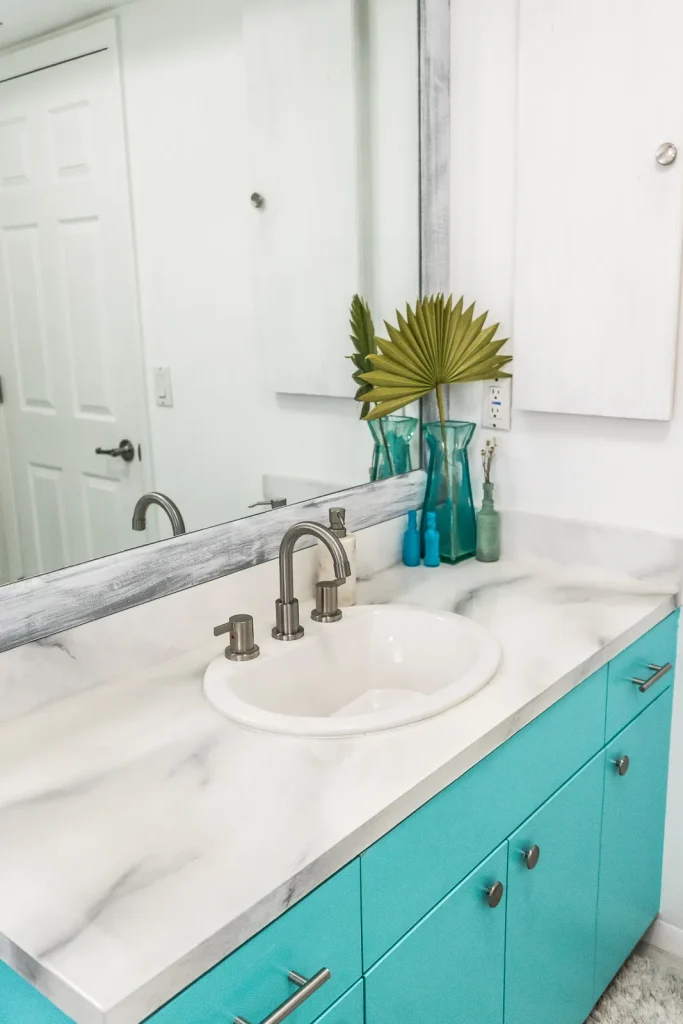
Wondering if painting the countertops to get a marble-like look is even possible? Well, our experts say that it is not only possible but has been popular in the world of home decor and interior design for years. The best part is that it has a very negligible expense yet a gorgeous look. There are just a few things you have to do to get this timeless beauty. Start by cleaning the existing countertop with sandpaper, applying a base color that mimics the beauty of marble, using soft brushes, and carefully painting the DIY countertop to create marble-like patterns. To make sure that this DIY countertop lasts long, don’t forget to add a protective layer. This idea can be easily implemented for both kitchen and bathroom countertops.
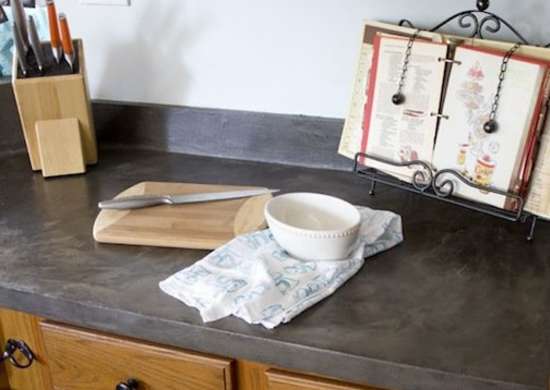
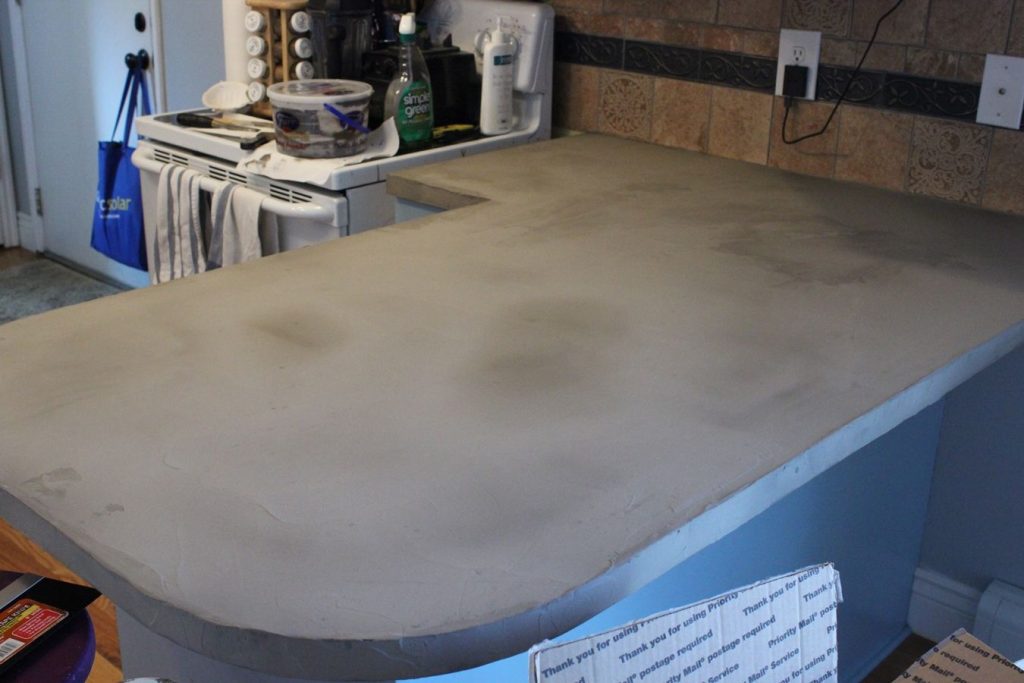
3. Use Concrete

This DIY countertop hack has come to our experts after several trials and errors. We have found that hiring workers who make concrete countertops is expensive. However, when you channel your inner creativity, it is just the opposite. Concrete is cheap, durable, and looks very modern. This ingredient has become increasingly popular when it comes to DIY countertops. You can mold concrete in shapes you like, which means you do not have to struggle with finding the right size. When colored, concrete can be used to fit just right with the overall aesthetics of the house, and if you are a lover of all things organic, you can just let it be by itself. You can even polish the concrete for a smooth and glossy look. Using concrete countertops is ideal for kitchens that survive a lot of heat and scratches. Create a unique countertop that looks grand without having to spend a lot.
4. Include Pennies
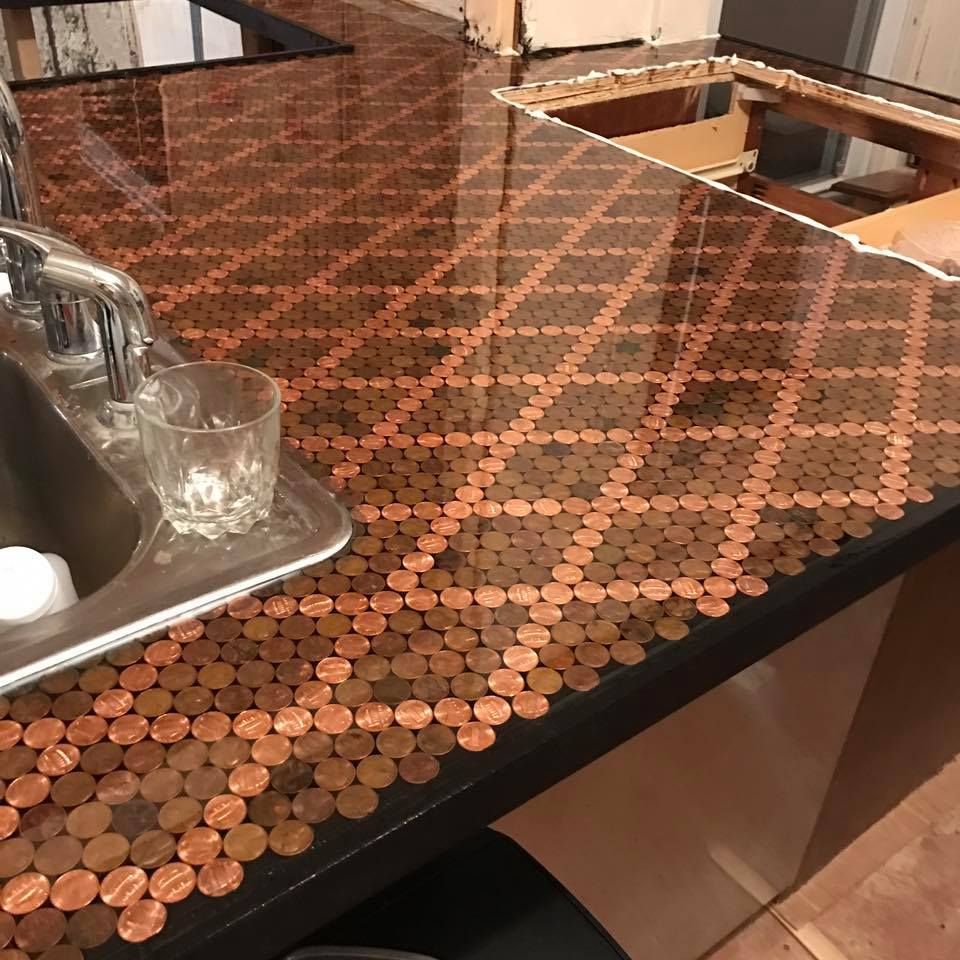
A lot of us have a knack for adding pennies to our collections. Are you one of them? Then it’s time to put them to use finally. Pennies have been in use in home decor, especially for flooring, for years. Try including them in your DIY countertops and look at the uniqueness they bring. This is not a very popular DIY hack yet when it comes to countertops. But this unconventional DIY technique makes for a great mosaic finish. Before you include the pennies in the DIY countertops, make sure to clean them thoroughly. Add a long-lasting adhesive or resin on the DIY countertop, and place the pennies in the way you want them to look. You can even create unique patterns with them, allow them to dry, and cover them with another layer of adhesive. The last layer helps fill the gaps between the pennies, making sure they stick around (quite literally)! Allow the setup to dry. Don’t forget to make a historical story up when showing it off to your guests.
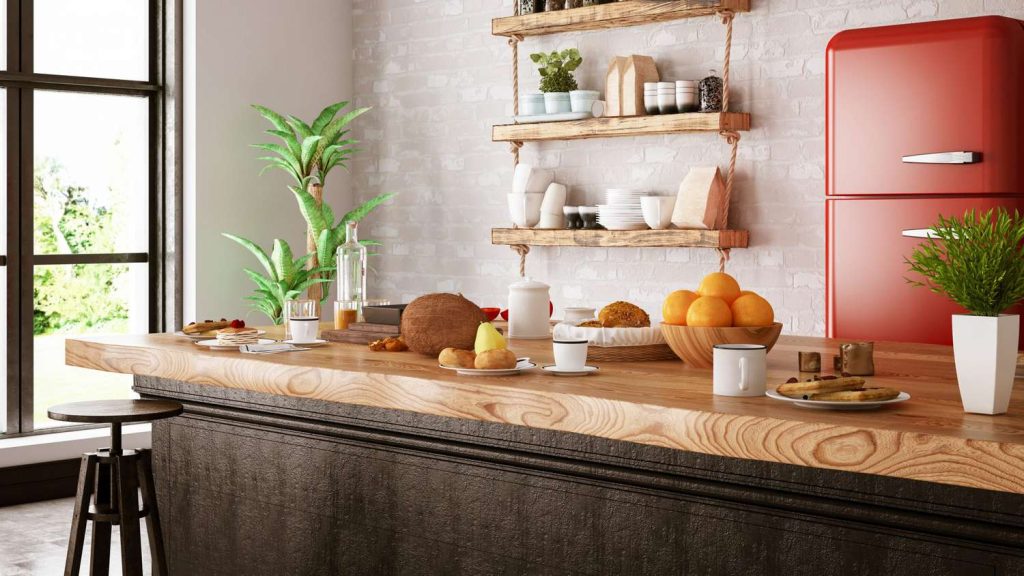
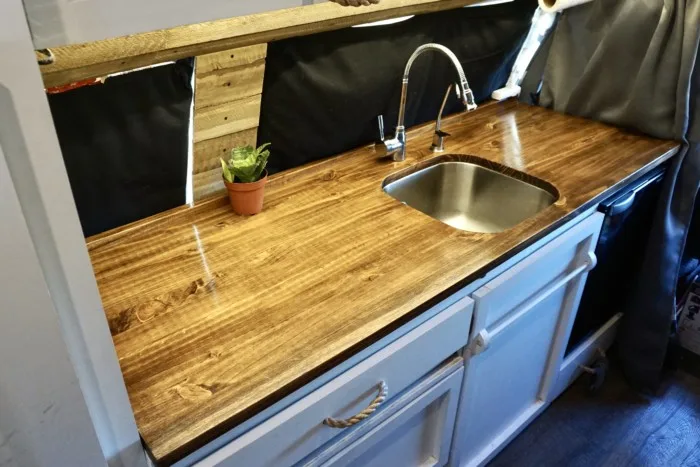
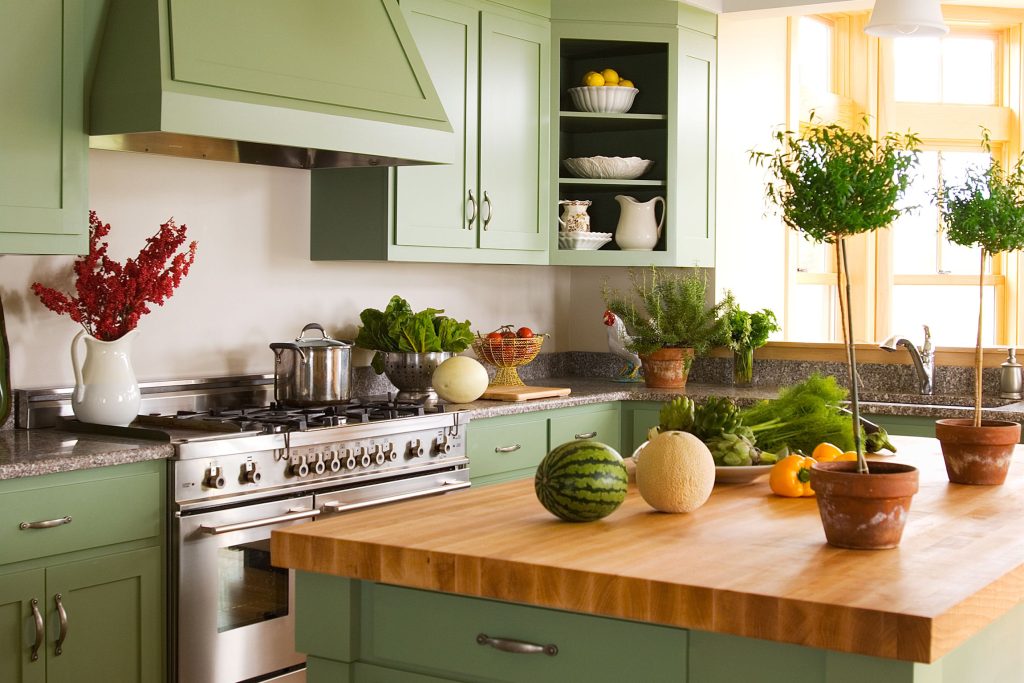
5. Add Wood
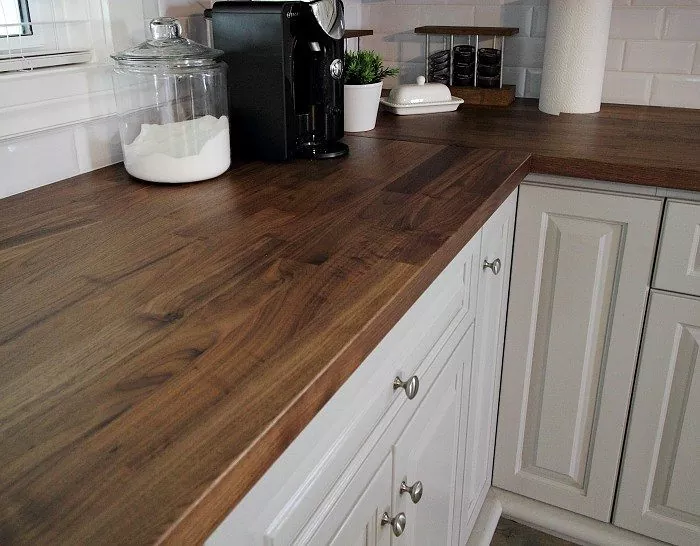
Using wood when performing DIY is one of the most common techniques. Then why should DIY countertop not get a chance to enjoy the rustic flavor of nature’s beauty? They are considered the all-time classic, and depending upon the design and pattern you create with them, they can be considered traditional or modern. From maple, oak, and cherry to walnut – there are several options when it comes to wooden countertops. Wood is easy to cut and shape. Whether you are remodeling entirely or just spicing things up, you can shape them that fit your style and personality. Our experts suggest that you can even use wood if you have an existing countertop with a different material. The uniqueness that it brings is just beautiful. Maintain regularly with oil and wax, and these countertops are here to last a lifetime.
6. Torch Wood
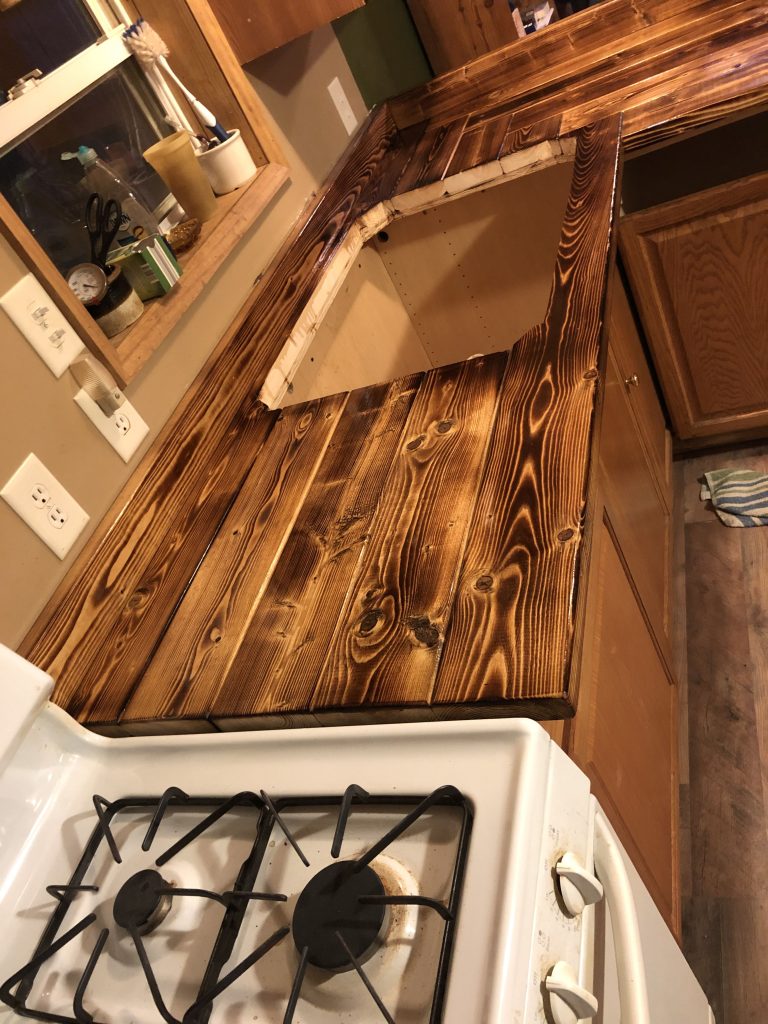
Turn your countertop into something brand new. Torchwood is most popular in commercial areas like bars and pubs, but that doesn’t mean you can’t have it. Cut the torchwood board size to fit your countertop, and arrange them based on the grain. Torching the wood helps accentuate the grains, giving it a more free-flowing natural look. Using glue and pocket holes, attach the boards together. Fill the gaps with glue and sand dust, and watch the beauty become the focal point of your home.
7. Use a Wallpaper
Too tired to make time for heavy artwork, yet want your countertops to look brand new? We have just the thing you need. Buy the kind of wallpaper that you want your countertop to look like, peel it off and paste it on the existing one; easy-peasy! You get a wide range of colors, patterns, and textures readily available. You can choose a modern and bold look or a subtle and traditional look. Before sticking the wallpaper to the countertop, make sure to check for any dust or dirt particles and clean it thoroughly. Measure the size of your countertop and use a strong adhesive to stick it. You can trim any extra length later. However, try to get the exact size before you paste the wallpaper.
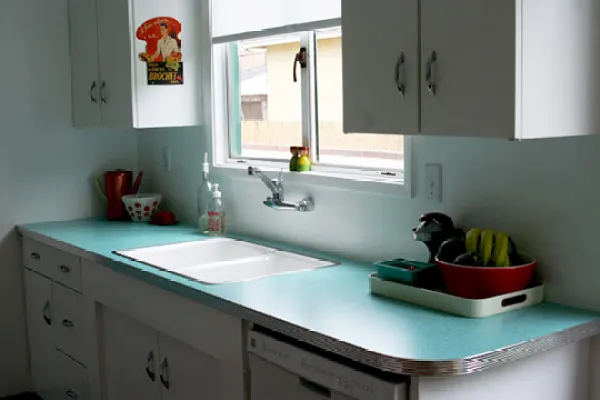
8. Use Epoxy on Laminates
A laminated countertop is quite common. It can be seen in many households. If you a looking for a DIY countertop idea to take your boring laminate to a sophistication level, here is something for you. Epoxy is used for a glossy finish for the DIY countertops. Cover your laminated countertop with several layers of epoxy, but make sure to fill any gaps with putty or wood. Use a brush to apply the epoxy perfectly. Before applying it, also make sure that there are no bubbles in the epoxy mix. If that’s the case, you won’t get the finish you are looking for. Epoxy is not only responsible for a unique look but also helps prevent heat, scratches, and moisture. Additionally, you can even use a mix of colors to get a marble-like look.
9. Add a New Layer of Laminate
Are you the classic one who doesn’t want to change the current look of the countertop but just wants a fresh feel? We got you, but only if you have laminate countertops. If you do not want to invest a lot of energy in changing the laminate countertops, spice things up with a new kind of laminate. You already know how laminates work, and we are certain you also know that they are inexpensive. But when adding another layer of laminate over the current one, make sure to be a little cautious while pasting it. The length of the new one should neither exceed the old one nor fall short of it. Once done, press it out to ensure there are no air bubbles stuck in between. If you want to add a more polished look, finish the edges with laminate edge strips. Keep them clean, and you are good for years to come.
10. Live Edge Countertops
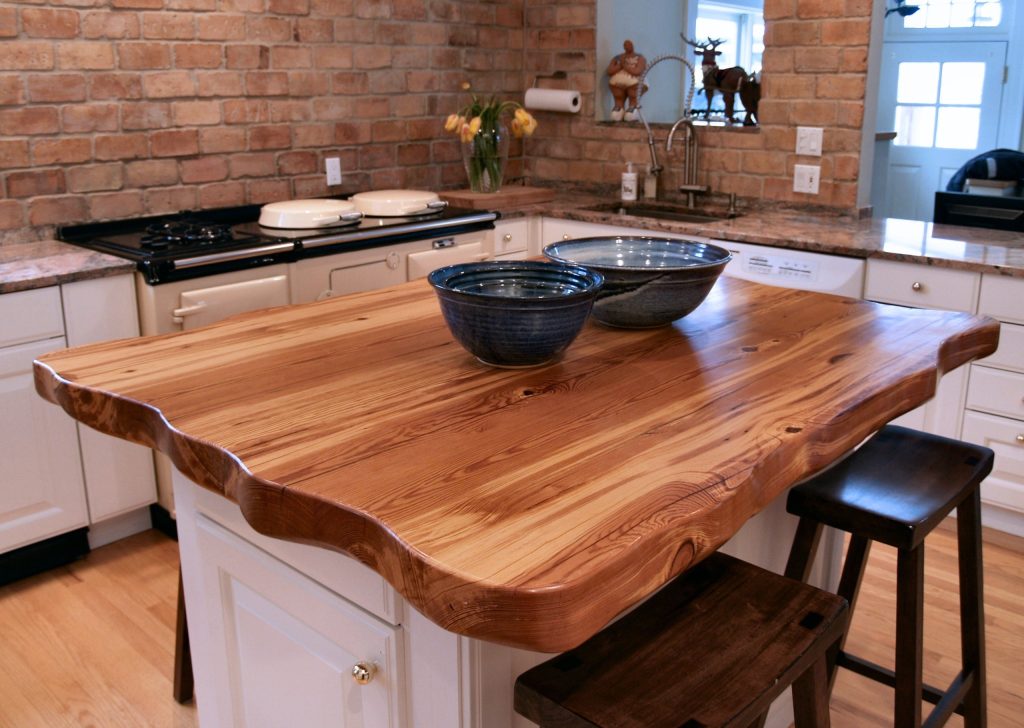
All in for natural beauty? So are we! That is why our experts bring to you this amazing DIY countertop hack that is ideal for every vintage lover. In the case of live edge countertops, the material used is wood. Instead of giving it a complete, symmetrical finish, the edges are left in their own natural look. You could add paint or polish to complete the look. But there is something you must keep in mind when opting for countertops like this. While it is very easy to install, make sure there are no rough edges and clean out such kinds of unevenness, or else they result in severe injury. You can also paint the top and the edges in two colors if you love the contrast. Showcase the natural beauty of wood and create a focus area that everyone falls in love with.
11. Let the Slate Write a New Story
Who said slate is only for kids learning to read and write? If you go back in time and recollect what you studied in school, you will remember that slate is a kind of stone. It has a matte appearance which is ideal for people who are in love with minimalism. You can use paint to add a layer of fun to the countertop. They are used for a lot of DIY projects, and this is, indeed, one of them. If you do not want to use this on the entire area, try choosing just a part of it. While they are extremely fun, you will need to maintain them regularly using wax for them to last long.
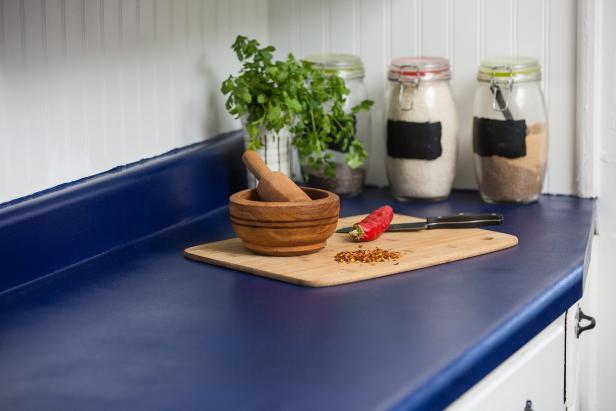
12. Go Monochrome
Do you love to paint or want to experiment with paints for your kitchen or bathroom countertops? Then this idea is the perfect one for you. The DIY countertop with monochrome is a perfect choice for those who love subtle and old school. We believe old school is great when it comes to certain things, like this one. Grab the paints and brushes and create a unique monochrome look. Instead of going jet black, choose shades of dark gray. This idea is a quick technique and can be fun. Having a monochrome countertop prevents a lot of visible dirt. Once they dry off, all you need to do is maintain them with water and a plain dusting cloth.
13. Put the Old Door to Use
Is there an old door that has been sitting in the storeroom for a while or the one that you have been adamant about replacing? Instead of throwing it all together, here is a great DIY countertop idea that could work. Shape the old door into that of the DIY countertop. Make the necessary trims and cuts wherever necessary. Adding plywood is a great idea for some extra stability. Make adjustments to the door as per the sink, faucet, or any other element. Sand the edges to remove any roughness, and follow it up with a sealant to make sure that this becomes a long-lasting addition to your countertop. This is a great way to add character to your home while preventing waste.
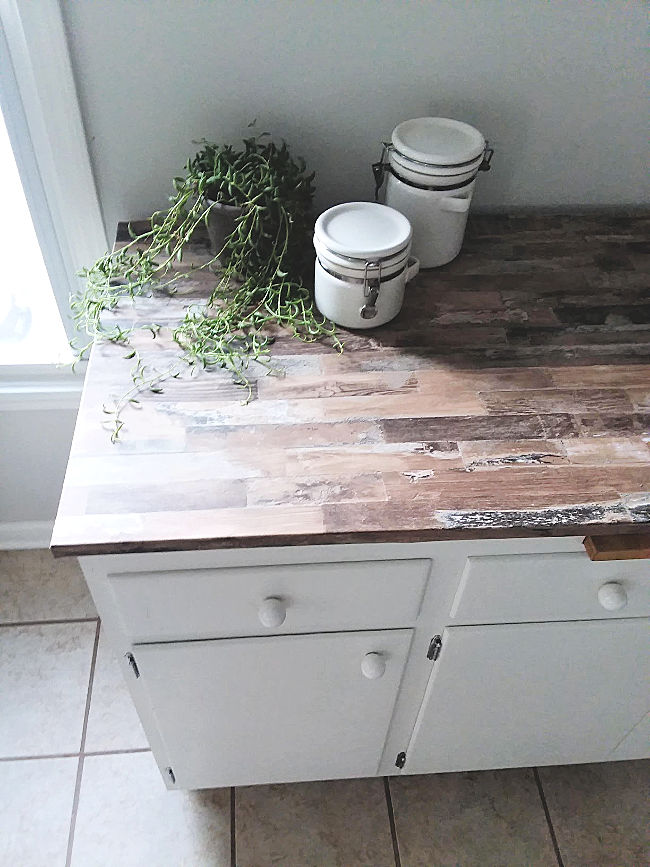
14. Update with Contact Paper
Contact paper is also known as self-adhesive. It is a self-sticky plastic with several decorative purposes, and upgrading your DIY countertop is just one of them. It is an extremely low-budget DIY hack, which anyone can do even without watching a tutorial. It is self-explanatory. All you have to do is stick it on the countertop in the right size and avoid letting in any air bubbles. If you see many air bubbles getting trapped while you try to paste it, just peel it off and start pasting it using a brush. Their appearance can vary from wood grain, marble, or solid colors.
15. Pour in Concrete Countertops
We already talked about installing a concrete DIY countertop for your kitchen and bathrooms. But you will be surprised to know the number of purposes concrete can solve. While the previous one suggests molding them to give the shape you need for the counter, this idea suggests that you pour the mixed concrete in a free-flowing way and watch it gain the shape of the area. Before you begin to pour in, you must keep in mind that they do not come in uniform color, and there might be some need to sand them out. Find this hack interesting? Try now.
16. Paint the Laminates
Laminates might start to look boring after a certain period of time. And our experts believe that you have every right to keep beautifying the aesthetics of your home as and when you please. While adding new layers of laminates over the old ones is easy, you know there is another way to spice things up for the oldies. Painting the laminates need just a handful of things; with proper preparation, you can give them glam up. Choose a paint for your DIY countertops that can survive moisture and pressure. Instead of applying one thick layer, make sure to paint the countertops with multiple thin layers. What is most important here is that the previous layer must dry before you add a new one. You can choose a solid or textured color and watch it become beautiful.
17. Choose Stainless Steel
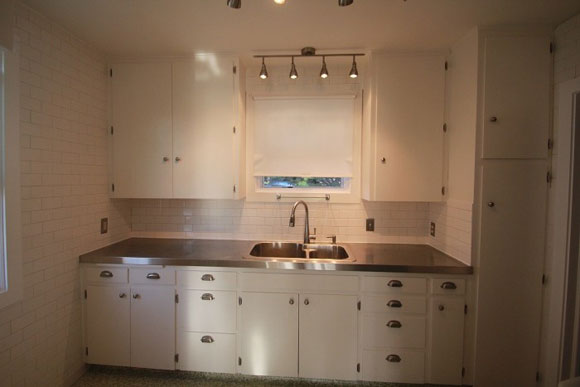
A DIY countertop using stainless steel might not come as inexpensive as the rest, but the results they deliver are worth spending a few bucks for. Stainless steel is known for its strength and durability, heat resistance, and easy maintenance. Most homeowners, who are looking for a long-term solution, choose this. Measure and cut the stainless steel sheets to fit your DIY countertops, and make sure to add a sturdy material to hold them long and straight. Trim the edges for a refined look. The use of water and mild soap is all you need to keep them going for years. You do not have to worry about them getting spoilt due to the heat from utensils.
18. Use Plywood
When opting for a DIY countertop using plywood, choosing one that is sturdy and long-lasting is extremely important. We do not want to go for a DIY idea that falls apart with the first pressure. Plywoods are cost-effective and give a lot of options to mold and build. After cutting in the desired length and shape, make sure to add something strong to help the plywood stay as it has been for a long time. If you are going for this DIY countertop idea, make sure to keep them away from very high levels of heat because plywoods aren’t great heat resistant. They work better for bathroom countertops.
19. Copper Countertops
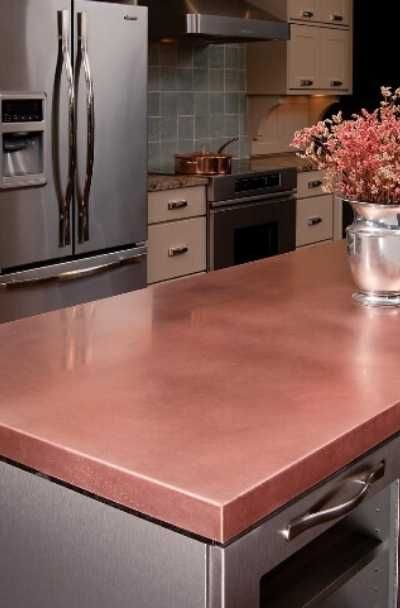
We love the effect copper has on light-color backgrounds. If you are in sync with us, then this DIY countertop idea might be just the one you are looking for. On your existing countertops, add a copper sheet, trim it to the shape of the area and get a vintage look. Copper countertops need some maintenance. But the kind of elegance they showcase makes it all worth it. Copper countertops aren’t a very common choice. But if you want to try something unique and beautiful, there is no better alternative.
20. Go for The Contrast
Do your DIY countertops look out of place with the wall and the overall aesthetics? Have you been looking for ideas everywhere? Maybe now’s the time. If you want to match the two, you can consider a mix of several things. You can try adding paint or buying wallpaper that brings everything into one space. You can add color to the concrete or get the faux marble or granite look. There are many options available. It is all about how creative you are and how much energy you are willing to spare. Our experts also suggest hiring a local handyman to help you with installations.
21. Restore Them Well
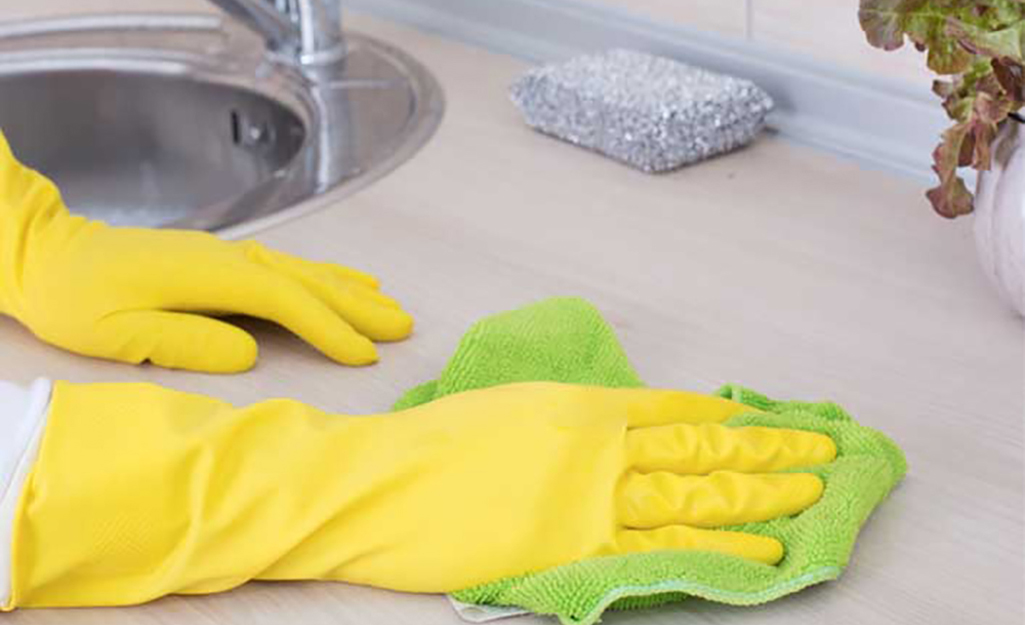
Are you out of everything? Time, money, and the enthusiasm to rehaul the countertops? Rehabilitating them might be a good idea. If you have a laminate countertop, you can consider resurfacing them. If you have wooden DIY countertops, you might want to apply a new stain or experiment with a distressed look. Whatever your material might be, there is always an option. The major option that our experts suggest is by maintaining the countertops right from their installation. This helps to keep the old ones new for several years.
Conclusion
Your house should represent who you are, what your style is, what you like, and what you don’t. Our experts believe that it is not just about the DIY countertops. Every element of our house should shadow us. If you have been looking for some great inspiration to help you give your kitchen and bathroom countertops a makeover, then we hope that this article will help.
No matter the kind of look you have in your mind. It doesn’t necessarily have to cost you a lot of money. It is your vision for elegance and beauty that truly makes a difference.
Always remember, one size doesn’t fit all! What might go great with your aesthetics might be a disaster for someone else. Talk to people, not necessarily experts, and get opinions before you jump to a conclusion and decide upon the ideal choice and design for your house. Happy crafting!