We have always been fascinated with the charm of the woods, be it from 1.5 billion years ago for survival or in the 21st century for being naturalists. Woods are not only durable but have a tranquilizing ability to remove NEGATIVE energies as well.
Embellishing the woods with your own creativity is a real art, and the most prominent way of doing it is by Stencil painting. This activity lets you fly your mind in the clouds of imagination and carve out an eye-pleasing wooden decor presenting your true self.
This blog will guide you on how to beautify your aura with stenciling on wood to use either as a tea coaster, a nameplate, a menu board, a holiday sign, or anything else you desire.
Materials You Need to Stencil on Wood
- Stencils: Reusable, Mandala, Home Decor, Customizable
- Spray Adhesive
- Acrylic Paint/ Latex Paint/ Chalk Paint / Stencil Creme
- Paint Tray
- Mod Podge
- Wedge Sponge
- Paper towel
- Scraper tool
Wooden Surface Preparation
There’s no doubt that barn woods or reclaimed woods give a very rustic and vintage look, but at the same time, stenciling gets very hard because of its irregular platform and grain marks. The mishap occurs in the form of bleeding and smudged printing.
This is why it is very important to have crisp and clean wood and, if not, prepare it well.
1. Sand It Out
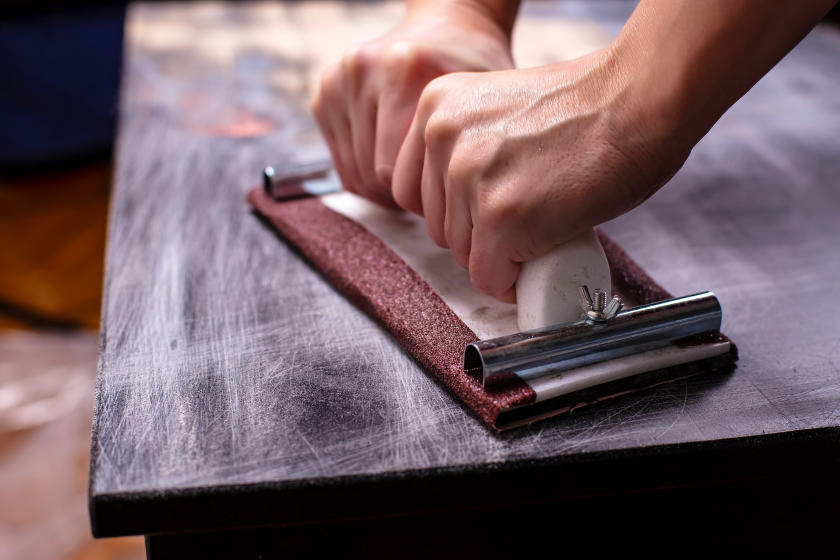
Use sandpaper to remove all the grains from the wooden surface. Rubbing it vigorously will also smoothen the surface, just as a nail filer sharp the nails perfectly.
2. Clean and Clear
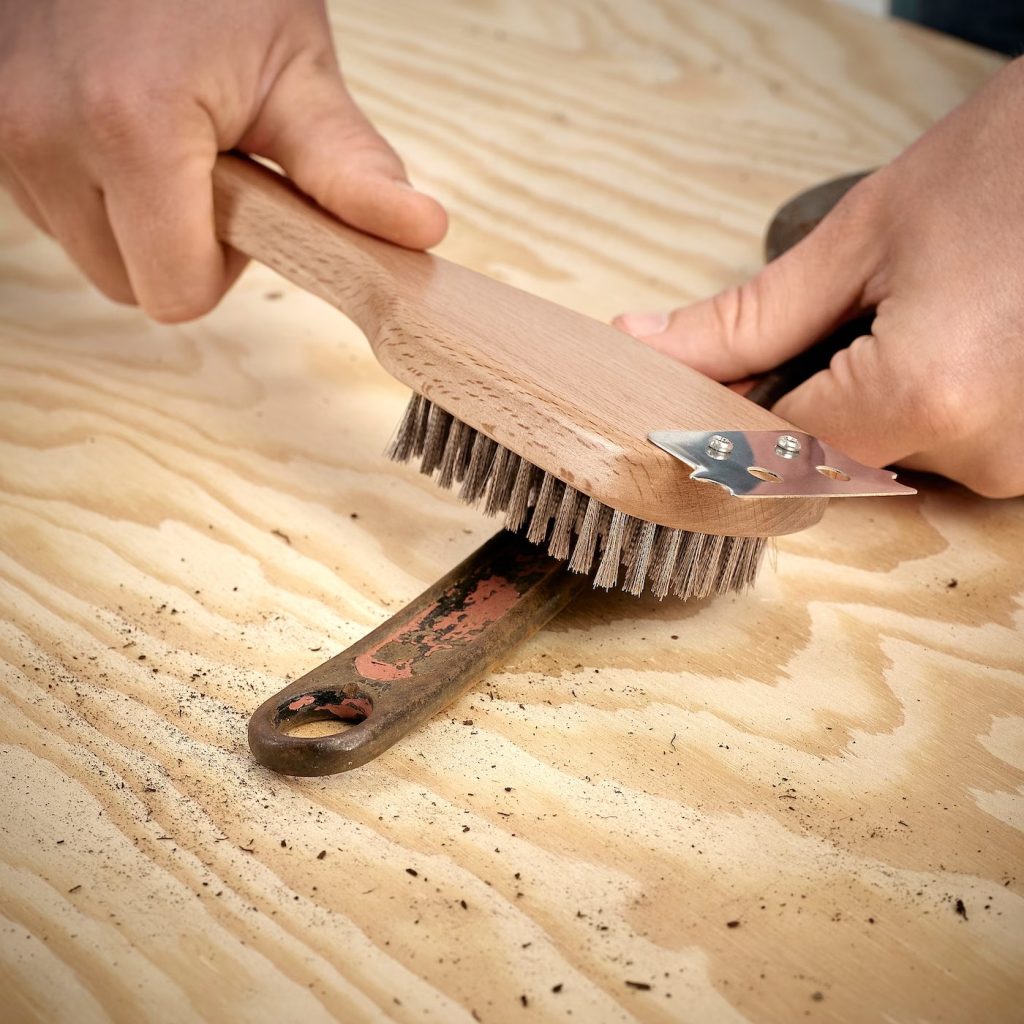
Use a brush to remove minute wooden particles and wipe the surface with wet paper towels. You can also use a hair dryer to remove tiny particles from the gaps.
3. Coat It Well (Optional)

It is recommended to apply a layer of paint all over the surface to avoid gaps. It provides better visibility to your stencil and makes the wood water-resistant.
Easy Steps to Affix the Stencil
Step 1: Stencil Stabilization
Before stenciling on wood, it is very important to make sure that the stencil will not move from its place and to seal the edges of the stencil and the surface so that the colors won’t seep into the edges and bleeding is avoided.
Step 2: Avoid Bleeding with Repositionable Adhesive Spray
Before placing your stencil, spray a small amount of spray adhesive over it. Make sure the spray is repositionable because we don’t want to stick the stencil permanently to it.
Step 3: Clean the Mess
The spray adhesive will create a mess for sure but wipe it off with a damp towel. It may take a little more effort to wipe excess adhesive, but it will go off easily by placing parchment paper beneath the stencil.
Step 4: Place the Stencil
Lastly, place the stencil on a marked point and avoid readjusting it. Once placed, you can secure it with painter’s tape.
Priming and Painting
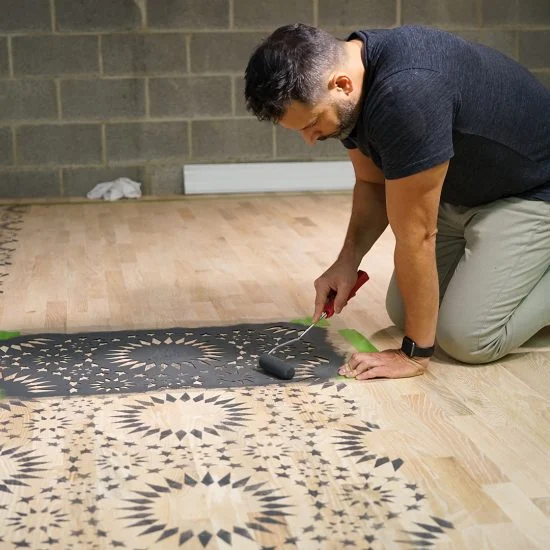
The fun part begins now. Painting on stencils can be very tricky. A little error could easily drain all the efforts out. Here’s what you should do:
- Use acrylic paint for full coverage and a crisp finish. Take the desired amount of paint on the palette.
- Use a makeup wedge or a spouncer for painting. Avoid brushes as they do not give even strokes, and it’s hard to remove paint from them.
- The dry brushing technique is best suited for stenciling on wood. It involves offloading the paint by removing the excess on a rag or paper towel. This will prevent the excess paint from sweeping into the edges and messy blobs.
- Dab the sponge over the surface in a Tap-Tap motion. Do not use a side-to-side motion as it squishes the paint.
- If there’s a light shade color being used, DOUBLE coating is recommended.
- For a hand-painted look, you can dip a toothpick in the same color and fill up the in-between gaps.
Wiping Out The Finished Stencil Wood

- As the paint dries, it is time to remove the stencil. Make sure you are not removing it while the paint and the mod podge are wet, or else the last-moment bleeding could occur.
- Use a sharp cornered tool to lift the stencil from the corners to avoid paint smudging.
- Remove the stencil gently and clean the paint stain with a damp cloth or nail paint remover.
- Use a scraper to remove extra paint from the surface and from the stencil.
Final Finishing and Locking
You must have felt immense pleasure while looking at the final result from the stenciling of the wood. Indeed, your hard work has given the prettiest results.
- Gap Errors: Fill out the gaps using thin brushes and overdo the bled areas.
- Double Coat: If the colors are not displaying well, double-coat the areas with thin brushes.
- Bled areas: if your stencil has swept the colors in and has caused bleeding, no worries. You can outline the areas with the same acrylic color, and no difference would be seen.
- Protection: Varnish the wood to lock moisture and preserve the color stain. Use transparent colored varnish or Mod Podge for the best result.
- Framing: Frame the wood with a wooden frame for a better look and attach hooks to hang them on the walls.
What Can You Create with Wood Stencils?
Our minds are trained to be very initiative, so why not use them with the full ‘muscle’ that they have? We sometimes lack ideas, and our imagination gets stuck, but that is okay. Here are some artful suggestions on things to create while stenciling on wood:
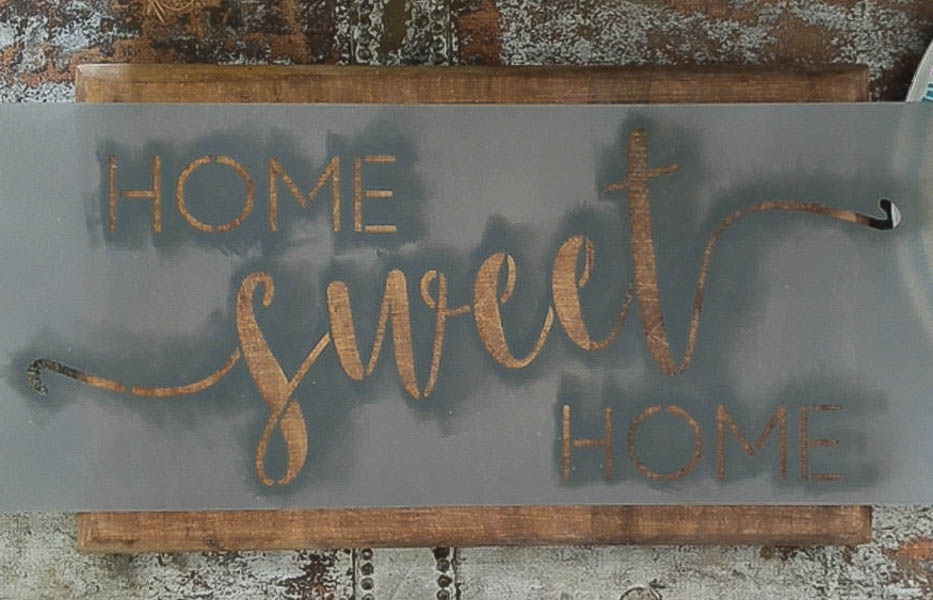
1. Door Signs

These are not only signs but are also attached to us emotional hubble-bubble. You must be pondering over with ‘How SO?’ Well, it is because it represents our home sweet home. What could be better than designing your door sign by yourself and giving it a look at your personality?
2. Floor Design
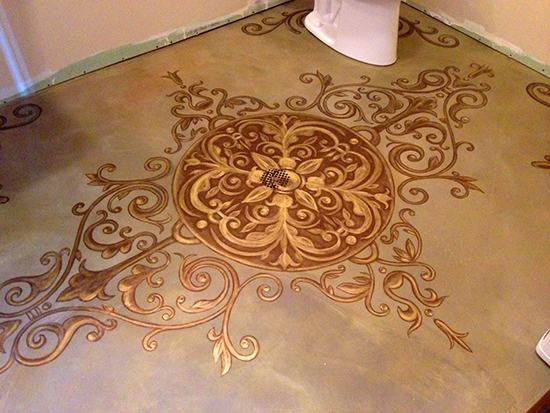
If you are a person who likes trying out new things, this one’s for you. You can design your wooden flooring with different kinds of initials, words, and whatnot. Give your creative mind a jump, and let others be amazed at your ideas.
3. Wall Hangings

Aesthetic wall hangings made of natural products like wood with pastel colors are so in trend. They not only are eye pleasing but can give out a great message to society. Do not miss the opportunity of decorating your home with such trendy decor.
Pro Tips and Savvy Hacks for Wood Stenciling
Following the proper instructions while stenciling wood may not give appropriate results, and that is because your creativity must sync with your experiences.
This is why we have tried to combine all the expert ideas for you to give out the best result every time you are stenciling on wood. These tips would ease your stenciling process and would make you Master it in no time.
- Surface Cleaning: it is a must to clean the surface before applying paint for a bright finish. All the dirt particles either get mixed with the paint and turn the color into a muddy shade or will form a crooked texture throughout the surface.
- Appropriate Stencil: always choose the stencil that completely fits your wooden platform. Choosing a smaller or larger one will not give it even space, and bleeding would be caused.
- Locking the stencil: Always lock the stencil with adhesive spray or painter’s tape before applying the paint, as it would ensure the sticking of the stencil to a definite space and would avoid sliding off the stencil and creating a mess.
- Do not use Brush: While painting, always avoid the usage of brushes even though they are flat. Flat brushes would not show even strokes while stenciling on wood and would create bleeding.
- Dab-dab motion: It is recommended to avoid painting in a sliding swaying motion rather than doing it in a dabbing motion. Yes, just how the foundation is applied. It is because it lets an even distribution of colors throughout the surface and avoids the paint bleeding.
- Layer-wise painting: light shaded colors that emit background shadows must be painted in layers. It means that one should not take large quantities to hide the background but should patent a layer, let it dry, and then double-coat it.
- Stencil Removing: Stencils should be removed with a lot of care. They may be strongly stuck to the base and get torn. Remove them gently from the corners, and if they get stuck in between, use a sharp needle to scratch them out from the surface.
- Stencil cleaning: it is very important to clean the stencils after use. The uncleaned stencil may release extra color while stenciling on wood the next time. Clean them with hot water and a damp cloth. You can also use rubbing alcohol or nail paint remover to clean.
- Practice before performing: if you are a beginner, it is recommended to practice the whole process of stenciling on wood on a rough wooden plank to observe your mistakes and try new techniques on the actual ones.
- Sealing is a Must: After completing your design, seal it to prevent smudging and remove the paints. Use varnishes or mod podges to apply a strong coating of lamination on the wood. Final finishes are the reason why wooden design could be used for a longer period of time.
Final Thoughts
To sum up, this detailed guide for stenciling wood is enough for a person to try out their creativity. The materials required, the process to follow, the precautions to take, and the tips to keep in mind, this blog gulps in all the important measures for stenciling on wood.
Also, to stay updated on the trends, it is recommended to bag in a few stencils online and keep them in your racks, as they are reusable and can make dull and dusty surfaces look new and chic.
We aim to provide you best and only the best. The recommendations made are highly curated and are a hit on the Bull’s eye when it comes to meeting your needs in the most affordable ways.
Try these creative koo-hoos and flaunt them in your circles like never before!
Frequently Asked Questions
What Type of Paint Is Recommended for Stenciling on Wood?
The most recommended paint for stenciling on wood is Acrylic paint, which is cheap and gives a rubbery finish. Other than that, craft paint, stencil creme, and chalk paints are also fine.
How to Prevent Paint from Bleeding Beneath the Stencil?
To avoid bleeding, make sure that the wooden surface is even. The stencils are taped to the surface, spray adhesive has stuck the stencil and the wood finely, and finally, avoid using excessive paint.
What Mistakes Should Be Avoided While Stenciling Wood?
You can simply avoid using too much paint or avoid loose placement of stencils. Also, try and avoid sliding motion while painting on the stencils and clean the stencils and the surface before use for sure.