19 Results

tom ford

Search

Laundry rooms are an essential part of the home. After all, they offer the space to clean and reuse your clothes again. But laundry rooms can be aesthetic, creative, and exuberant and reflect different vibes than just a simple room used for washing clothes.

If you think that the laundry room can’t look aesthetic, your laundry space area will always remain a dull workload space.

Now how can you make your laundry space look aesthetic? You can create an aesthetic, creative, or exuberant laundry space area in a small corner with DIY or by picking up a particular theme.

In this post, we have covered 17 small laundry room makeover ideas to help you select the one good idea for your small laundry room. We have covered the pastel tone approach to art, from wall closet DIY to small shelf stack theme.

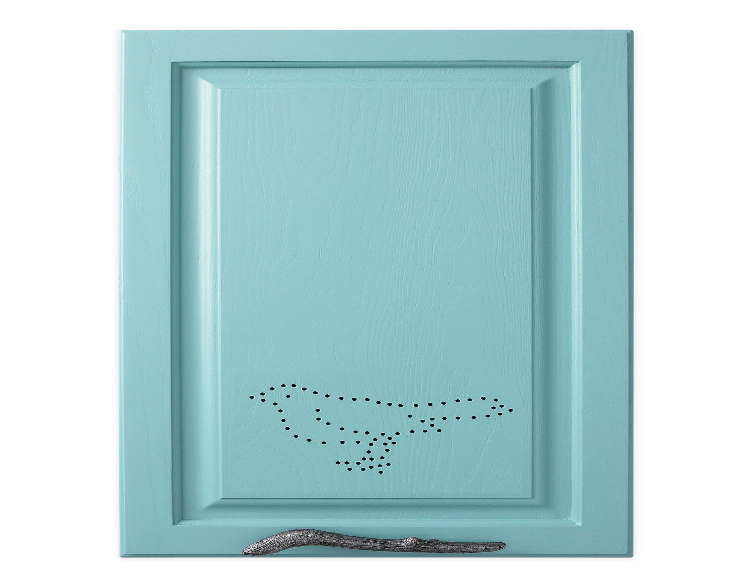
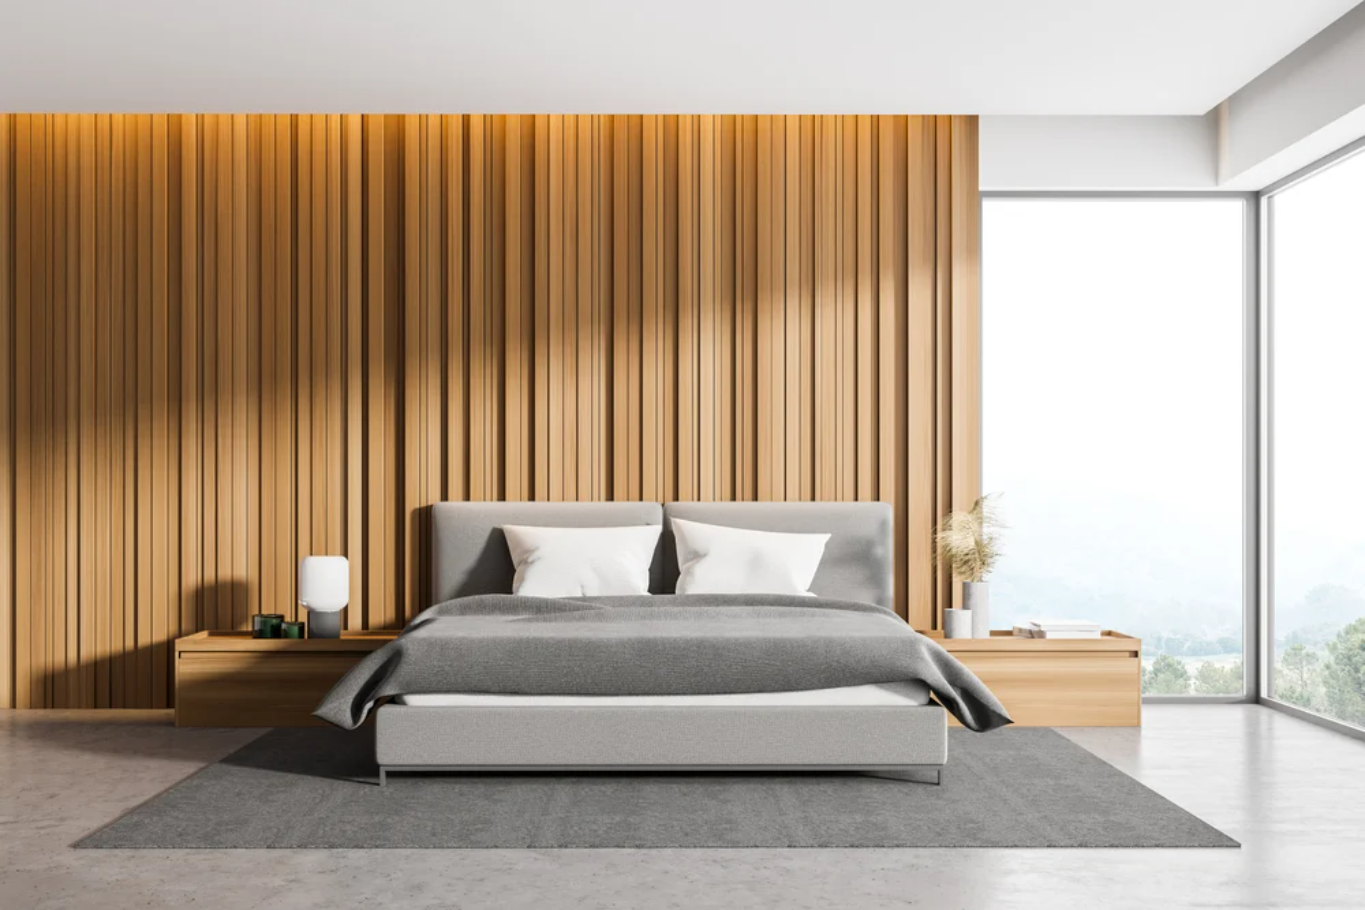
1. Pastel Tone Laundry Room

Pastel Tone Laundry Room

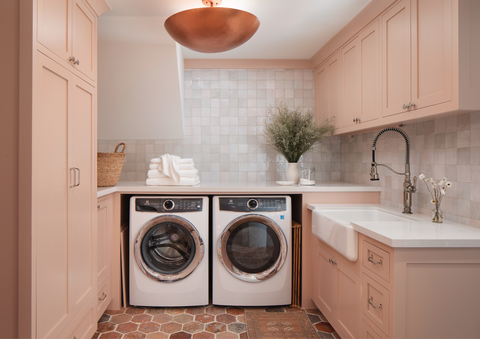
If you want to create your laundry room or space like a cozy space that doesn’t seem like a hectic workload space, opting for a pastel theme is worth trying at every cost. You can use beige or pastel pink colors on the cabinets or wood shelves to make it light and warmer. Use a light color like white or cream for the counterparts and walls.

While organizing the laundry room or designing the interior, please don’t consider it like the cleaning room only. This different approach will help you to make it a light space, and your laundry room will also stand out like the other rooms of your home, like in this image by Paul Dyer.

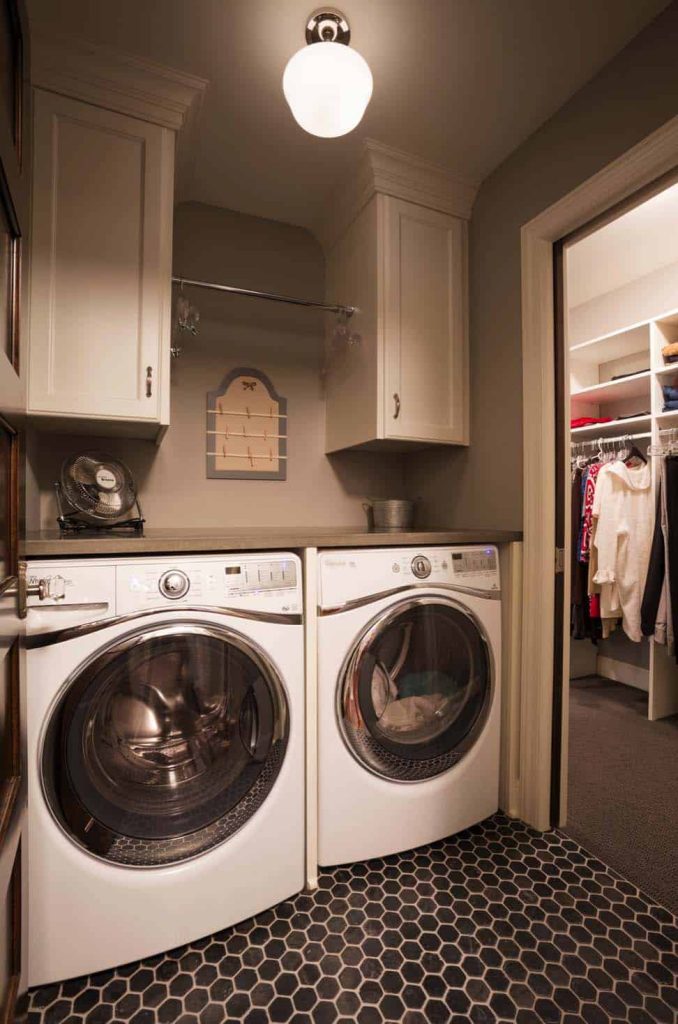
2. Rod Installation Laundry Room

Rod Installation Laundry Room

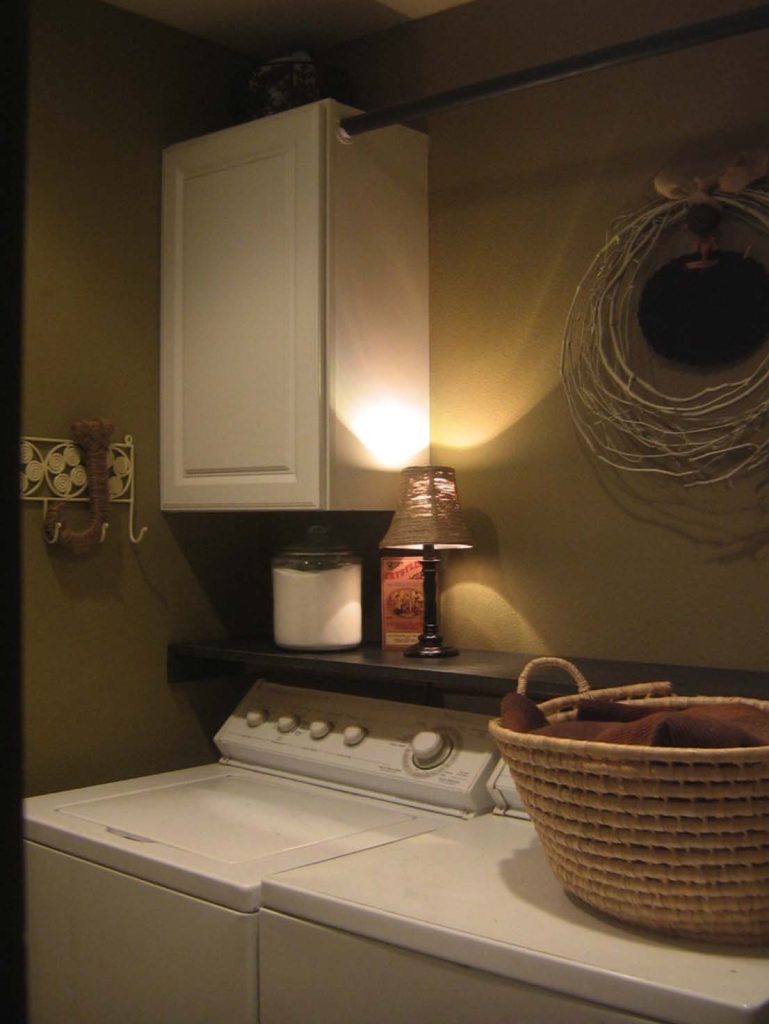
If you want to create the laundry space in the Bathroom itself, this rod installation DIY idea is for you. Above the leftover space of the washing machine and between the other washroom utilities, horizontally install a long rod for hanging clothes.

If the rod is long enough, you can create the separation by the stopper or decorative hangers to categorize it into parts for different purposes, like half side to hang clothes you will wash. And on the other half side, you can hang the clothes after washing and cleaning. You can install double rods to create more space with the rod installation. You can use the designer hangers on the rod for a creative touch.

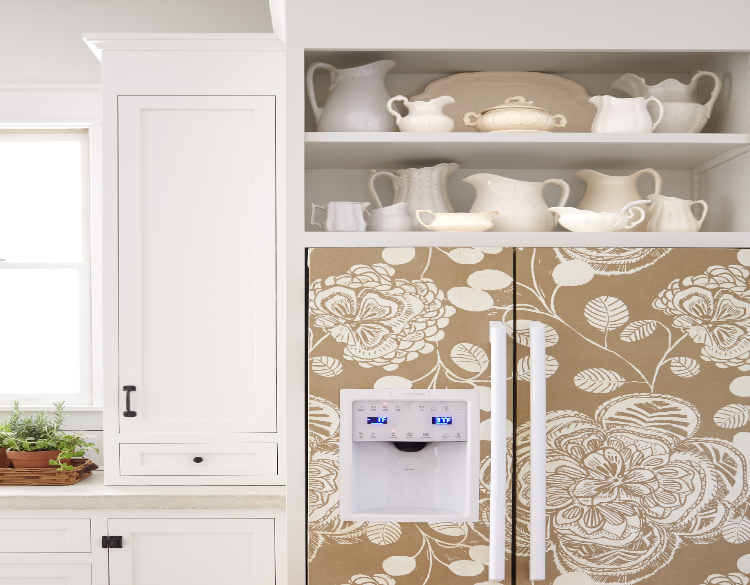
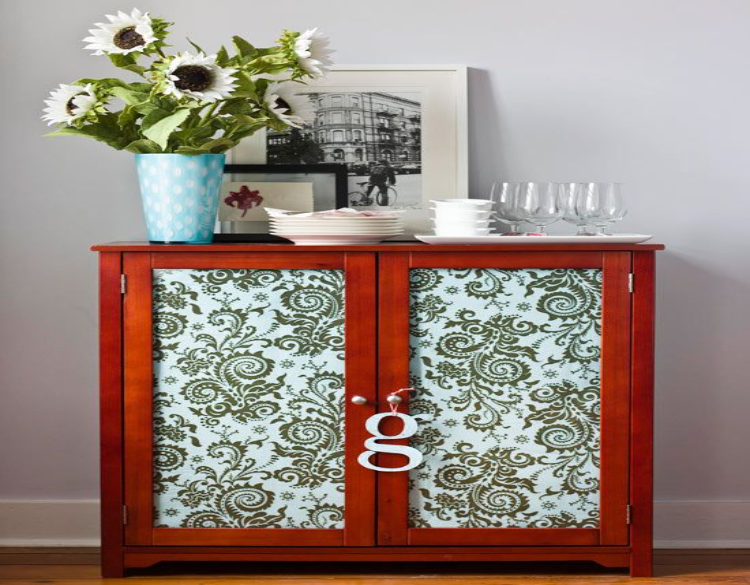
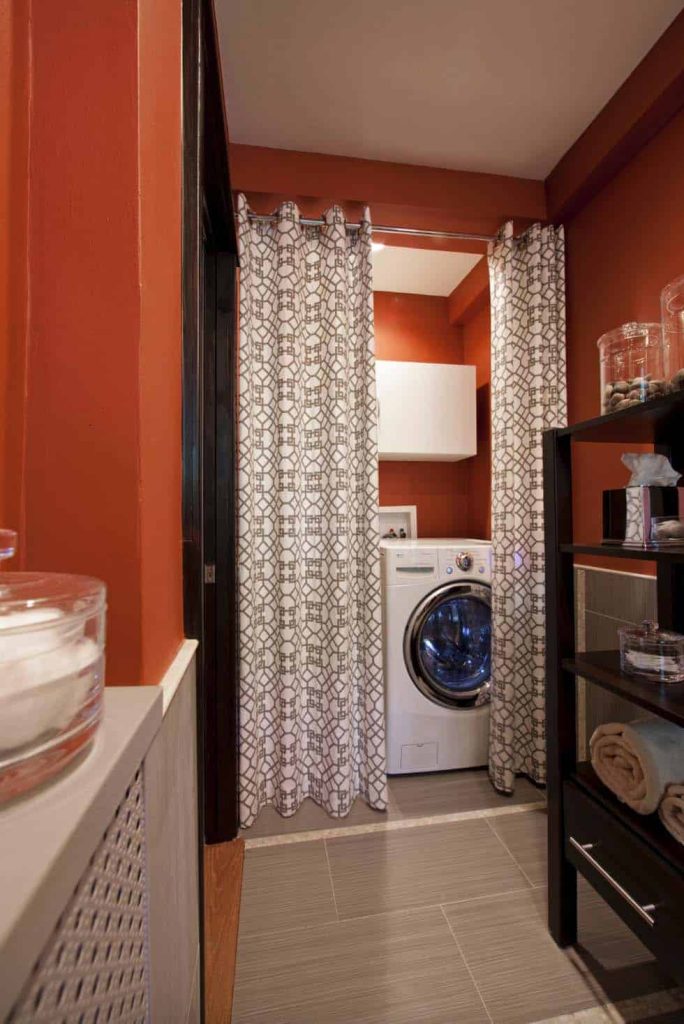
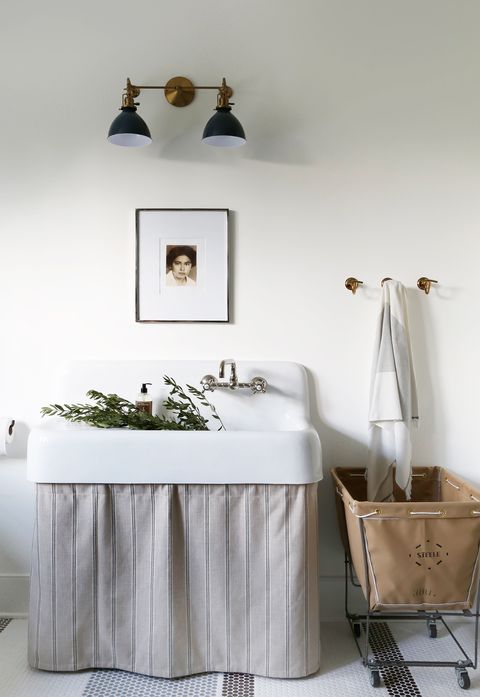
3. Add Fabrics in The Laundry Room

Add Fabrics in The Laundry Room

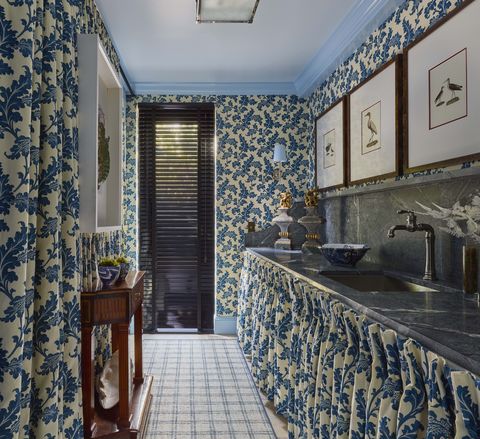
If you want to make your laundry room creative and don’t mind using textiles, this Laundry room theme is for you. Add the fabrics in the laundry room to create fresh, new, and vintage vibes. You can use a pattern or flower-based fabrics to cover the laundry walls and designated areas like cabinets and doors and utilize them as the curtain, as shown here in the image by Carmel Brantley.

If you don’t want to use much fabric, you can use a similar theme wallpaper to cover the walls of your laundry room for better creativity and avoid fabric cleaning tasks.

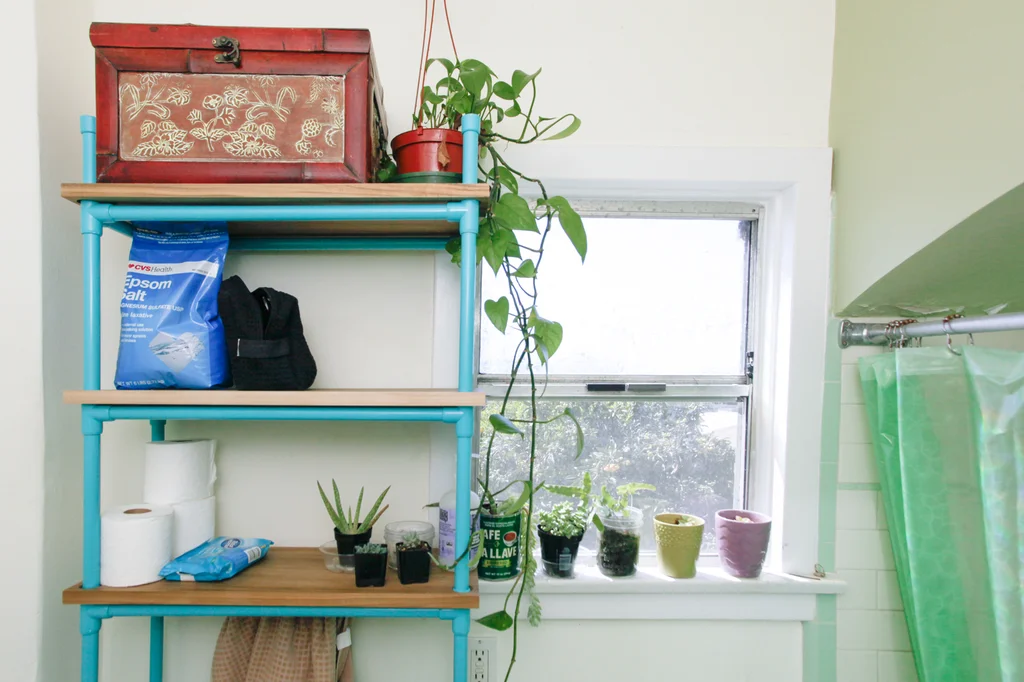
4. Industrial Chic Utility Room Ideas Small Laundry

Industrial Chic Utility Room Ideas Small Laundry

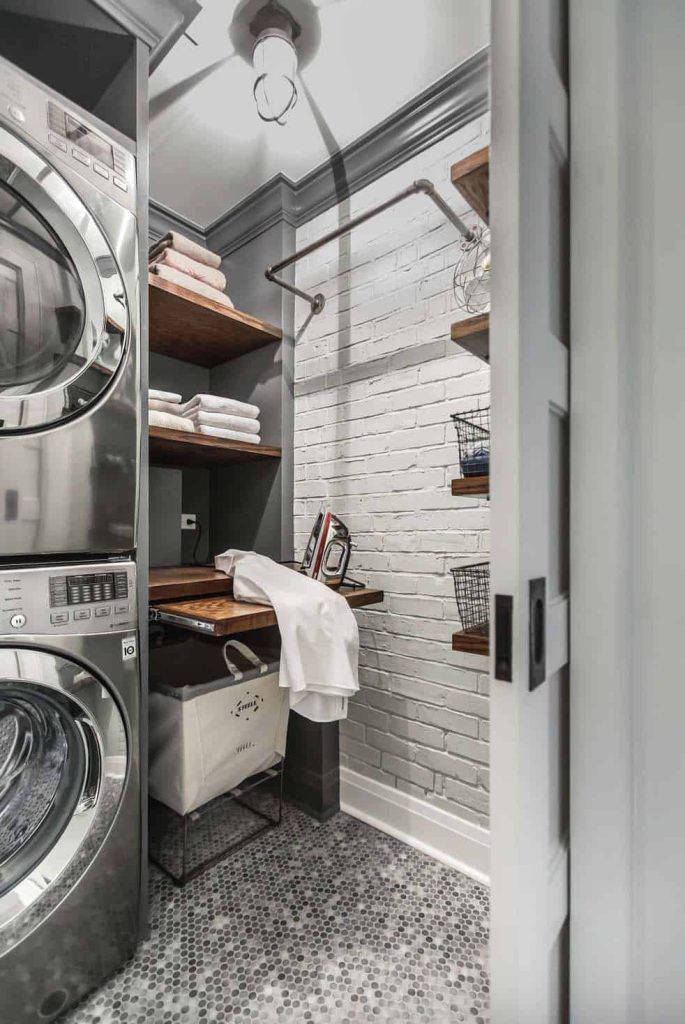
If there is space like industrial chic storage in your room or washroom, you can easily convert it into the laundry room by DIY. Use a rollout shelf and convert it into an aesthetic closet, so you can easily hide it when you don’t need it or when the laundry is done.

The good thing about this rollout shelf is you can utilize it after washing clothes, like folding or ironing them over the rollout shelf. You can keep the dry folded clothes, laundry detergent, or linen clothes on the smaller and higher shelves. Since the rollout shelf goes from ceiling to floor, it will save lots of ground space and is the perfect utility room idea for small spaces and easy DIY tips.

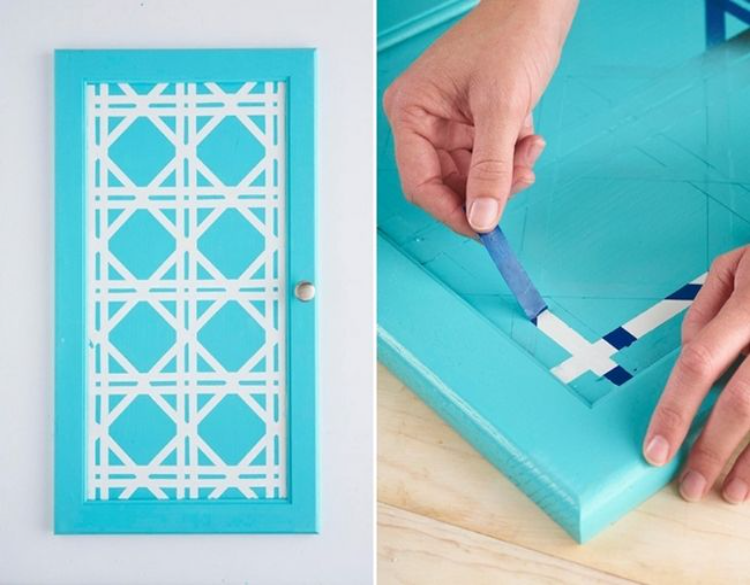
5. Pop Color Utility Room Ideas Small Laundry

Pop Color Utility Room Ideas Small Laundry

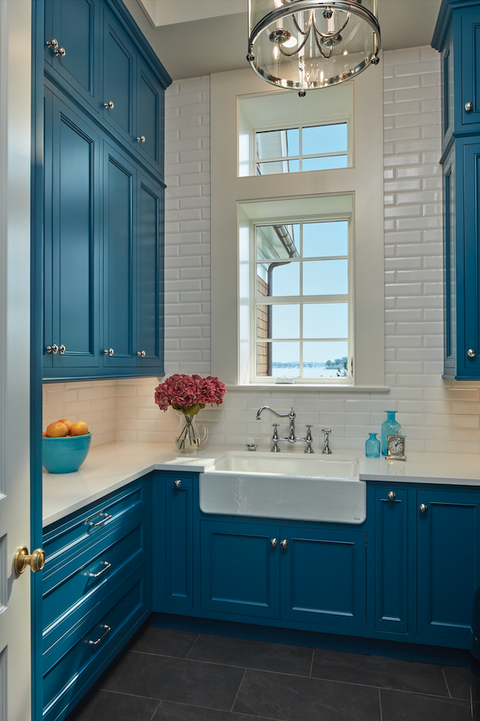
This pop-up theme is for you if you want to make your laundry space interesting and exuberant instead of tough task vibes. Add the vibrant color splash in the cabinets of your laundry room, as shown in this image by Purple Cherry Architects. If you use a closet DIY laundry space, paint the closet cabinets or drawers with a vibrant or pop color to bring an exuberant look.

This pop-up touch with color splash will make your laundry space warmers, and make it creative and interesting, to ease off the heavy working load. Balance the overall laundry room look with light-tone colors like white or the faintest shade of blue to paint the leftover space.

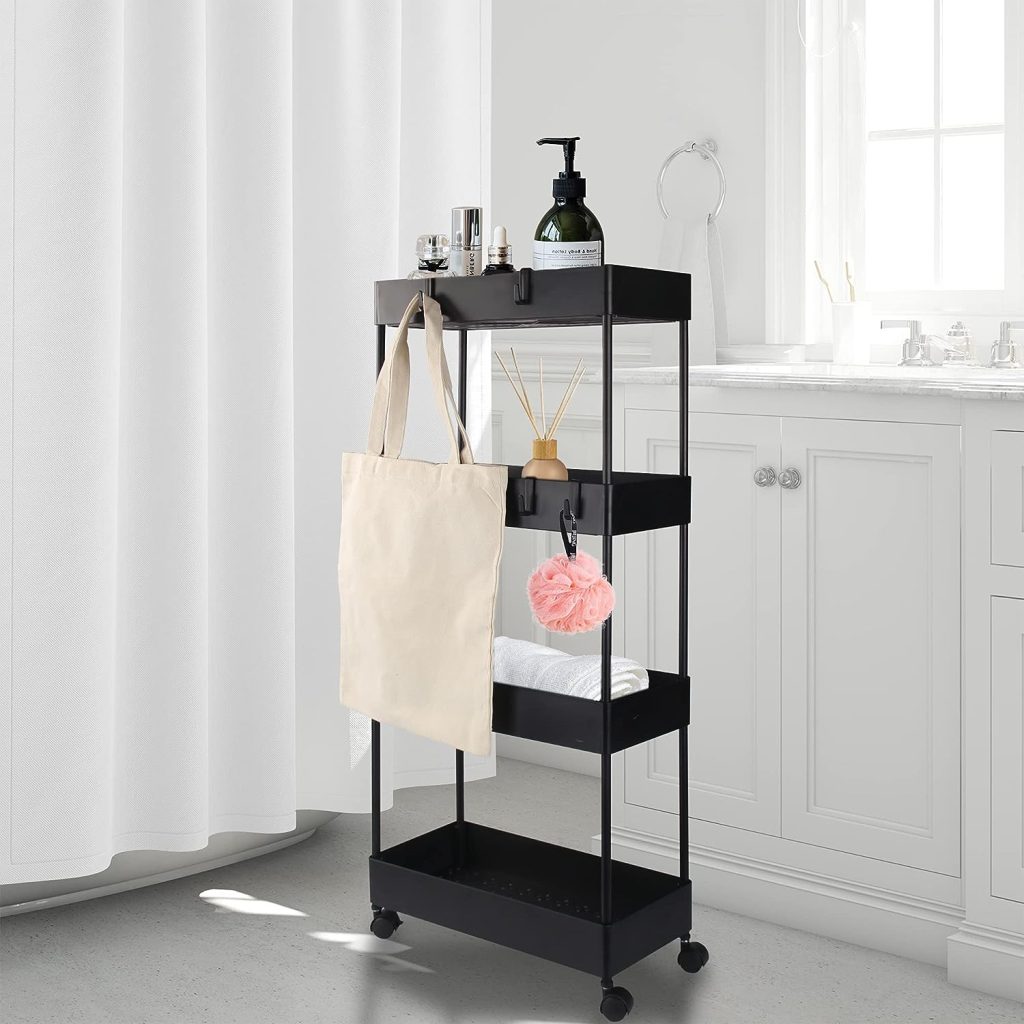
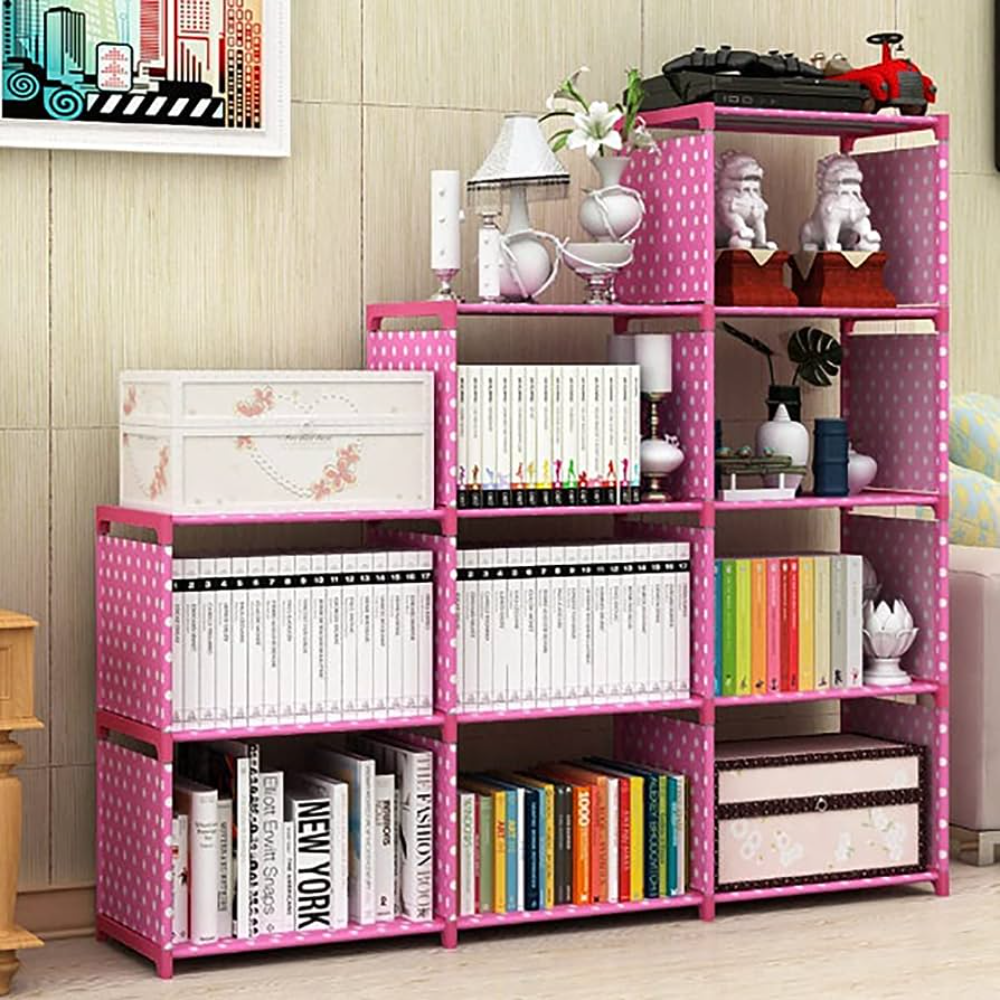
6. Organizational Utilties Room Ideas Small Transformation

Organizational Utilties Room Ideas Small Transformation

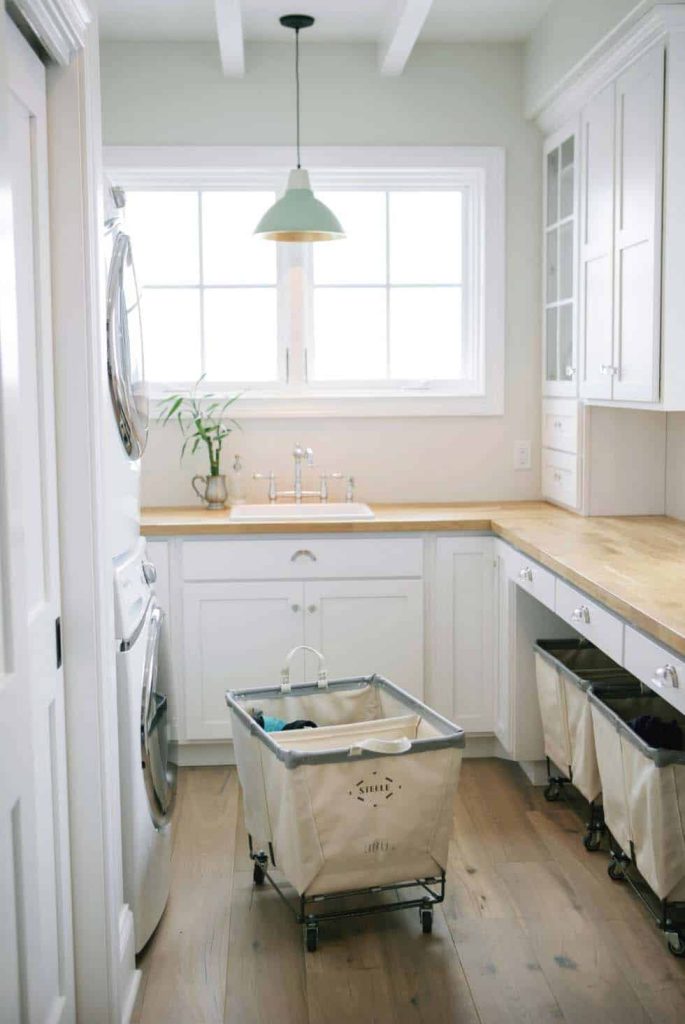
If you want to create more organizational utility room ideas for small laundry transformation, this idea is for you. You can incorporate canvas storage laundry baskets in your laundry room. If you don’t want to DIY, you can buy them. If you are looking for affordable ideas, you can easily DIY them.

Pick up a rolling stand. Use an old clean blanket to wrap around it and cover it from all four sides and the base area. Use the hooks or create them with the rope piece by fixing them with the blanket with thread and needle or hand stitching machine to make it easier to carry or move the canvas basket, and your canvas laundry storage basket is ready.

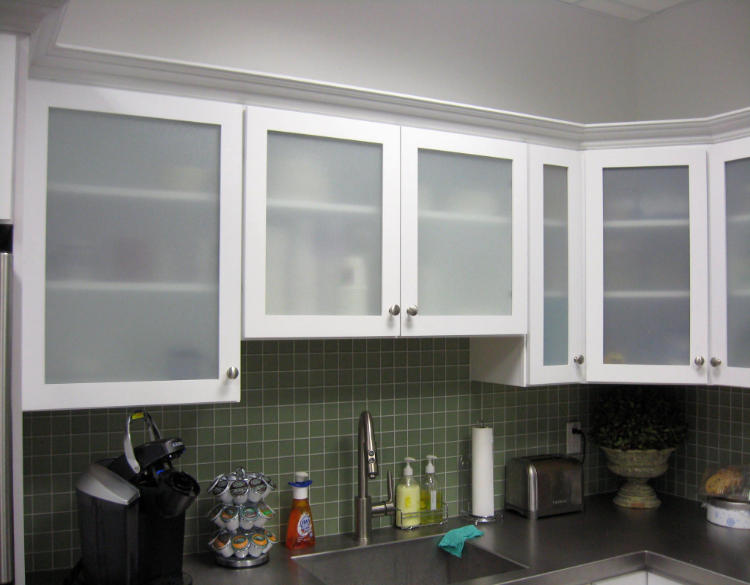
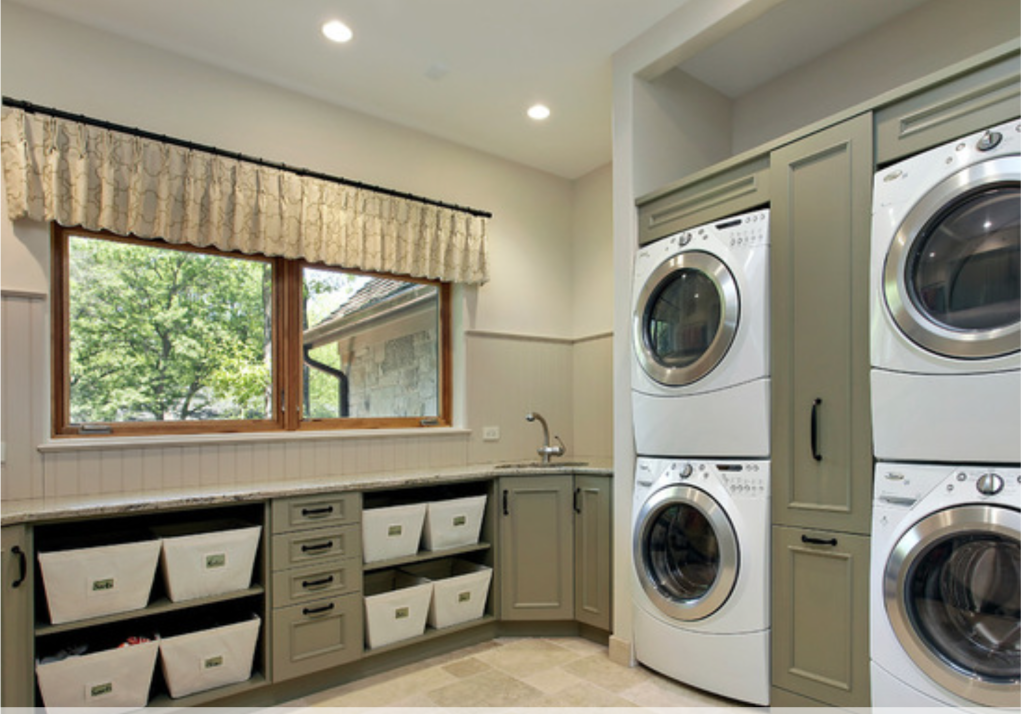
7. Artistic Flair Touch Laundry Room

Artistic Flair Touch Laundry Room

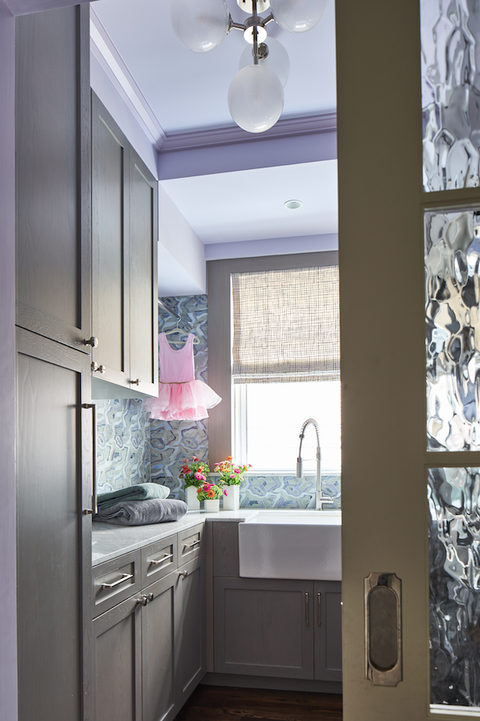
An artistic laundry room is suitable and possible if you design it professionally instead of creating it with a DIY. So it will be a little costly and need the professional help of architecture. Create the space in the laundry room for proper and more than enough lighting so it will be easier to dry the clothes quickly.

You can use the big glass windows to make it easier to light the entrance and take the help of curtains to add a privacy touch when you are working or loading the laundry. Use the shiny backsplash tiles, as shown here in the image by Lisa Frantz, for maximum light reflection in the laundry room itself.

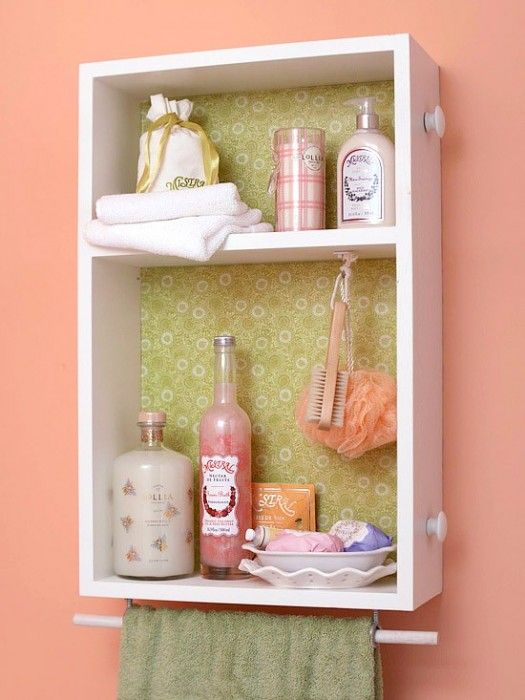
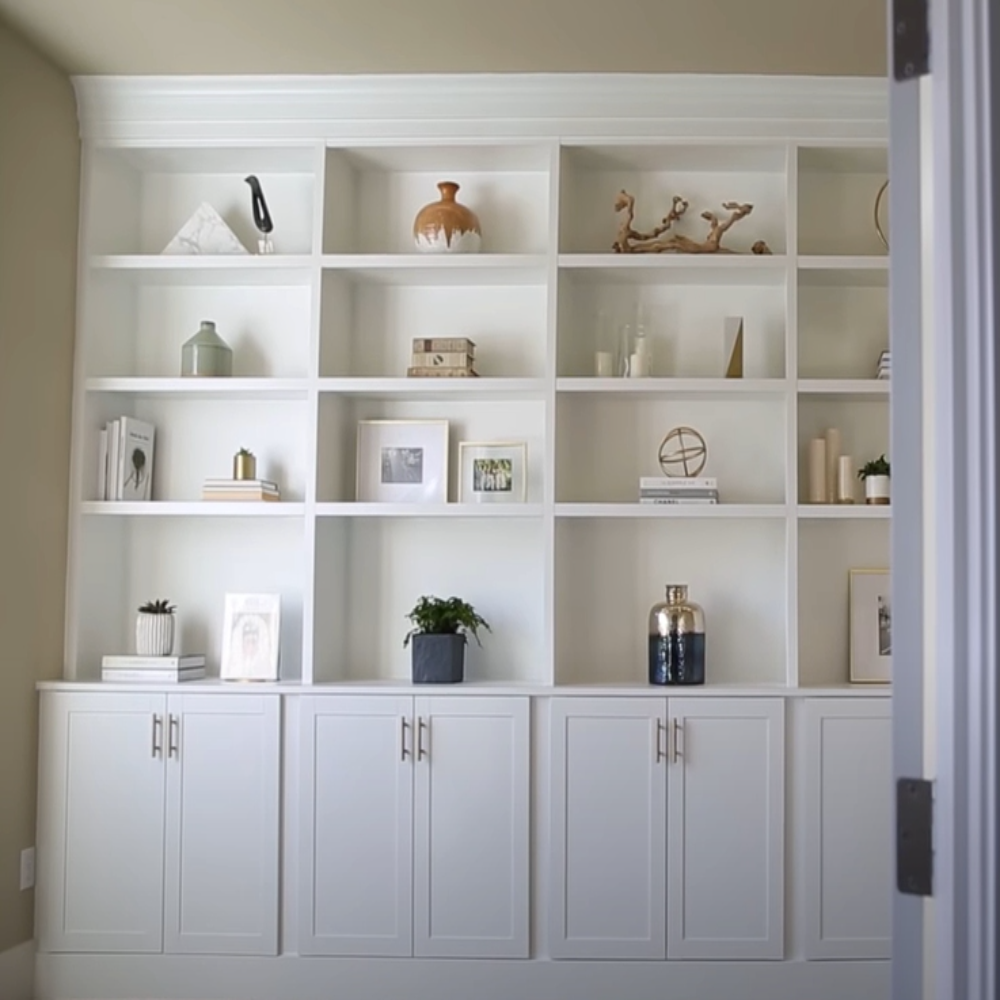
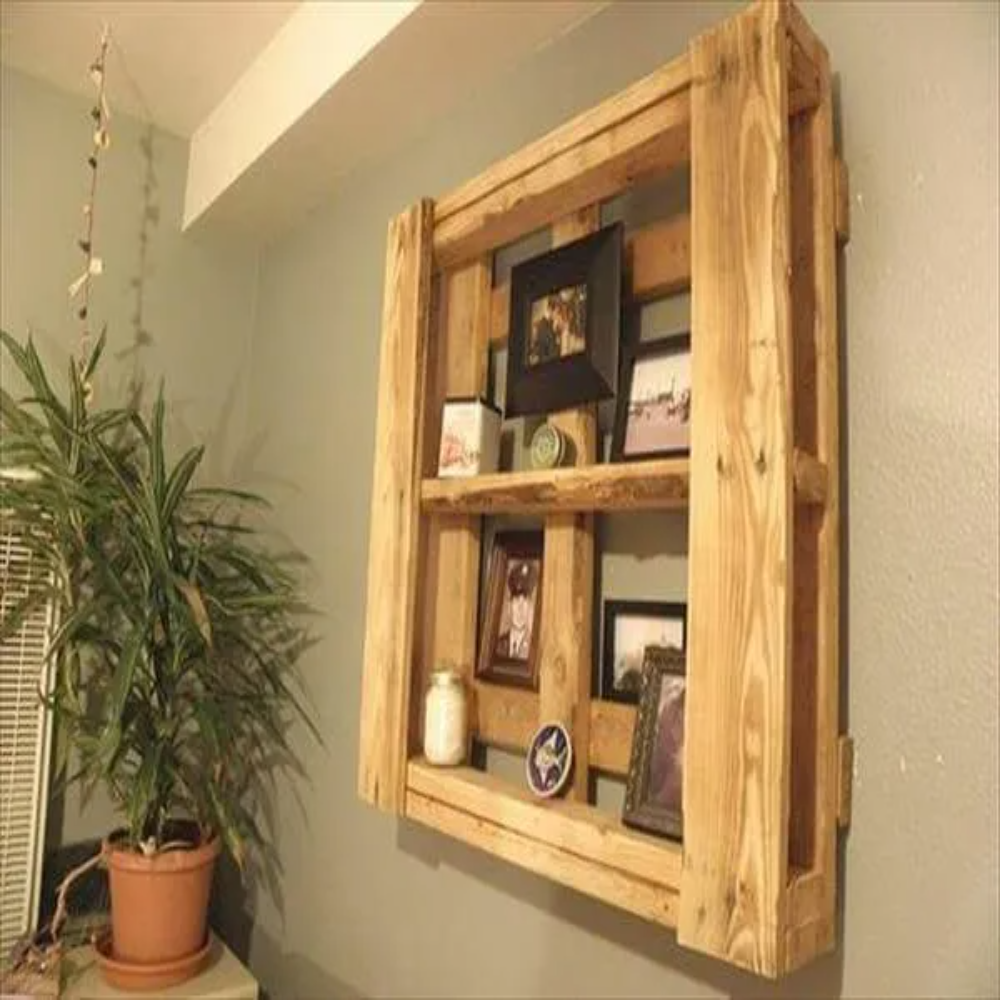
8. Utility Room Ideas Small Built-In Cubbies

Utility Room Ideas Small Built-In Cubbies

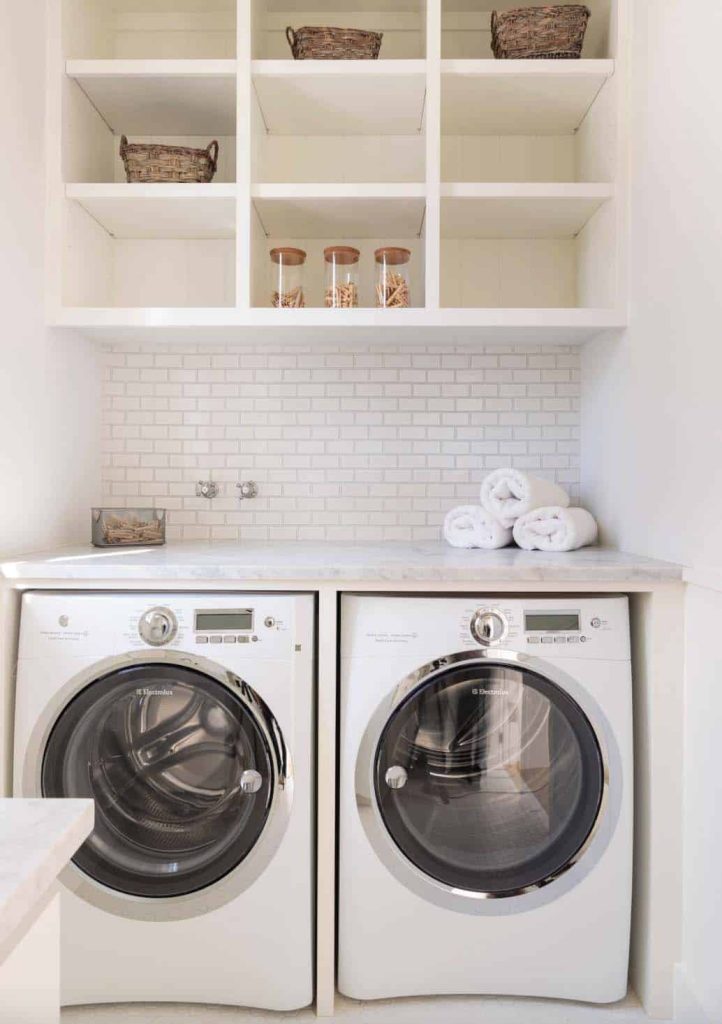
If you want to dedicate a smaller area for the laundry service or room, this Cubbies DIY idea is for you. Keep the washing machine in the lower part to make it easier for you to do cleaning and washing. For the upper leftover space, fix the built-in cubbies so you can utilize them for multiple purposes.

Installing smaller and multiple storage cubbies can increase the storage capacity and save ground-level space. Also, you can easily store laundry detergent or clothes before or after the laundry in the cubbies as per your comfort.

9. Utility Room Ideas Small DIY Partition with Curtains

Utility Room Ideas Small DIY Partition with Curtains

If you are looking for an affordable idea and where you need less effort in the DIY process, this curtain theme is worth trying. This will go well if you don’t want to create a separate laundry room or don’t want to invest in the door of the laundry room. You can easily convert an old closet into a laundry space. And use the curtains to create the separation in your room, instead of using a door or leaving it open.

Use the tension curtain rod to hand the curtains so that it will be easier to open and close them. It will save money as the curtains are much cheaper than wood planks or door installation. And it will also not affect the beauty of your roof, as the curtains will act like the aesthetic or creative soft wall.

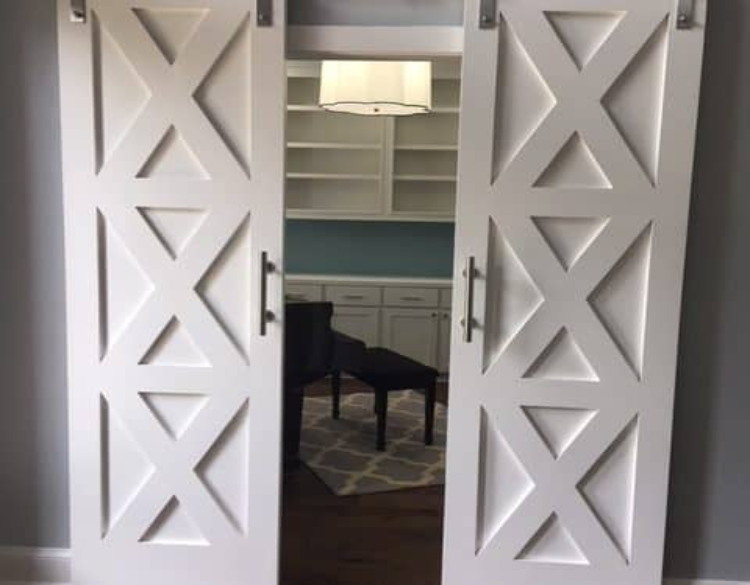
10. Utility Room Ideas Small Wall Closet

Utility Room Ideas Small Wall Closet

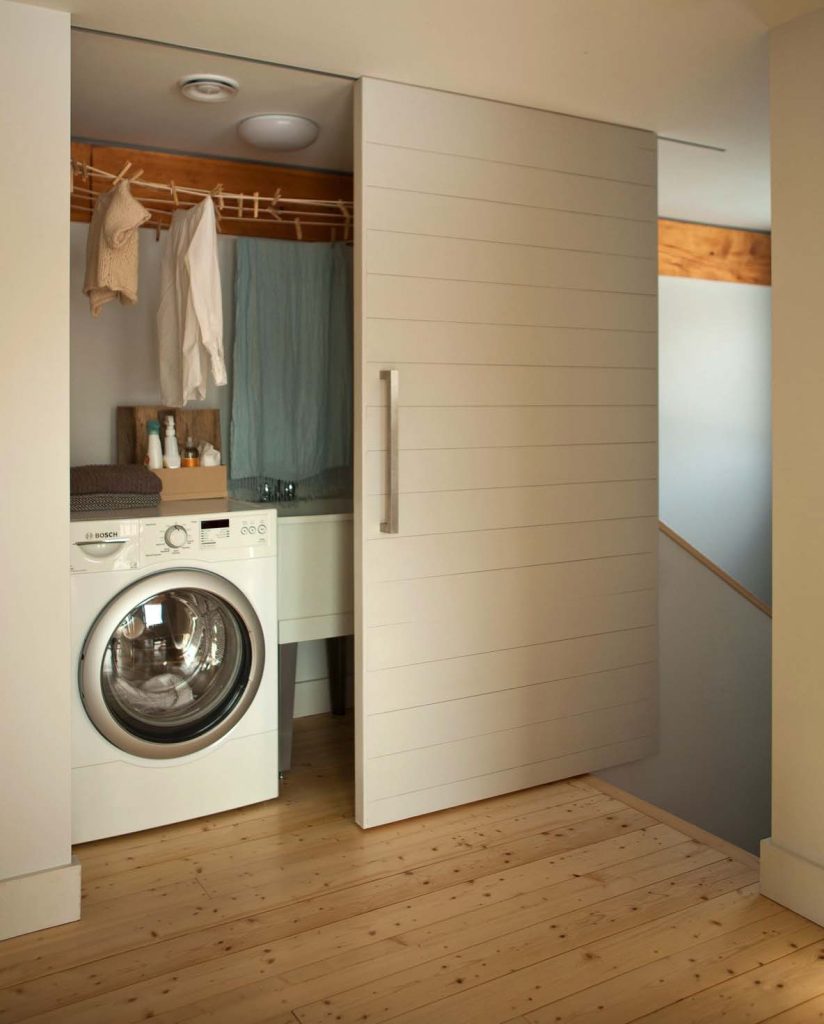
If you want a hide-and-seek laundry space theme, this wall closet idea is for you. You can easily store the washing machine or laundry loaders in them. The wall closet will work like a hidden secret space for your laundry room. Use the upper space to hang the clothes.

You can install the handles and rod in the wall closet to create more storage space. Like to store laundry detergent, fix a drawer in it. Use one more rod to hang the clothes. And the best thing about the wall closet laundry space is that it will not affect your home’s aesthetic.

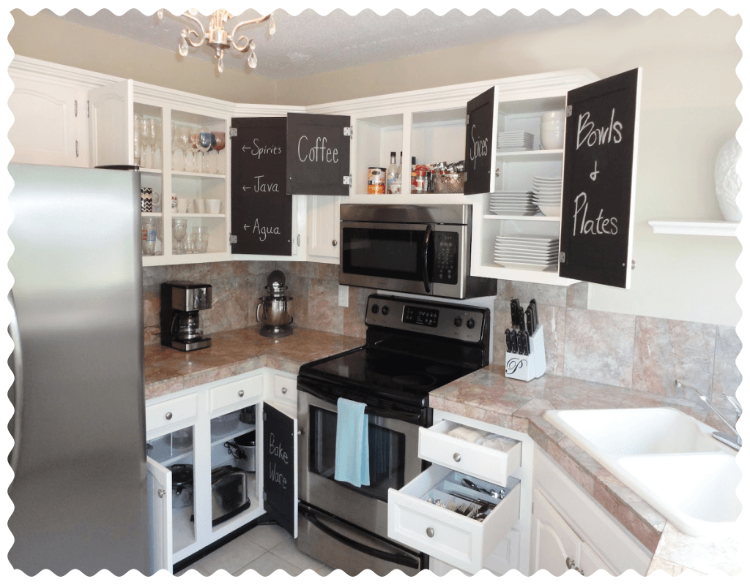
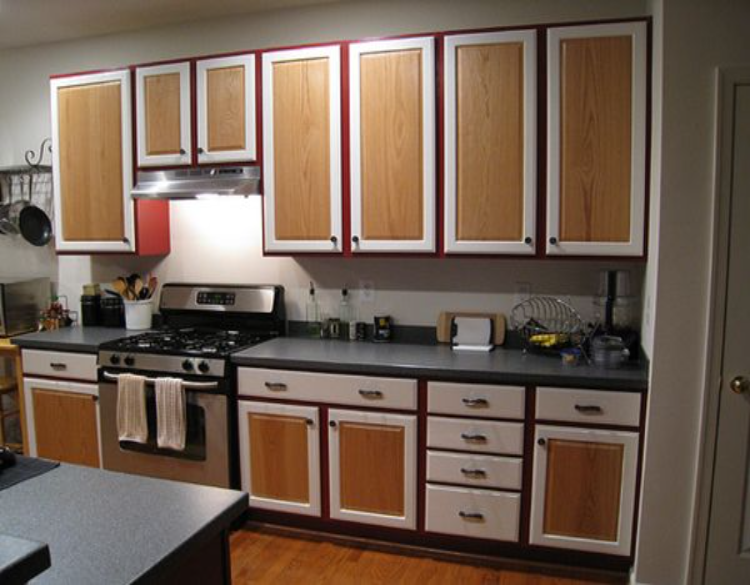
11. Black And White Laundry Room

Black And White Laundry Room

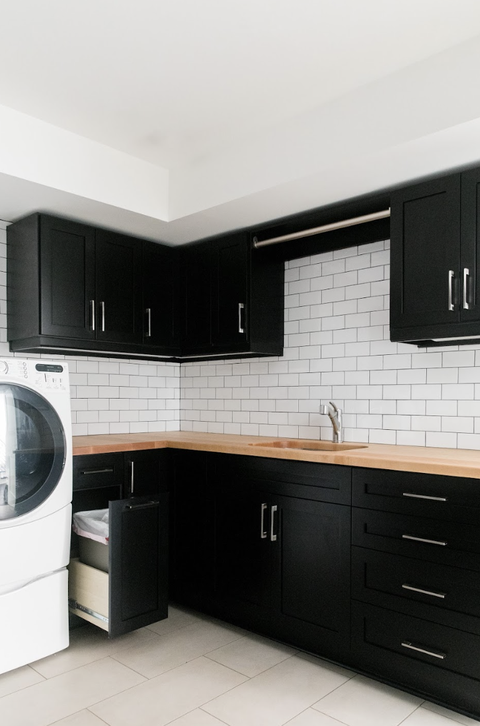
Adding a contrasting touch in a working space is the easiest way to start the work or DIY or design repurposing. The issue with the patterns and other designs is that you will need to use your brain so much about the color combination, what will look good, and so many other factors are there. Black and white laundry theme makes it easier for you, and your laundry room no longer looks like a laundry room.

Paint the cabinets in black, and keep the laundry room walls in white paint. If you will add tiles, keep them in solid white instead of patterns, as shown here in the image by Morse. Use the wooden accent or brown paint on the countertops of cabinets for a bold touch.

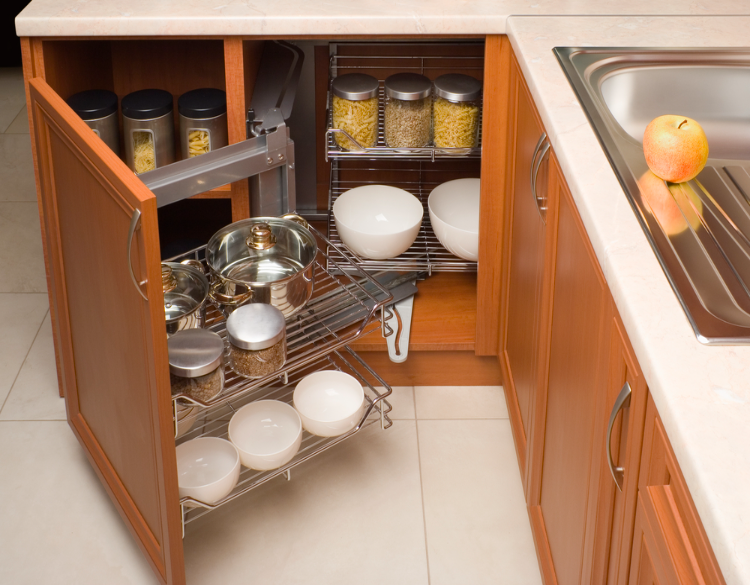
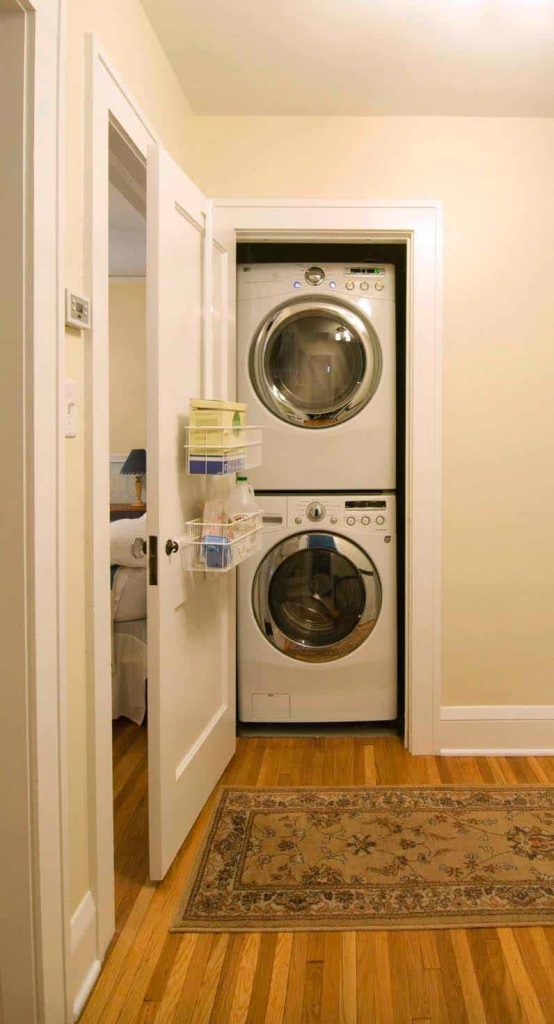
12. Utility Room Ideas Small Laundry Space

Utility Room Ideas Small Laundry Space

This idea is for you if you want to create unique utility room ideas for small storage laundry spaces. You can easily convert a small or narrow shelf into a laundry space. For this theme, your washing machine and dryer should be stackable and have a flat bottom area; otherwise, loader sitting might damage the laundry machine.

You can easily fit the washing machine loader and clothes dryers in two sections, one by one, where one is at the bottom and another on the top. It will help you to save enough ground space. And the flat bottom surface of the laundry machine will ensure safety and prevent slippage. Keep the water valves on the back side and create room for installation via the accessible panel and adjacent joint cabinet or closet.

13. Master Closet Laundry

Master Closet Laundry'

Repurposing the master closet with some easy DIY steps can help you create a brand-new laundry room for your laundry. As usual, keep the lower part for the laundry loader and dryer. Install a rod in the upper part for multiple purposes. Especially you can use this rod to hand the clothes before washing or to dry them.

The great advantage of converting a master closet into a laundry room is that you don’t need to hide it. It will give attractive vibes instead of creating a dirty or dull look. For a more aesthetic and eye-appealing touch, you can pair the floor rug or tiles with the aesthetic vibes and color tone of your master closet.

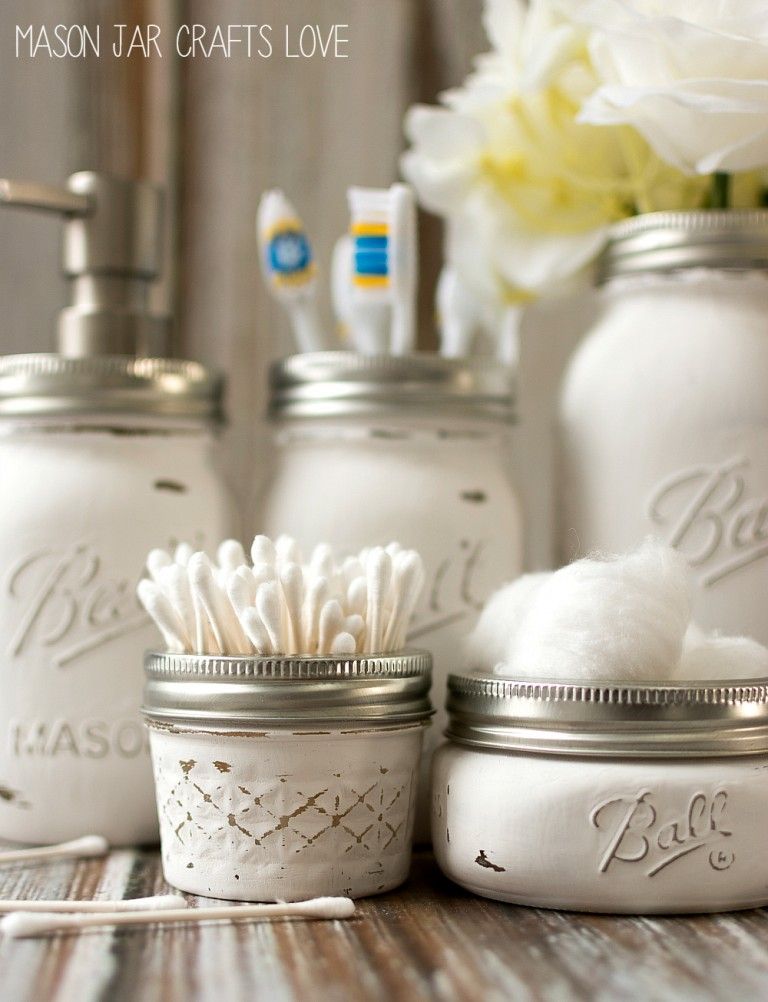
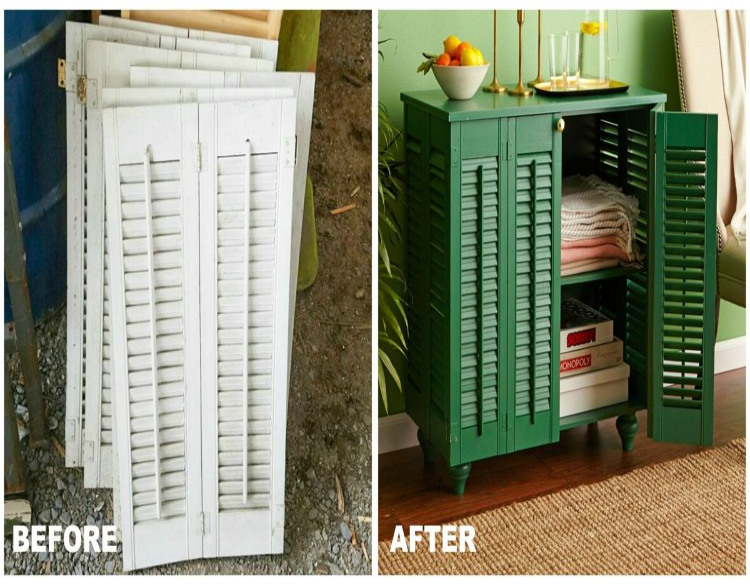
14. Special Laundry Storage

Special Laundry Storage

If you want to add a traditional or special touch to your laundry room and storage, this idea is for you. The fabric can cover or redecorate your laundry storage or space space. You can pick a calming tone while selecting laundry devices and storage cover material. Please don’t cover the whole area like people cover their cars after usage.

Cover the bottom parts of only outer boundaries so you can easily use the storage space area or laundry automatic commands while loading or picking up clothes from the washing machine or dryer. This attempt will help you create a mild vintage look in your laundry room and items.

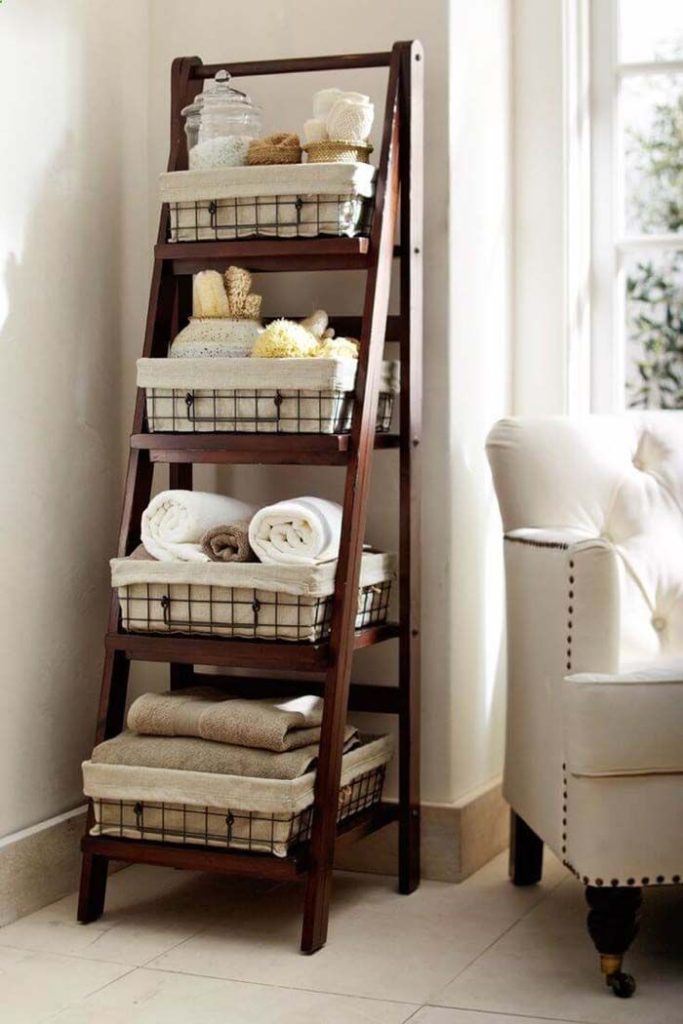
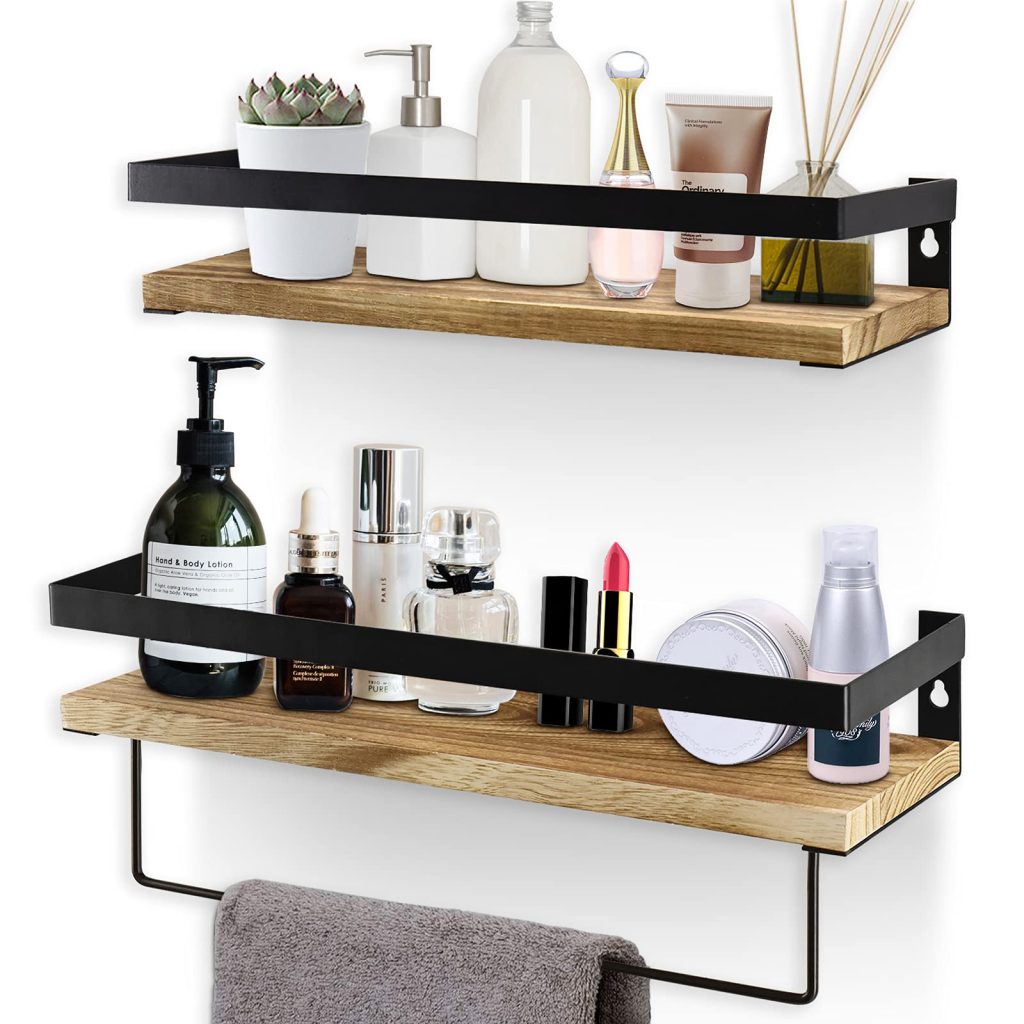
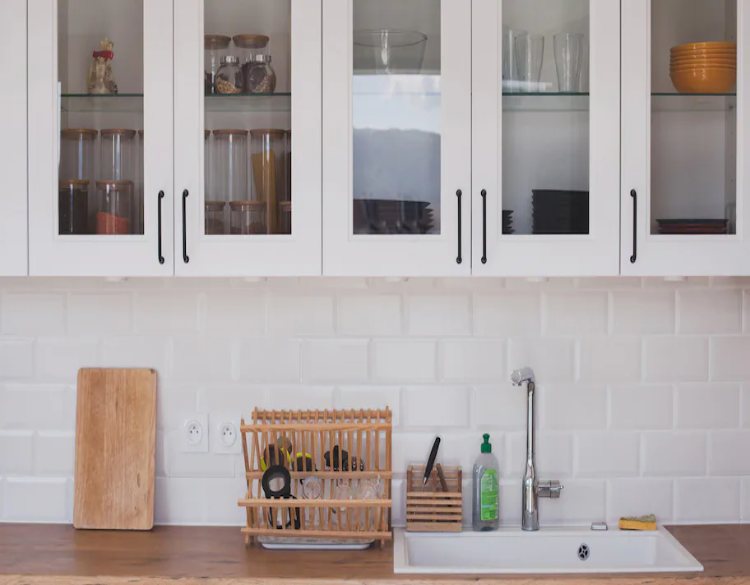
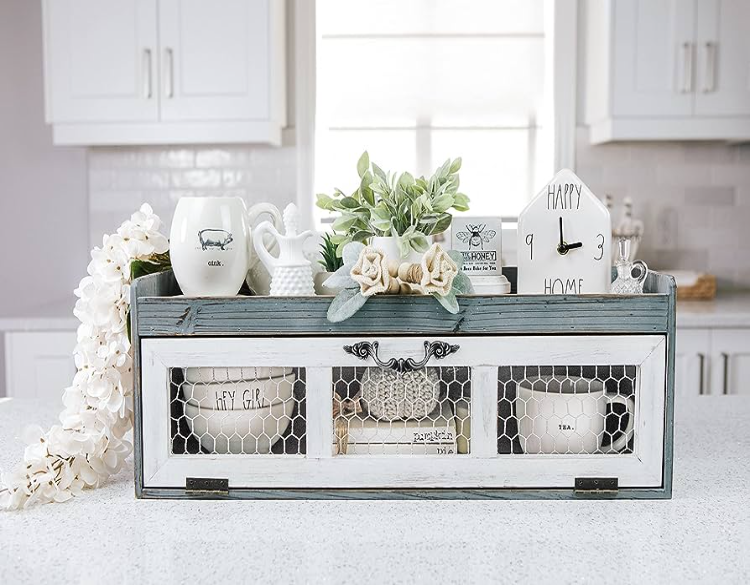
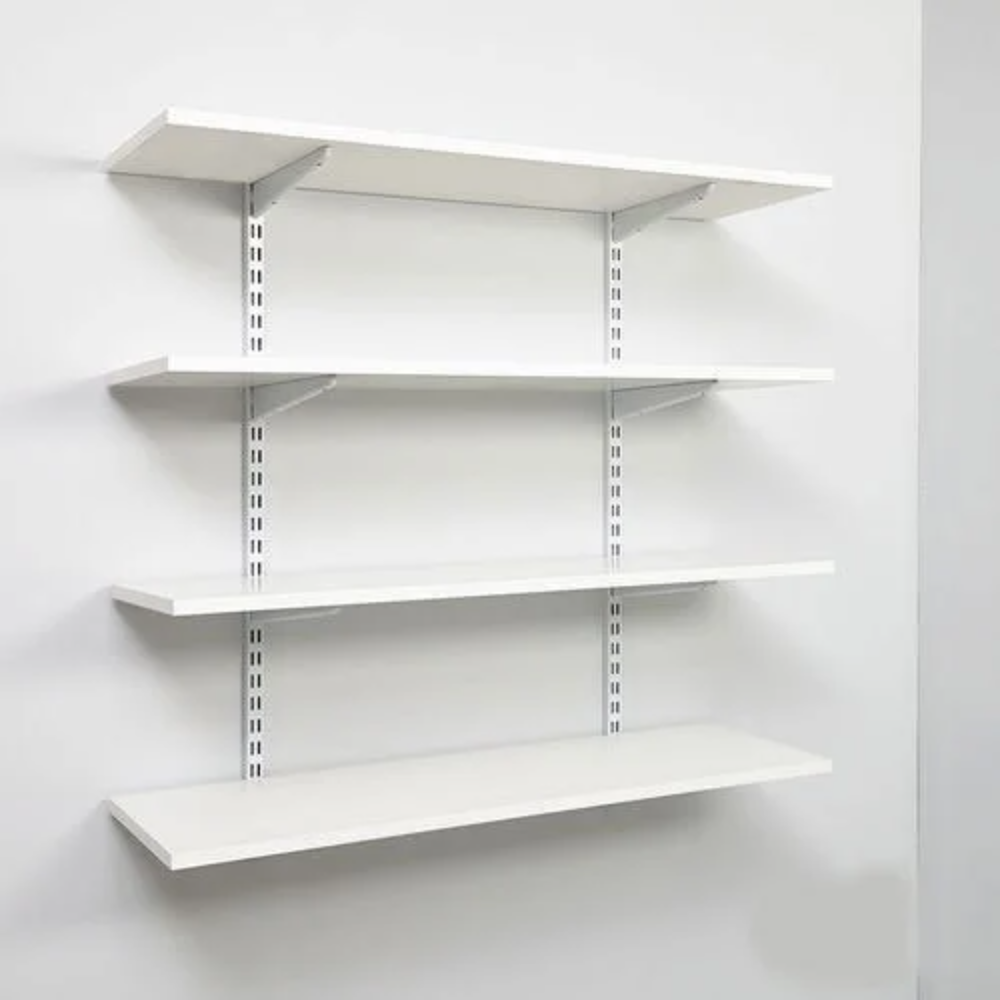
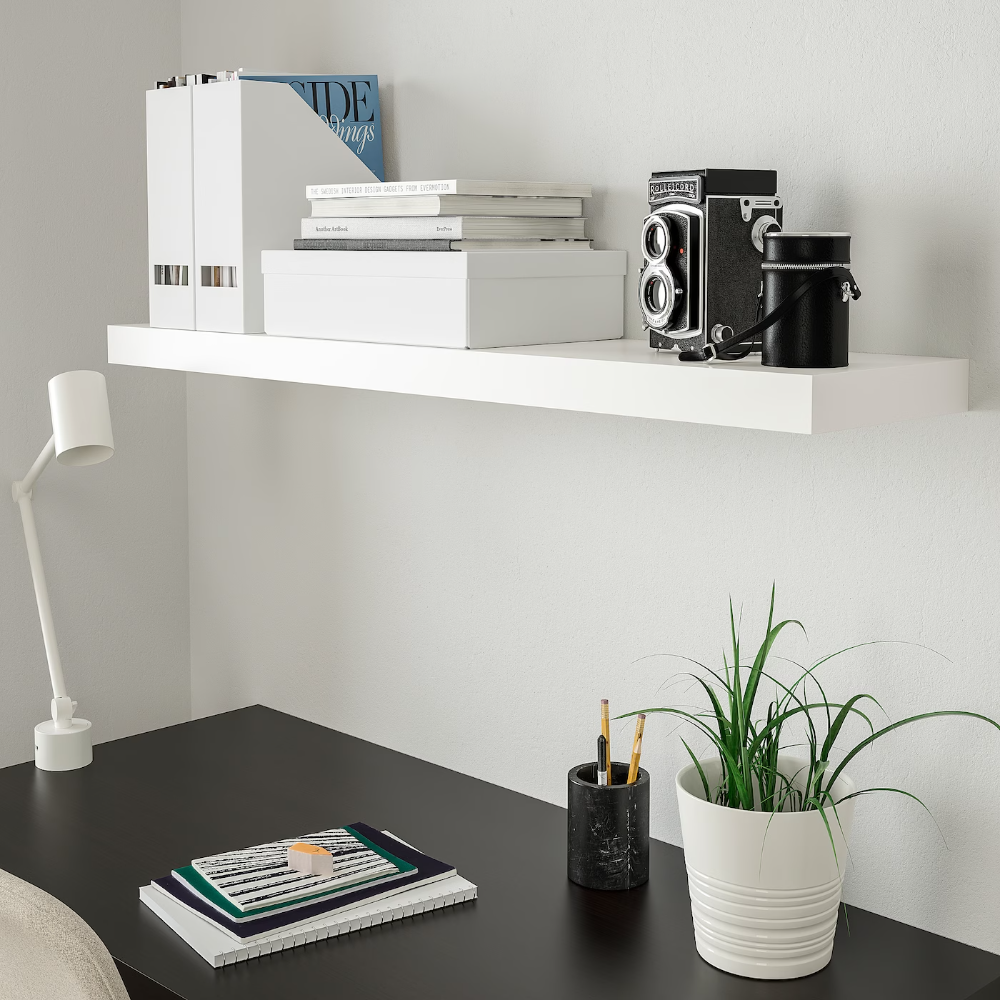
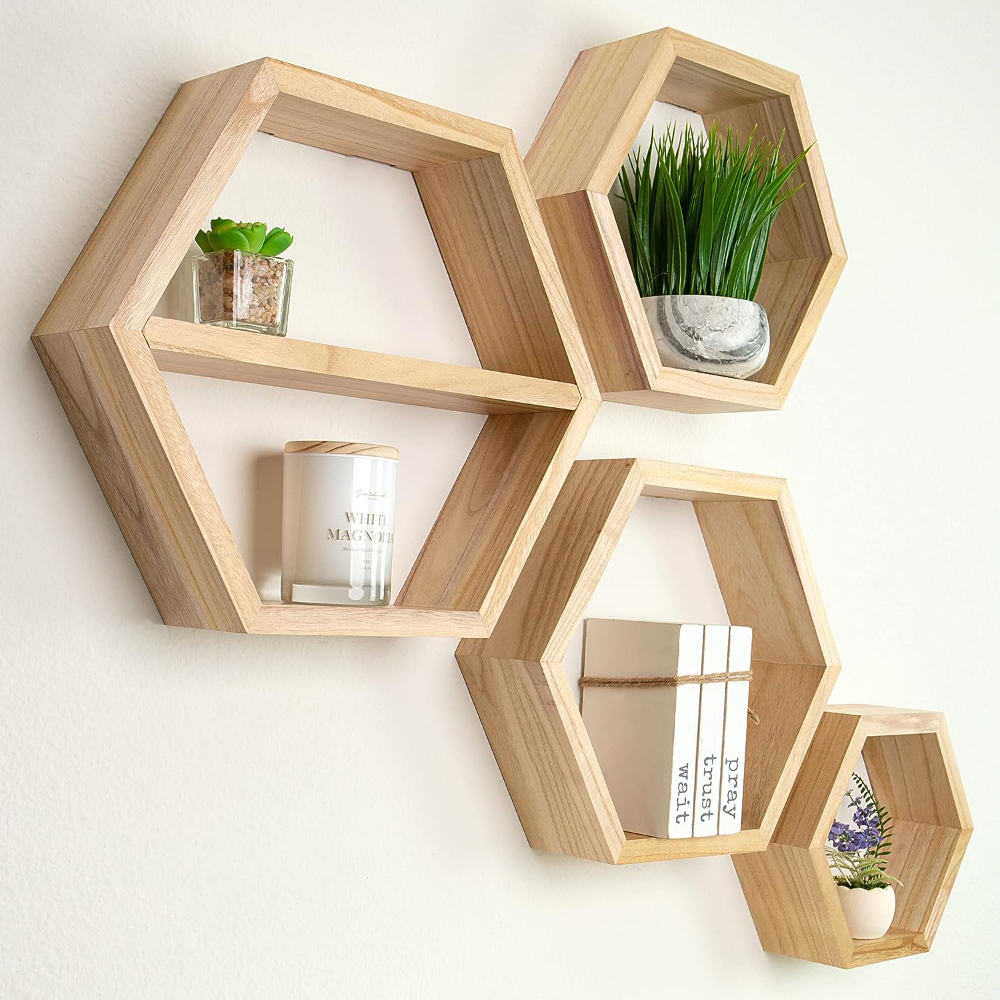
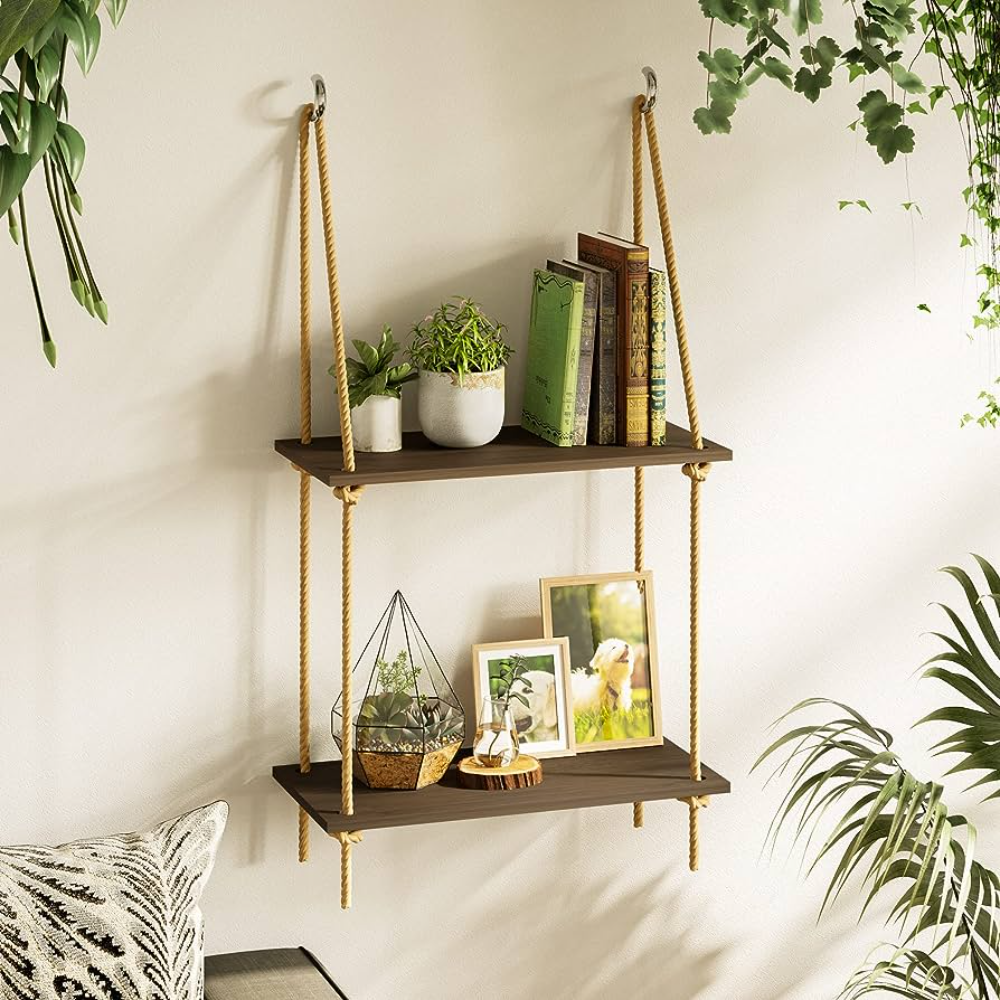
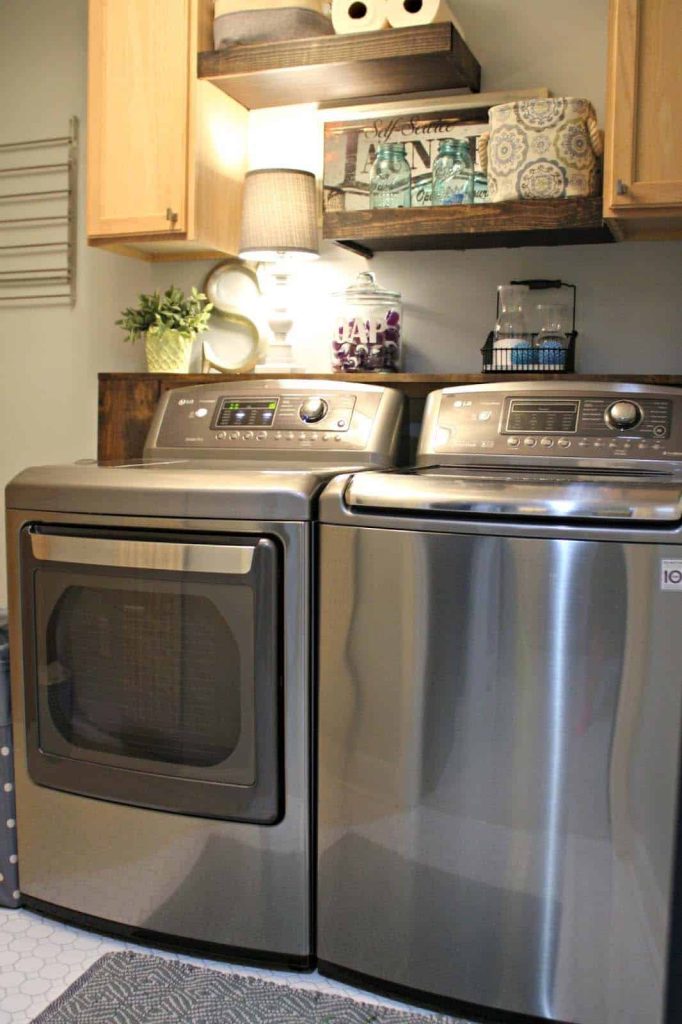
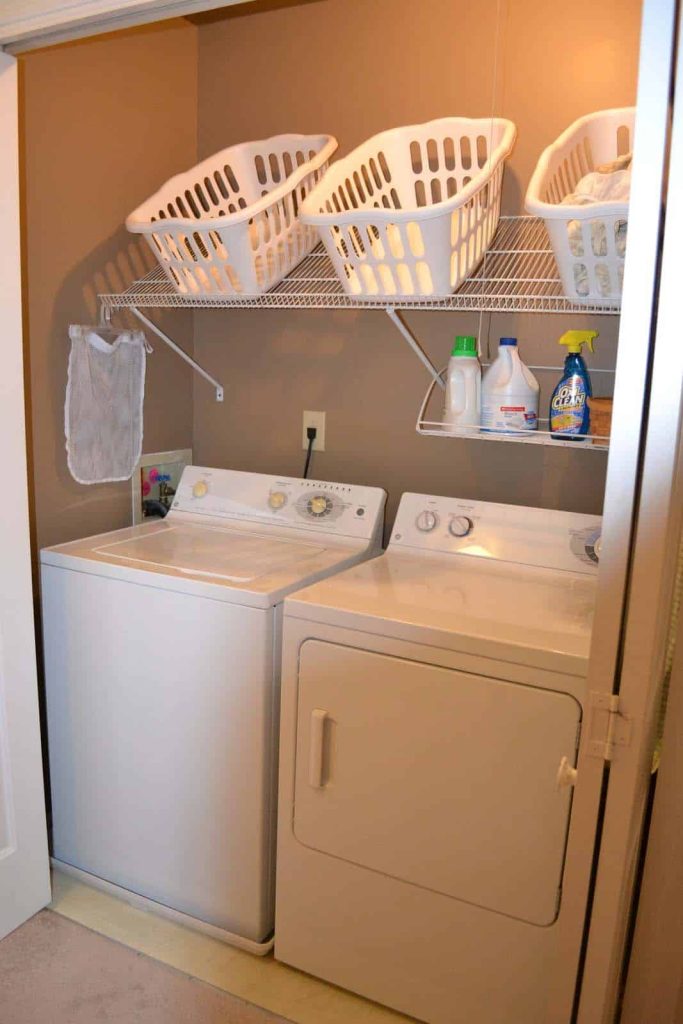
15. Utility Room Ideas Small Shelf Stack

Utility Room Ideas Small Shelf Stack

You can easily convert this theme into your laundry room if you have a top-loading washer. Add a small shelf above the washing loader machine. Use the shelf area to store soap, laundry detergent, and frequently needed accessories. To create this small storage shelf, you can easily DIY it with the help of wood planks. Pick up two wood planks that can be of the same size. If not, it is fine.

Use the larger plank among the two and install it above the washing machine by leaving some gaps. Install the other wood Planck above this plank to create one more storage shelf. You can fix the wood pillars or planks on both sides of these planks as the support system.

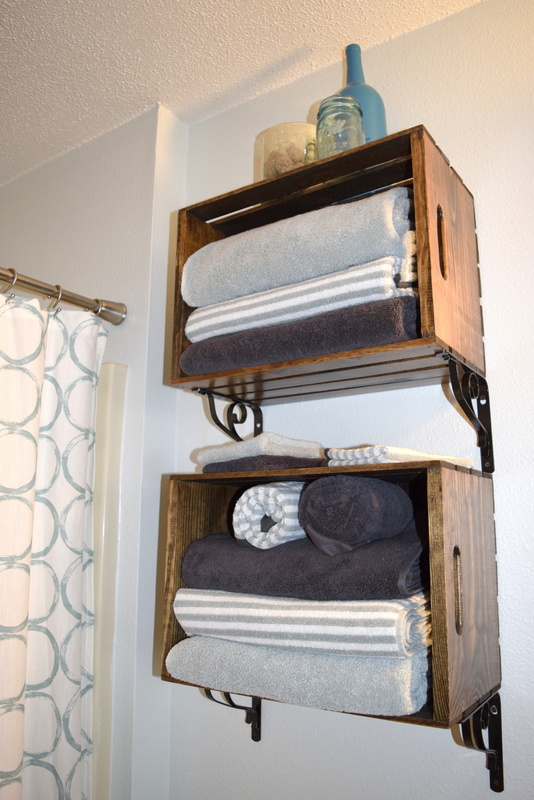
16. Laundry Room from Closet

Laundry Room from Closet

If you have an old closet you no longer want to store your precious and new clothes, you can easily convert it into a DIY laundry room. Keep the washing machine in the lower area and do some DIY tasks in the above area of the closet. Install the iron board on the shelf to hold the laundry supplies or baskets.

You can fix multiple iron boards or racks in the closet to create more storage space in less area. Store the laundry detergents in the smaller drawers or iron board cabinets. Use the baskets to store clothes and further organize them on the iron board installed in the closet.

You can also install the iron rod or hooks on the iron board to hang the clothes before or after the laundry.

17. Double Function Laundry Room

Double Function Laundry Room

If you want to create multiple rooms or a high-class custom cabinetry laundry room, this idea is for you. This double-function theme is the most costly one among all the ideas listed here, so go with it only when your budget allows you. Use the custom cabinets to store clothes, laundry items, and supplies.

Insert the washing machine and dryer in the biggest customized cabinet, and it will be easier to complete the laundry task hassle-free. Use the counterparts to keep the frequently used laundry supply like detergent, wiping cloth, soap, brushes, etc. Create a relaxing nook with lower cabinets to relax when the machine works or comfortably fold clothes.

Final Thoughts

Everybody wants to create an exuberant and interesting laundry Space or room that doesn’t seem like an additional workload or dirty area. Using the cozy and warm themes in your laundry area by not considering it just the cleaning or laundry space will help you try the exciting laundry room theme. And using suitable utility room ideas, small laundry storage themes, or DIY ideas according to your requirement and laundry space area will help you achieve the exuberant laundry space look.

This post showed you 17 small laundry room makeover ideas from professional interior setup to DIY and aesthetic to creativity to make things easier. This post has covered a wide variety of laundry space ideas from the pastel tone theme to add on fabric, closet DIY laundry space ideas to curtains, artistic touch, and more so that you can easily pick up at least one theme according to your requirements of a makeover and the laundry space or room type.

If you want more ways to add creativity to your home interior or rooms, sign up and get our best strategies in your inbox.

Every kitchen needs to be efficient to handle daily cooking adventures. In addition to this, we expect it to appear up to date. Hence to achieve our kitchen efficiency goal, we install various kitchen accessories or tools. A range hood or vent hood is one of them.

Earlier, people used to have primary exhaust fans for ventilation purposes. However, in recent decades many other improved ventilation accessories have been invented to match a particular style of kitchen’s necessity.

Nowadays, Kitchen Islands are gaining popularity all over. Meanwhile, it has some different structuring than usual kitchen counters. Hence, it demands a specific air venting system for its cooktops or ranges.

In this article, we are going to talk about Island kitchen ventilation alternatives, where you will find 15 coherent kitchen island ranges and vent hoods. But before getting any further with the topic, let’s first understand why the island range hood or vent hood is important for kitchen islands.

Why is Island Range Hood Important for Kitchen Islands?

Why is Island Range Hood Important for Kitchen Islands?

Basically, air venting is important for any type of kitchen. The most important role of the range hood or vent hood is to remove all the gas-released by-products from kitchen areas. For instance, this range hood collects all the harmful fumes as well as it collects grease, smoke, heat, and cooking aromas from the kitchen and releases them on the outside so that you can enjoy a clean and fresh kitchen every day.

Unlike usual kitchen counters, the island is different in structure. It is a stand-alone kitchen countertop that can be customized and let you offer overall usage of sides without any blockage. As long as kitchen islands’ ventilation is concerned, you will see some different island range hoods and vent hoods.

They are specifically designed for island kitchens that can be fixed to the ceiling. These range and vent hoods have bit different specifications than wall-mounted range and vent hoods, i.e., size, power, types, etc. To understand these aspects, you will need to know the trending and popular island range hood and vent hood and its overall specifications.

Core Components of Island Range Hood

  • Size – It is the width of the range hood. (24 inches/30 inches/36 inches) choose the size according to the size of your cooktop.
  • Operating – Push button and screen touch or soft touch are operating options you will see on the range hood..i.e., on/off/speed setting, etc.
  • Airflow Capacity – Cubic Feet Per Minute or CFM is the suction capacity of range hoods. You can choose CFM as per your daily cooking tasks, i.e., heavy cooking task needs high CFM, and low CFM can manage minimum cooking activities.
  • Noise Controle – It refers to the motor’s volume, which is included in the range hood or vent hood.
  • Filter Type – range hood basically has permanent filter and disposable filter options. Permanent filters are dishwasher friendly, so we can use them for a long. On the other hand, charcoal or carbon filters are disposable filters with approx 3 to 6 months’ life. It needs to change.
  • Vent Option – Ducted and ductless are both options in range hood installation. Where the ducted range hood vents out kitchen air outside, and the ductless range hood suctions kitchen air, and after filtration, it releases this air again in the kitchen area.

List of Best Kitchen Island Vent and Range Hoods

1. COSMO-668ICS900

COSMO-668ICS900

Cosmo Appliances’s COS-668ICS900 island range hood is a premium product. This Italian-style designed range hood has a classy appearance with its sleek stainless steel body and curved heat-resistant glass shield. Apart from its stylish aesthetical appearance, it is a trusted option in durability and competency.

  • Size – 36 inches
  • Operating – Soft Touch
  • Airflow Capacity – 380 CFM (Cubic Feet Per Minute)
  • Noise Control – 45 db
  • Filter Type – Baffle filter (Stainless steel)
  • Vent Option – Ducted or Ductless with carbon filter kit
  • Additional Features – Led Lights, touch screen, digital clock, dishwasher-friendly filtering panels, 3 fan speeds (high-medium-low)
  • Warranty – 3 years

2. Tieasy Island Range Hood

Tieasy Island Range Hood

Tieasy Island Range Hood is a perfect professional quality range hood for an island kitchen. It has high CFM, which means the heavy amount of suction of grease, smoke, smell, and heat from the kitchen. This island range hood offers a very subtle operating system with a push-button panel. Hence, it adds value to the product. Apart from great functional features, appearance-wise also, it has scored very well with brushed stainless steel and tempered glass hood.

  • Size – 36 inches
  • Operating – Push Button
  • Airflow Capacity – 700 CFM (Cubic Feet Per Minute)
  • Noise Control – 65 db
  • Filter Type Baffle filter (Stainless steel)
  • Vent Option – Ducted
  • Additional Features – Led Lights, touch screen dishwasher-friendly filtering panels, 3 fan speeds (high-medium-low)
  • Warranty – 24 months

3. FIREGAS Island Range Hood

FIREGAS Island Range Hood
Island Range Hood 450 CFM with Chimney, Ceiling Mount Kitchen Vent Hood with Tempered Glass,4 LED Lights, Permanent Filters,Premium Touch Control Panel,Includes Charcoal Filter : Everything Else” width=”997″ height=”617″>

FIREGAS island range hood provides convertible venting options, i.e., duct or ductless with charcoal filters. Its high-quality rust-proof stainless steel body and tempered glass shield offer durability as well as a sophisticated look to the kitchen. This contemporary island range hood can fit every sized kitchen.

  • Size – 30 inches
  • Operating – Soft touch
  • Airflow Capacity – 450 CFM (Cubic Feet Per Minute)
  • Noise Control – 58 db (minimum)
  • Filter Type – Permanent filter
  • Vent Option – Duct / Ductless with charcoal filter
  • Additional Features – LED Lights, strong exhaust, less noise producing, energy saver.
  • Warranty – 24 months

4. COSMO COS-63ISS75 Island Range Hood

COSMO COS-63ISS75 Island Range Hood

Eyoroyien Style COSMO COS-63ISS75 island range hood is one of the affordable island range hood products introduced by Cosmo Appliances. It provides high-power suction for island kitchen ranges with 380 CFM. Ultimately you can experience odor-free, grease-free, and heat-free cooking activities in your kitchen.

  • Size – 30 inches
  • Operating – Touch
  • Airflow Capacity – 380 CFM (Cubic Feet Per Minute)
  • Noise Control – 45 db
  • Filter Type – Permanent filter
  • Vent Option – Duct / Ductless with carbon filter kit
  • Additional Features – Led Lights, touch screen dishwasher-friendly filtering panels, 3 fan speeds (high-medium-low), flexible ducting.
  • Warranty – 3 years

5. JOEAONZ Isaland Range Hood

JOEAONZ Isaland Range Hood

This JOEAONZ island range hood is an amazing vent option for an island kitchen environment. It deploys less noise and provides extra powerful suction capability. Moreover, this simple touch-operated product even offers convertibility, i.e., duct to ductless, with a charcoal filter kit which you can buy individually.

  • Size – 30 inches
  • Operating – Soft Touch
  • Airflow Capacity – 700 CFM (Cubic Feet Per Minute)
  • Noise Control – 65 db
  • Filter Type – Permanent filter (Stainless steel)
  • Vent Option – Duct / ductless with charcoal filters
  • Additional Features – Led Lights, touch screen dishwasher-friendly filtering panels, 3 fan speeds (high-medium-low)
  • Warranty – 24 months

6. Empava Island Range Hood

Empava Island Range Hood

ETL (Electrical Testing Laboratories) certified Empava island range hood is a USA-manufactured product. It comes in a stainless steel body with a heat-resistant glass hood that beautifies the kitchen area. Apart from the aesthetic appeal, it delivers high safety in the kitchen with a completely sealed aluminum motor. Moreover, this product has a convertibility feature that can allow you to opt for a ducted to ductless island range hood.

  • Size – 36 inches
  • Operating – Soft Touch
  • Airflow Capacity – 400 CFM (Cubic Feet Per Minute)
  • Noise Control – 50 db
  • Filter Type – Baffle filter (Stainless steel)
  • Vent Option – Ducted/ Ductless with carbon filter kit
  • Additional Features – Led Lights, touch screen dishwasher-friendly filtering panels, 3 fan speeds (high-medium-low), convertible
  • Warranty – 3 years

7. ZLINE Convertible Vent Island Mount Range Hood

ZLINE Convertible Vent Island Mount Range Hood

Z Line Kitchen and Baths ZLINE convertible vent hood product has great flexibility in terms of its ducting facility. It offers convertibility from ducted to ductless by adding a carbon filter to the vent hood. In addition, it features a 4-speed control (120/240/320/400 CFM) which lets you choose your ideal speed for your specific cooking task.

  • Size – 36 inches
  • Operating – Push button
  • Airflow Capacity – 400 CFM Maximum (Cubic Feet Per Minute)
  • Noise Control – 41 db
  • Filter Type – Baffle filter (Stainless steel)
  • Vent Option – Duct / Ductless with carbon filter kit
  • Additional Features4-speed motor, convertible
  • Warranty – 3 years

8. Thermomate Island Range Hood IRATS90

Thermomate Island Range Hood IRATS90

Themomate’s IRATS90 island range hood can be the best choice for island kitchens. This range hood’s beautiful stainless steel and tempered glass structuring can create a spark in any kitchen. However, many range hood or vent hood has convertibility feature, but they don’t offer filter kits to convert to ductless. Moreover, we have to buy them separately, but the Thermometer island range hood provides a pack of 2 carbon filters with 2 permanent aluminum filters.

  • Size – 36 inches
  • Operating – Soft Touch
  • Airflow Capacity – 350 CFM (Cubic Feet Per Minute)
  • Noise Control – 60 db
  • Filter Type – Permanent filter (Aluminium)
  • Vent Option – Duct / Ductless with carbon filter kit
  • Additional Features – Led Lights, touch screen dishwasher-friendly filtering panels, 3 fan speeds (high-medium-low), convertible
  • Warranty – 12 months

9. IKTCH Upgrated Island Mount Range Hood

IKTCH Upgrated Island Mount Range Hood

IKTCH’s island range hood is a premium quality product with high efficiency. It allows you to enjoy your cooking task’s mire peacefully with 900 CFM suction capacity and the least noise production, even at the highest speed used. Apart from soft touch operating, it also provides remote-controlled operating options.

  • Size – 30 inches
  • Operating – Soft Touch
  • Airflow Capacity – 900 CFM (Cubic Feet Per Minute)
  • Noise Controle – 65 db
  • Filter Type – Permanent Filter (Stainless steel)
  • Vent Option – Duct / ductless with charcoal filter kit
  • Additional Features – Led Lights, touch screen dishwasher-friendly filtering panels, 4 fan speeds, convertible
  • Warranty – 12 months

10. COSMO 668ICS750 Island Mount Range Hood

COSMO 668ICS750 Island Mount Range Hood

COSMO 668ICS750 island range hood is another popular range hood choice by Cosmo Appliances. This product adds value to the kitchen with its sophisticated appearance as well as smooth functionalities. The convertibility feature of this product provides huge flexibility in the installation process, i.e., duct or ductless range hood operations.

  • Size – 30 inches
  • Operating – Soft Touch
  • Airflow Capacity – 380 CFM (Cubic Feet Per Minute)
  • Noise Control – 45 db (minimum)
  • Filter Type – Permanent filter (Stainless steel)
  • Vent Option – Duct / ductless with charcoal filter kit
  • Additional Features – Led Lights, touch screen, digital clock, dishwasher-friendly filtering panels, 3 fan speeds (high-medium-low), convertible
  • Warranty – 3 years

11. PROLINE PLFI 520.36 Island Range Hood

PROLINE PLFI 520.36 Island Range Hood

Proline’s PLFI 520.36 island range hood model is best suited for daily cooking tasks. Its rust-proof stainless steel body provides durability as well as a cleaner look to the product. The convertibility feature of this range hood gives freedom to choose ducting type, i.e., ducted or ductless venting option. For ductless installation, you need to buy its charcoal filter kit individually.

  • Size – 36 inches
  • Operating – Soft Touch
  • Airflow Capacity – 600 CFM (Cubic Feet Per Minute)
  • Noise Control – 53 db
  • Filter Type – Permanent filter
  • Vent Option – Duct / ductless with charcoal filter kit
  • Additional Features – Led Lights, touch screen, digital clock, dishwasher-friendly filtering panels, 6 fan speeds, convertible

12. Winflo Convertible Island Range Hood

Winflo Convertible Island Range Hood

Winflo island range is ETL certified model with convertible ducting features. It provides very calm vibes to the kitchen with minimum motor noise production. In addition, the sleek and strong stainless steel finish accommodates with toughened curve-shaped glass shield, enhances its beauty, and deploys a stylish look to the kitchen.

  • Size – 30 inches
  • Operating – Soft Touch
  • Airflow Capacity – 475 CFM (Cubic Feet Per Minute)
  • Noise Control – 65 db (minimum)
  • Filter Type Permanent filter (Aluminium)
  • Vent Option – Duct / ductless
  • Additional Features – Led Lights, touch screen, digital clock, dishwasher-friendly filtering panels, 3 fan speeds (high-medium-low), convertible
  • Warranty – 3 years

13. KitchenAid Island Canopy Convertible Range Hood

KitchenAid Island Canopy Convertible Range Hood

KitchenAid island canopy convertible range hood is a bit high on the price scale, but it provides a good cooking experience with its ultra-efficient features. For instance, its auto speed adjustment feature works according to the particular cooking task. Its four LED task lights give a brighter space for cooking.

  • Size – 36 inches
  • Operating – Soft Touch
  • Airflow Capacity – 585 CFM (Cubic Feet Per Minute)
  • Noise Control – 65 db (minimum)
  • Filter Type – Permanent filter
  • Vent Option – Duct / ductless
  • Additional Features – Led Lights, touch screen, digital clock, dishwasher-friendly filtering panels, 3 fan speeds (high-medium-low), convertible

14. Akdy Convertible Island Mount in Embossed Copper Vine Design

_Akdy Convertible Island Mount in Embossed Copper Vine Design

Akdy’s convertible island mount range is a designer peace from their vintage series. Hence, if you are an art lover, you can add this island range hood to your kitchen for venting purposes. It delivers great performance in the kitchen, along with an elegant visual appearance.

  • Size – 30 inches
  • Operating – Soft Touch
  • Airflow Capacity – 350 CFM (Cubic Feet Per Minute)
  • Noise Control – 60 db (minimum)
  • Filter Type – Permanent filter (Stainless steel)
  • Vent Option – Duct / ductless
  • Additional Features – Led Lights, touch screen, digital clock, dishwasher-friendly filtering panels,4 fan speeds, convertible
  • Warranty – Not Mentioned

15. GE Profile Island Chimney Hood

GE Profile Island Chimney Hood

GE Appliances GE Profile island chimney hood is the best designer island range hood option you can choose. It’s made of stainless steel body, providing this product classy look and sturdy nature.

  • Size – 36 inches
  • Operating – Push button
  • Airflow Capacity – 450 CFM (Cubic Feet Per Minute)
  • Noise Control – Not Mentioned
  • Filter Type – Permanent filter
  • Vent Option – Duct
  • Additional Features – Led Lights, push button, dishwasher-friendly filtering panels, 4 fan speeds.
  • Warranty – Not Mentioned

Conclusion

Maintaining a kitchen is a little tricky job for all of us. Somehow, it can be subtle with the usage of some efficient accessories. Especially kitchen countertops or islands can be managed by installing appropriate range hoods or vent hoods to have a non-greasy, odor-free, smokeless, and stemless kitchen.

In this article, we have discussed the importance of island range hoods and vent hoods in kitchens where an island exists. To give you choices to pick the right island range hood for your kitchen island, we have shared the list of the 15 best island vent and range hood products. Apart from the names of the products, we have elaborated their specifications and prices to compare and decide the best suitable option from this.

So overall information provided in this piece of article will really be useful to you in getting the right island range hood for your kitchen island.

As Alexander Smith said, “A man doesn’t plant trees for himself. He plants them for prosperity.” We are here to bring lush greenery into your life with 17 brilliant DIY plant stand ideas. These plants stand ideas will bring you peaceful vibes. At the same time, they are one fun and frolic activity to indulge in with your family.

We have chosen the best ones with the least effort and easily available materials. So, get into your carpenter pants and grab some stuff from the basement. We have to do some chopping and cropping together.

If you don’t have enough time t do these DIYs, then no worries, we are attaching here links to find the exact same products from the big giants and online sellers.

1. Ladder: Not for Standing But for Planting

Not for Standing But for Planting

Transform your old and broken ladder into a shelf showcasing plants and refill your energy every time you see them.

Materials

  • Wooden Ladder (4-5 feet)
  • Wood Cutting Machine
  • Wooden Planks (equal to the number of tiers of the ladder)

Instructions

  • Remove all the uneven surfaces by sanding the ladder and the planks with sandpaper.
  • Mark on each tier where the planks are to be fitted.
  • Remove the steps of the ladder by cutting them with a wood-cutting machine.
  • Attach the planks you measured before on the marked areas using screws and nails.
  • Apply the paint and make it decorative
  • Let it dry, and it’s ready.
  • Place your plants in small pots on each shelf, and there you have a beautiful little ladder going with your green aesthetics.

2. Hanging Trees

Hanging Trees

Create your own Amazon rainforest inside your home by using these pretty plant stand ideas and vibe along the swaying hanging plants.

Materials

  • 3-4 metal rings (more than 3 inches in diameter)
  • Macrame threads
  • 3-4 Hanging hooks
  • Ropes (1.5 meters each)

Instructions

  • Weave the macrame threads around the metal rings.
  • Tie the corner of three ropes to the ring and tie the other ends of the ropes altogether.
  • Repeat STEP 2 in both other rings.
  • Attach the hanging hooks to the ends of the ropes
  • Place the plant pots in between the rings and hang them on the ceiling.
  • There you have beautiful plants hanging from your ceiling, giving you a whole paradise feel.

Lucky for you, these berry beauties are now available online. Buy them and adorn your interiors now.

3. Marbellous Plant Stand Ideas

Marbellous Plant Stand Ideas

Get a bit creative with your home decor and bring some colorful tint to your living room to make it more lively.

Materials

  • Wooden stool
  • Acrylic Paint
  • Resing Gloss
  • Mixing Cups
  • Stirring Sticks
  • Cardboard box
  • Gloves

Instructions

  • Cover the legs of the stool with plastic wraps.
  • Prepare the resin solution. NOTE: Mix the Hardener and the Resin equally.
  • Stir the mixture for about 2 minutes evenly.
  • Transfer the mixture to another cup and again mix it for 1 minute.
  • Put an equal amount of mixture in different cups according to the color you have chosen.
  • Add acrylic colors to the cup and mix them.
  • Again pour all the colors into a big cup, and DO NOT MIX THEM.
  • Pour the solution over the stool slowly and tilt slightly to give it even coverage.
  • Once done, leave the resin to dry for 20 minutes.
  • Wipe out the excess raisin and wait for 24 hours to use the stand.

Put your plant pots on and get amazed with colorful blended stands with plants shining over them.

Got no time to tempt up with your own efforts? Try spending a few bucks and getting these plush pots right in your home online to your rescue!

4. Wooden Legs: Plant Stand

Plant Stand

Get a standing plant look with these easy plant stand ideas. These are trendy, aesthetic, and modern, just like the way you want them to be.

Materials

  • Legs – ¾ inches x ¾ inches dowel square, 36 inches length
  • “x” brace- 1×4 inches common board
  • Pocket Hole Jig
  • Wood Stain
  • For Dip-Dye Effect- Any color Spray Paint and Painter’s Tape

Instructions

  • Cut the common board into two pieces. (Dimensions should be equal to the size of the pot)
  • Form an X either by using a dowel or by ½ Lap Joint method.
  • Determine the height of the stand and cut the legs according to it.
  • Attach the legs to the X structure using a pocket hole jig.
  • You can also pour the bottle of wine over the stand for a stained look.
  • Mark where you want to have a dip dye effect and cover the area with painter’s tape.
  • Use spray paint on the uncovered area and let it sit for a few hours.

And DONE, you have a beautiful yet unique plant stand. You can also make some smaller-sized ones and attach them to give a tiered effect. They have these beauties lined up on their virtual shopping shelves. Buy now and witness these greens doing marvels all by themselves.

5. Hang-on Stands

Hang-on Stands

These plant stand ideas are our personal favorites because they are easily made and very classy. It will surely give your balcony an extraordinary look.

Materials

  • Wooden Planks 2
  • Strong rope (white)
  • Glass jars
  • Hole saws or Drilling Machine
  • Hook

Instructions

  • Mark 3 circles at equal distances on each plank.
  • The circles marked should have a larger circumference than the lower part of the jars but smaller than the upper part of the jars.
  • Drill out to form the hollow circles in the planks.
  • Drill out two holes in both corners of each plank.
  • Tie the rope first to the bottom plank and then to the upper plank. Do the same on the other side.
  • Tie the upper part of the ropes to each other and attach the hook.
  • Hang it on the wall and arrange the jars.
  • Fill the jars with water or soil and sow small plants in them.

Voila! Your beautiful and classy wall hanging is ready. The real plant freaks will find it most attractive as the showcasing of plants is very eye-catching.

6. Rolling Serene

Rolling Serene

Fancy is the new classy, and so is this idea. It is very challenging to arrange the heavy pots or to make them move, but not now. This one will help you in moving as well as removing waste from them.

Materials

  • Wooden log in a thick slice
  • 4 detachable wheels
  • Screws
  • Drilling machine

Instructions

  • Take a clean wooden log slice and make four holes in the corners.
  • Attach the wheels through screws.
  • Put the pot with the plant over it, and done.

And the moving stand is ready. Drag it anywhere without the risk of breaking it.

7. Tomato-Cage Plant Stand

Tomato-Cage Plant Stand

There isn’t anything JUST LIKE THAT! Its time to get into your creative suit and build these cute plant stands with your old, rusted, and dusted Tomato carriers. Yes, you heard it just right, so let’s GO!

Materials

  • wire tomato cage
  • pot for plant
  • Spray paint
  • cutting tool
  • sisal or jute twine
  • Scissors
  • Hot glue gun

Instructions

  • Paint the pot with spray paint.
  • Cover the tomato cage rings by rolling twine around them.
  • Put the pot on the upper ring. Fill it with soil and plants.

That’s how you get super easy and affordable plant stands without much effort.

8. Crate to Embrace

Crate to Embrace

Recycling is the key to a better future. It’s important to reuse waste materials for new things as it encourages creative skills as well as nourishes the environment. So let’s make a beautiful plant stand with a crate box and see how good it turns.

Materials

  • Crate box
  • Iron rod stands
  • Screws
  • Drilling machine

Instructions

  • Create holes in the corners of the crate box
  • Attach the iron stand through screws to the crate.
  • Fill in soils and plant small plants.

You can sow veggies and tomatoes. It is best for planting as it provides ventilation space to the soil.

9. Lush with The Lampshade

Lush with The Lampshade

These beautiful berry stands are just what you need to get an entirely new aura to your abode.

Material

  • Lampshade
  • Pot
  • Strong glue
  • Wooden log

Instructions

  • Turn upside down the lamp shade
  • Put a wooden log over the shade and fix it with strong glue.
  • Affix the pot over it and plant it with beautiful flowers.

A beautiful plant stand for your room decor is ready.

10. Glass Bottle Plant Stands

Glass Bottle Plant Stands

We can reuse our leftover wine and milk glass bottles as plant stands. Let’s see how!

Materials

  • 4 Glass bottles
  • Acrylic paints
  • Ropes
  • Pebbles

Instructions

  • Color the bottles with acrylic paints
  • Fill it with pebbles for an aesthetic finish
  • Then fill out the soil and plant smaller herbs
  • Tie the neck of the bottles with one end of the rope.
  • repeat the same with all other bottles.( take different lengths of the ropes)
  • Tie the other end of the ropes together and attach with a hook.

Hang it to the roof, and you have a tiered plant stand. Watch your head while walking. Don’t let them bang you.

11. Concrete Plant Stand Ideas

Concrete Plant Stand Ideas

Materials

  • Concrete bricks -2
  • Super Glue
  • Wooden plank

Instructions

  • Arrange the bricks at some distance.
  • Put the plank over the bricks like a shelf
  • Glue it well
  • Put the pots over the plank.

The stand is very basic though it is still found useful for garden arrangements.

12. Troublesome Tires as Plant Stand Ideas

Troublesome Tires as Plant Stand Ideas

We all have some old car tires lying in our garage. Why not turn it into a beautiful plant stand? Let’s try it.

Materials

  • Car tires-3
  • Spray Paints

Instructions

  • Clean and paint the tires with bright colors. You can also draw patterns on them.
  • Stack the tires over each other to form a tabular structure.
  • Fill it with soil and plant beautiful flowers.

There you have amazing colorful plant stands to beautify your garden even more.

13. Plants in a Suitcase

Plants in a Suitcase

The heading sounds a bit weird but wait. Actually, a plant stand can be made out of suitcases as well, and that too in a very interesting manner.

Materials

  • An empty suitcase
  • Spray paints
  • Plastic sheets

Instructions

  • Paint the suitcase with pretty colors.
  • Do doodles and draw patterns on them too.
  • Place the plastic sheet inside them.
  • You can either cut the upper covering portion or leave it.
  • Spread soil and plant climbers in the suitcase.

The climbers will climb on the cover of the suitcase, and it will give a gorgeous lush green presentation.

14. Drawer Plant Stand

Drawer Plant Stand

You can reuse your old drawer as a presentation of different plant species. Here’s what you can do.

Materials

  • Wooden drawer
  • Ropes
  • Drilling machine
  • Sandpaper
  • Spray paints

Instructions

  • Clean the drawer with sandpaper.
  • Paint it using spray paint.
  • The hole around the four corners of the drawer.
  • Tie ropes from the corners and combine the other portion of the rope.
  • Form a loop and hang it on the wall
  • Place some soils and small plants.

There you have a drawer full of green seedlings. Look and feel the peace.

15. Chair Into a Plant Stand

Chair Into a Plant Stand

We all have an old creepy chair lying in our store room that was once used by our granny. Now let’s be creative and transform it to do some good deeds to make our granny proud.

Materials

  • Wooden chair
  • Hammer
  • Wooden crate
  • Ropes

Instructions

  • Break the middle part of the chair with a hammer.
  • Make the crate fit into the hollow frame
  • You can either tie ropes around the chair and hang it on the roof or,
  • You can just do plantings in the crate and let the chair lie in the corner of the porch.

This plant will turn out to be so easy yet unique that every visitor will definitely praise your efforts.

16. Fruits from Boots

Fruits from Boots

This is the best hack of all the DIY Plant Stand Ideas because it requires the least effort of them all, and the results are absolutely beautiful.

Materials

  • Old boots
  • Hooks
  • Spray paint

Instructions

  • Clean the boots and let them dry.
  • Paint them with full creativity.
  • Fill them with soil and plant your favorite herbs.

Watch the flowers grow out of them and thank the universe.

17. Plant Stands from Hats and Baskets

Plant Stands from Hats and Baskets

Reusing every ordinary stuff into an extraordinary one is an ART. Let’s learn this art by following this idea from the clan of plant stand ideas.

Materials

  • Empty jute baskets
  • Empty cowboy hats
  • Ropes and hooks

Instructions

  • Tie ropes to the handle of the basket and hang it on the roof.
  • Fill it half with soil and let the plant grow out.
  • Next, take the empty hats and tie ropes to the three corners of the hat.
  • Fill the hollow portion with soil, and it’s done.

Hang both of them on the roof, and that’s how you get a beautiful wall hanging without spending a single penny.

Final Thoughts

And we finally hit the dead end! These were all the plant stand ideas we could sum up that might spark intrigue in you. Try the ones you liked the most. All the ideas are safe and tested. Plant stands are an easy way to make the space look more lively and bright. Creative plant stands to showcase creativity and offers a unique way to spruce up your place.

We have tried our best to keep the three R’s, that is, Reuse, Recycle, and Reduce principles, in mind with each of these ideas, being budget-friendly, easy-to-make.

Do try them and enjoy the company of nature and give a new makeover to your heavenly home.

When it comes to transforming the ambiance of the room, certain major things should be taken care of, like the color of the walls, the standing vase, wall hangings, and so on. But what is neglected is a single piece of rug that can transform the whole vibe of a room from nothing to the most stylish.

Choosing the right rug can give the room a sense of personality and warmth. Now, buying a rug outside your jam-packed schedule could be hard. Instead, go along the mentioned online rug stores, which are filled with thousands of rug designs differing in size, material, texture, origin, etc.

These online rug stores have certified products with a return policy to ensure you find your best piece. With just a few clicks on your screen, your chosen rug will be delivered to your doorstep, instantly transforming the room into a heavenly place.

1. All-Rounder Amazon

All-Rounder Amazon

With the endless availability of rugs, Amazon rules over the rug stores market because of its excellence. From top brands like nuLoom, Safavieh, and unique loom to local artisans with affordable ranges, rugs are available in such big chunks of varieties that cannot be counted on fingers.

With Amazon’s sorting feature, find your best in chenille, cotton, jute or silk, etc., and that too with specifications like fade-resistant, flame-resistant, non-slippery, washable waterproof, or multiple piece range, etc.

Why

  • Fast and free shipping in 2 days, i.e., for Prime-eligible items
  • Available with the free return policy

Why Not

  • Amazon’s inventory may vary in different areas depending on your location

2. The Home Depot

The Home Depot

Along with supplying construction materials, the home depot also holds up on your demands for rugs.

With the most adaptable budget range, these rugs give the room a sense of prestige. What could be the better deal at less than $150 for 8*10 area broad rugs or just $40 for a runner?

From practical rugs to runners, outdoor rugs to area rugs, Home Depot is among the rug stores that maintain quality over quantities.

Quality is a big concern for all buyers, especially in online rug stores but with The Home Depot, you get well-tested rugs in terms of durability and washing specifications. Designs like Shop Shag, Moroccan, cowhide, jute, and braided rugs with different colors and textures are among the best in collections.

Why

  • Free shipping within two days
  • Easy return policy within 90 days

Why Not

  • Limited collections in popular designer’s product

3. Ruggable

Ruggable

The power pointer for Ruggable online rug stores is because it collects unique washable rugs. It is much easier when a two-way cleaning system is available- a washing machine and a dryer.

This store, among other rug stores, stands out because it collects multiple sizes, textures, and designs with child-friendly or pet-friendly specifications.

The best part of this store is that they provide a standard or cushioned rug pad with velcros to hold the rug in one place. They provide ease in walking, sitting, and standing.

Another best part about this store is that once you use the Ruggable system, you just need to change the rug covers for different looks rather than changing the new heavy rugs.

With Ruggable, you can get Sample Testing to find your perfect piece of rug. Order your favorites in size with cushion pad samples for just $15.

Why

  • Free Shipping available
  • The sample covers with rug pads are available
  • Machine wash and dry wash available

Why Not

  • $25 processing fee on all items.
  • Thinner in quality than other rugs

4. RugsUSA

RugsUSA

Most rug stores have limited collections of rugs in terms of design and sizes available. But not with RugsUSA. This store specializes in swallowing the endless demands of the customers.

These rug stores have something to cater to every style preference. While choosing the best among Moroccan, bohemian, outdoor, or farmhouse rugs, don’t forget to go for washable rugs that are children and pet safe.

They deliver to your doorstep free of cost, and this feature is crucial as you are already spending big bucks on buying expensive rugs. Our word on this? Ruggable must be your go-to online rug store for sure.

Why

  • Free shipping on all orders in just two days
  • Heavy discounts available
  • Wide range with reasonable pricing

Why Not

  • Returns available with the shipping fee

5. Wayfair

Wayfair

With the rise of multiple online rug stores, finding the best one has been tricky. But with Wayfair, you can get all sorts of rugs on a single screen at a versatile price range.

Be it a masterpiece of the living room or regular indoor outdoor runners to be cleaned with a garden hose, the Wayfair gives the best in both. The best-sellers are ‘traditional jute rugs’ or ‘woolen square rugs,’ which symbolize perfectionism with uniqueness.

These rug stores also greet their customers with FREE Shipping on orders above $35 and 30 days Return Policy to ensure the quality of the rugs.

Why

  • Free shipping on orders above $35
  • 30 days return policy
  • Wide range of products available

Why Not

  • Returning includes a shipping fee

6. Crate and Barrel

Crate and Barrel

Such online rug stores provide a wide array of options allowing you to browse through countless designs that suit your taste. Crate and Barrel excel in understanding the regular demands of the people. They offer durable rugs that fit well in every corner of the house.

Their organization of rugs into different columns is an excellent initiative to save time. The Laval group holds rugs with sizes ranging from 6’*9’ to 10’*14’.

For choosing a bedroom rug that imparts royalty in itself, choose the handwoven rugs with silky, fluffy textures made by the artisans of India.

Why

  • Sample rugs available
  • Modern and contemporary designs

Why Not

  • Paid shipping available

7. Rugs Direct

Rugs Direct

From seeking the simple cotton rug for daily use or the Persian print to add the element to your home, these rug stores offer an unparalleled shopping experience at your fingertip.

This online store boasts extensive rugs, ranging from traditional to modern designs, with a user-friendly interface and detailed product descriptions.

These rug stores offer a wide range of branded rugs like Surya, Loloi, Jaipur Living, and more. Also, Rugs Direct offers sample rugs to satisfy your insecurities but offers credits for smaller ones only when you’d buy a larger rug.

Rugs Direct stands out along with the rugs. It also provides suggestions for home decor like cushion sets, pillows, wall hanging, throw blankets, etc.

Why

  • Free shipping
  • 30 days Return Policy
  • Sample rugs available

Why Not

  • No free return shipping
  • $8 fee for handling

8. Rugs.Com

Rugs.Com

Talking of benefits? Well, Rugs.com has you all covered. First, among all other online rug stores, this place offers free shipping with very lenient return policies. We understand that spending big bucks online can be troublesome for many, but their return policies ensure your trust in many ways.

They also have limited-period lightning discount offers on their homepage offering upto 75% discount on MSRPs, which is pretty huge in itself. Their Monte Carlo Area Rug is exemplary as it is made of durable polypropylene fibers in Turkey and stands out in its range in terms of quality, distressed motifs, creative shapes like rectangles, circles, triangles, etc., and ten vibrant colors.

Why

  • Free Shipping
  • Easy Return Window
  • 10% discount on two or more rugs

Why Not

  • Some rugs may be of inferior quality
  • No transparency in rugs origin or factory certifications

9. Beni Rugs

Beni Rugs

Embrace your living rooms with these rug stores to bring chicness to your house. Beni Rugs is known for its vast assortments of the most classic rugs in different sizes and patterns, fitting into everyone’s choice and pockets.

This place is exclusively for those preferring quality over quantity. Hailing from Morocco with intricate hand-woven designs, particularly to the love and likes of Athena Calderone and Colin King, Beni Rugs open its doors to those ready to spend big bucks to bag in the best quality rugs. Their Rothko Modern Art rugs have our hearts on fire.

Another plus point, general rug stores seldom do not deliver customized rugs, but this is not the case with Beni Rugs. With these sumptuous benefits follows a drawback. Since these rugs are custom-made, they are for final sale. That is no return policy. So, if you are even a teeny bit unsure, then Beni Rugs is not for you at all.

Why

  • 12-16 weeks shipping time post-custom ordering
  • Complimentary Shipping
  • Reasonable rate for premium quality rugs

Why Not

  • All orders are final
  • No return policy

10. Urban Outfitters

Beni Rugs

These rug stores offer retailing of some most exquisite rug designs. Ranging from abstract art to bold colors, they have printed, shag, indoor and outdoor rugs that are capable of turning any room into heaven.

The best feature they have is the recycled rug-making process. Urban Outfitters knows well to stand out among other rug stores and be more eco-friendly by recycling old rugs into new ones, and that too with style.

Why

  • Rugs made from recycled and sustainable materials
  • Unique designs

Why Not

  • Shipping charges on large rugs
  • Return policy with a 15% restocking fee

11. Lulu and Georgia

Lulu and Georgia

Just like the name, this online store is the epitome of urban fashion. These rug stores provide a great line of rich and classic rugs which could transform any ambiance into a luxurious one.

Recommended by eminent designers like Sarah Sherman and Jake Arnold, these rug stores also have an amazing collection of vintage rugs.

When it comes to quality, Lulu and Georgia give out their best. With hand-dyed shaggy wool and low-key geometric designs, such rugs call for their praisings.

Another plus point of shopping with this store is their free return shipping policy.

Why

  • Free returns available
  • Wide range of designer and vintage rugs

Why Not

  • A bit more expensive
  • Limited information regarding the manufacturing factory and origin

12. Pottery Barn

Pottery Barn

Phoebe from friends must not have liked it, but you’d surely. This rug stores retail handwoven and Persian-style woolen rugs that just look majestic. Made with polyester fibers, and many other materials and weaving styles, these rugs are compact and easy to clean.

A recommendation is to buy Capitola Hand Tufted Wool Rug, which comes in three natural shades and is made by skilled weavers from India.

Enjoy your rug swatch just at $25, as these rug stores make it available only on selected rugs. Pottery Barn stands out in making custom rugs as per your dimensions and has ready-to-take rug mats as well. Smaller rugs can be shipped by ground delivery, but for oversized rugs, you have to loosen your wallet a bit, for White Glove Delivery ships them.

Why

  • Nicely styled rugs
  • Few Eco-friendly options are available

Why Not

  • Prices can hit peaks.

13. World Market

World Market

Wondering to bag in rugs from different corners of the world without having to travel a lot? If such is the case, World Market is your right pick. They have it all, from variants to varieties, styles to selections, natural to next level, and origin to orientation. Magical patterns, or even solid colors, anything you wish for is on their shelves. Their Persian and flat woven Kilim rugs are the eye soothers to interior decorators or anyone with a taste. And if you are a newbie, then the BEST-SELLERS section is just for you.

Speaking of quality, the best part about them is they have it all inked in their tags. You must have a vision to look through, for they have it all mentioned, from the composition of the rug to the place from where it hails or even the price breakdown. It is all listed down there. Like for example, their World Market Ivory Diamond Tufted Wool Kelsey Area Rug is 95% wool and 5% artificial fibers.

Why

  • Specializes in ethnic and artisan rugs from all around the globe.
  • Have an offline (window-shopping) presence as well.

Why Not

  • No Free Shipping is available.
  • Surplus charges are applicable on oversized rugs.

14. Revival Rugs

Revival Rugs

Got a thing for vintage-themed architecture and interiors? If yes, then this, among all other rug stores, is just for you. From India to Morocco and Turkey to Tunisia, they shelf in all the best quality vintage rugs with apt and gentle care. Their rugs date back more than a hundred years, handcrafted and applied with different weaving methods. Among every other rug store we have listed, this is our go-to website and will work well with you too.

Vintage rugs aging from 20 to 100 years of manufacture and are gently curated by Revival Rugs’ workforce for sale in Morocco, Casablanca, and Turkey. After a thorough inspection, quality care, and approval, they are clicked in the highest possible resolution and are put forward for sale on websites. Their Yasutomos, the unique and premium rug, is loved by all.

Need our word on this? Go for Hart Jute Rug, which is affordable, available in many sizes, and stylish without a doubt. To ensure its perfect quality, Revival Rugs partners with a small weaving house operated by third-generation craftsmen, and they deliver the best indeed.

Why

  • They offer a return and refund policy.
  • Free Shipping on all rug orders.
  • Complimentary design assistance for choosing the right rug.

Why Not

  • Cash refunds incur a $20 restocking fee.
  • Only a 7-day return window

15. Rifle Paper Co

Rifle Paper Co

When buying rugs online, Rifle Paper Co might not be the first online rug store that clicks your mind, but they sure would cover all your needs. Rifle Paper.Co offers a wide variety of home goods, including premium quality rugs and carpets. These rugs are popularly curated based on their dominancy in designs and based on collaboration with high-end designers. From bold to geometric, from subtle to solid, one can bag in as many varieties as per need. Outdoor rugs like Monestra Cream selections ensure an aristocratic appearance indoors and outdoors, like a patio or pergola.

They offer profound power-loomed rugs and handcrafted collections as well. Hand-tufted wool rugs are their core specialty. Affordability and exclusiveness are both well-cornered at Rifle Paper Co. They indeed are included among the bests when we talk of online rug stores.

Why

  • Options for power-loomed and woolen hand-tufted rugs.
  • Vibrant designs.

Why Not

  • No free shipping is applicable.

16. Macy’s

Macy’s

Talking of rug stores, one place that you can never miss is Macy’s. Yes, the popular aged brand never fails to deliver what it promises. They feature top-notch brands like Safavieh, Surya, Loloi, KM Home, etc. They have wide varieties stocked in, from boho to farmhouse, from contemporary to mid-century. They have covered it all. These rugs are available in small to oversized sizes, with their prices ranging from minimal to thousands.

Our eyes are constantly stuck on their Palmetto Living Cotton Tail Retro Slide Area Rug, and we believe that it will add an extra pinch of richness to your abode. The best part is they don’t charge extra for oversized products at all.

Macy’s offers both in-store and online shopping portals for your convenience. However, one drawback is that they don’t provide trial products. So, it is all up to you to dig deep into the product descriptions and pick out the best for yourself.

Why

  • An array of selections
  • Both in-store and online presence
  • Free Shipping on a selected range
  • 30 days Return Policy

Why Not

  • Shipping time is not consistent
  • No rugs samples are available

17. Bed Bath & Beyond

Bed Bath & Beyond

Looking for those big, bold SALE banners? Well, there are rug stores that offer you plenty, but Overstock stands out in many ways. For starters, they stock premium to moderate quality styles of rugs to suit every taste of customers. Secondly, from large area rugs to outdoor rugs, machine washable rugs, stair treads, rug pads, and handmade rugs, they offer a lot more. From premium luxury brands like Safavieh or Artistic Weavers and Alexander Home, they shelf in traditional rugs from local retailers as well.

From shag to flat weaves, these rugs available at Overstock might not be exclusive and are available at other retailers as well. Still, their sale selections offer a price that is reasonable and hard to compete with.

Why

  • Free shipping in the contiguous U.S
  • Affordable price

Why Not

  • Styles are not exclusive

Final Words

Without practice, words are nothing. Therefore, our careful curators experiment with the best rugs, explore them, and then pass on their final verdict. Based on these very diligent decisions, we curate the best online rug stores for you. Each of these recommendations is handpicked and explored very carefully.

We know that buying rugs online can be a little confusing for you but rest assured, these rug stores are certified and cross-checked, providing an assurance of quality with basic features like return policies and shipping methods to help you in any and every possible manner.

Visit these sites, wishlist, or directly head to check out, for these websites have our green light, and we certainly hope they don’t disappoint you at all.

If you find calmness in organizing things and want everything in place or at least on the shelf, then don’t worry. It is not necessary that you have OCD. It is just that you like to be in discipline and want things in order.

Organizing your bathroom by adding bathroom shelves can be very satisfying after you observe that it gives a whole new dimension to your bathroom. You don’t even know there are so many options available that you can do it on your own to revamp the look of your bathroom.

There are built-in bathroom shelves options or cabinets over or under the sink. There are just so many possibilities that too creative that you can choose to make your bathroom look so creative and obviously organized.

We have got you a list of 17 creative DIY ideas for your bathroom shelves that will impress your guest. Just keep reading and choose which one is your favorite.

Creative Ideas for Your Bathroom Shelves

Installing bathroom shelves has endless good reasons, especially if you have big or small kids. They all love to create a mess, so if you want to avoid those possibilities, below is a list of 17 great ideas.

1. A Cart with Wheels

A Cart with Wheels

A RASKOG rolling cart can be the easiest and most fun way to decorate your bathroom. These carts with wheels are the best bathroom shelves you can have, as they are attractive and functional. Also, an immobile cabinet can be bulky and hard to move. It has shelves that can store all the bath necessities like towels, shampoos, and other things.

Also, these carts are strong enough to store potted plants to make your bathroom look more fresh and lively. You can surely choose these cart-with-wheel options to give your bathroom a more organized look.

2. Vintage Ladder Shelf

Vintage Ladder Shelf

The vintage ladder shelf is a charming and practical addition to any bathroom, offering a rustic touch while maximizing storage space. This is a very creative DIY idea for bathroom shelves because you can transform an old ladder into a unique and functional storage solution as well as organize your bathroom. While reusing an old ladder, you can create a multi-tiered shelf that accommodates towels, toiletries, and decorative items.

The weathered wood and worn-out paint give the ladder shelf an authentic vintage look, adding character to your bathroom decor. Whether leaning against the wall or securely mounted, this DIY project combines nostalgia and functionality, providing a stylish storage solution for your bathroom essentials.

3. Crate Shelves

Crate Shelves

Carte as bathroom shelves is a great idea for storage. This DIY option shows both beauty and functionality of old wooden crates lying in one corner of your home. All you need to do is stack and secure the crates together, and you can create a unique shelf that offers ample space for organizing towels, toiletries, and other bathroom essentials.

The rustic charm of the crates adds character to the space, while their open design allows for easy access to items stored within. With a touch of creativity, you can paint or stain the crates to match your bathroom decor or leave them in their natural state for a more organic and earthy feel. These crate shelves not only serve a practical purpose but also add a charming and rustic aesthetic to your bathroom.

4. Floating Mason Jar Shelves

Floating Mason Jar Shelves

This is a very innovative DIY idea for bathroom shelves. These floating shelves provide a unique and charming storage solution. By affixing sturdy brackets to the wall, mason jars are suspended, creating a whimsical and functional display. These versatile jars can store and organize small bathroom items such as cotton balls, Q-tips, or even decorative items like fresh flowers.

The transparent nature of the mason jars allows for easy visibility of their contents, adding a touch of elegance and simplicity to the bathroom decor. With a few simple materials and a dash of creativity, floating mason jar shelves bring a touch of rustic charm and practicality to your bathroom space.

5. Wine Rack Shelves

Wine Rack Shelves

Using a wine rack in functional bathroom shelves is a smart and creative move to revamp your bathroom on a budget. Also, this is a unique way to organize towels, toiletries, and other essentials. The individual compartments of the wine rack conveniently accommodate rolled towels or even small baskets for organizing smaller items.

The sleek design of the wine rack adds a touch of sophistication to the bathroom decor, creating a modern and elegant look. By painting the wine rack to match the bathroom color scheme or leaving it in its original finish, you can customize the shelves to fit your desired aesthetic. These DIY wine rack shelves combine practicality and aesthetics in your bathroom.

6. Leather Strap Shelves

Leather Strap Shelves

These leather strap bathroom shelves offer a blend of functionality and aesthetics, adding a touch of modern sophistication to your space. By attaching leather straps to wooden boards or planks, you can create suspended shelves that provide a minimalist and contemporary storage solution. The leather straps serve as a support system and add a visually appealing element to the shelves.

The natural texture and color of the leather bring warmth and character to the bathroom decor. These DIY leather strap shelves can be easily adjusted in height and position, allowing you to customize the storage space according to your needs. Whether used to display decorative items or to organize toiletries, these shelves are a versatile and eye-catching addition to your bathroom.

7. PVC Pipe Shelves

PVC Pipe Shelves

PVC pipes are strong, durable, and versatile DIY ideas for bathroom shelves. By using old PVC pipes, you can create unique and customizable shelves that offer efficient storage solutions. All you need is little creativity and basic DIY skills. Just cut the PVC pipes into desired lengths and assemble them into various configurations, such as a ladder-style shelf or a multi-tiered organizer.

The lightweight and durable nature of PVC pipes makes them ideal for bathroom shelves. These DIY shelves provide ample space for storing towels, toiletries, and even small potted plants. Additionally, PVC pipes can be painted in different colors or left in their natural form to match your bathroom decor. With their affordability and versatility, PVC pipe shelves are a practical and creative way to maximize storage and add a modern touch to your bathroom.

8. Upcycled Drawer Shelves

Upcycled Drawer Shelves

Another interesting DIY bathroom shelf that will surely elevate the look of your bathroom. You can create an impactful and functional shelf by using old drawers. The drawers can be mounted directly onto the wall or arranged horizontally for a more traditional shelf look. These upcycled shelves provide a perfect spot for storing towels, toiletries, and decorative items.

You can enhance the visual appeal by painting the drawers in vibrant colors or distressing them for a vintage look. The varying sizes and shapes of the drawers add an eclectic touch to the bathroom decor while creating an interesting focal point. This is a sustainable and budget-friendly idea to solve your organizing problem in your bath space.

9. Hinged Shelves

Hinged Shelves

These bathroom shelves are designed with hinges that allow them to fold or expand according to the need. By attaching hinges to wooden boards or planks, you can create hinged shelves that can be mounted on the wall or behind the bathroom door, maximizing space utilization. This design is particularly useful in smaller bathrooms where floor space is limited.

The shelves blend seamlessly into the wall when folded up, creating a sleek and unobtrusive look. When expanded, they provide a convenient surface for storing toiletries, cosmetics, or even displaying decorative items.

10. A Shelf Under Your Basin

A Shelf Under Your Basin

This is a very creative DIY solution for your bathroom space. All you need is a wooden shelf to place under your wash basin. However, the type of bathroom shelves will depend on your bathroom style. If you like floating-style shelves, then you can surely opt for this one. You can place a counter under your washbasin to store all your toiletries and towels.

This is a budget-friendly solution, as you only need an additional floating shelf underneath is a perfect solution for storage purposes. Also, it offers open space; thus, you can access your items quickly.

11. Vintage Suitcase Shelves

Vintage Suitcase Shelves

Repurposing vintage suitcases into wall-mounted shelves is a charming and unique idea for adding storage to your bathroom. These shelves not only provide functional storage space but also infuse your bathroom with a touch of nostalgia and character. All you need to do is attach your sturdy brackets to the back of the suitcases and mount them on the wall, and you can create eye-catching shelves that are sure to be a conversation starter.

Whether you use them to store towels, display decorative items, or even as a home for your potted plants, vintage suitcase shelves add a delightful and whimsical element to your bathroom decor.

12. Pallet Shelves

Pallet Shelves

Wooden Pallets add a rustic charm to your space while being functional for storage purposes. These bathroom shelves have a natural and organic look that brings a rustic charm to any space. After cleaning and sanding the pallets, you can easily mount them on the wall to create sturdy shelves. Pallet shelves provide ample storage space for towels, toiletries, and other bathroom essentials. Their open design allows for easy access and adds a unique visual appeal to your bathroom decor. By incorporating pallet shelves into your bathroom, you add functionality and infuse a rustic and eco-friendly vibe into the overall aesthetic of the space.

13. Rope Ladder Shelf

Rope Ladder Shelf

If you’re looking to add a nautical or bohemian style to your bathroom, a rope ladder shelf is an excellent DIY idea. This unique and eye-catching shelf combines wooden dowels with thick ropes to create a ladder-like structure. By attaching the dowels together with rope, you can easily hang the shelf on the wall.

The rope ladder bathroom shelves offer a perfect blend of functionality and aesthetics. Its rungs provide multiple levels for storing towels, hanging plants, or displaying decorative items. The ropes’ natural texture and the wooden dowels’ warmth add a rustic and cozy feel to your bathroom decor. The rope ladder shelf not only maximizes your storage space but also serves as a statement piece that enhances the overall visual appeal of your bathroom.

14. Hula Hoop Shelves

Hula Hoop Shelves

This unique idea repurposes hula hoops into stylish and functional shelves. Just paint the hula hoops in your desired color and attach them to the wall using brackets. You can easily transform them into eye-catching shelves. The wooden boards placed on top of the hula hoops provide a sturdy surface for storing towels, toiletries, or displaying decorative items.

Hula hoop bathroom shelves bring a fun and imaginative element to your bathroom decor, making them a great choice for children’s bathrooms or anyone looking to add a touch of creativity to their space. With their vibrant colors and circular shape, these shelves become a focal point and conversation starter, adding both storage and visual interest to your bathroom.

15. Basket Shelves

Hula Hoop Shelves

Basket shelves provide a charming and practical storage solution that adds a touch of texture and warmth to your bathroom decor. You can hang the baskets on the wall using hooks or brackets or even attach them directly to a wooden board for a more streamlined look. These bathroom shelves are perfect for storing towels, toiletries, or other bathroom essentials, while the woven texture of the baskets adds visual interest to the space.

You can leave the baskets in their natural state or paint them to match your bathroom color scheme. With their open design, basket shelves allow for easy organization and accessibility while also introducing a cozy and rustic vibe to your bathroom environment.

16. Pipe and Wood Shelves

Basket Shelves

This unique combination of industrial pipes and wooden boards results in sturdy and stylish shelves that add a unique flair to your bathroom decor. You can create a strong framework for the shelves by assembling the pipes and fittings. At the same time, the wooden boards provide a solid surface for storing towels, toiletries, or displaying decorative items.

The juxtaposition of the rough, metallic pipes and the warm, natural wood creates a visually appealing contrast that adds character to your bathroom. These bathroom shelves are functional and customizable, as you can adjust the height and arrangement of the pipes and boards to suit your space. Pipe and wood shelves offer a blend of practicality and aesthetics, making them a standout choice for those seeking a contemporary and industrial look in their bathroom.

17. Pegboard Shelves

Pipe and Wood Shelves

Pegboard shelves are a versatile and customizable option for bathroom shelves. Pegboard shelves allow you to arrange shelves, hooks, and other accessories in various configurations, giving you the flexibility to organize your bathroom essentials in a way that works best for you. Whether you want to hang towels, store toiletries in baskets, or display decorative items, pegboard shelves offer endless possibilities.

Additionally, the perforated surface of the pegboard adds a unique visual texture to your bathroom while providing a convenient solution for keeping everything within reach.

Conclusion

Bathrooms are one of the most important rooms in any house, and well all know that very well. Thus it is essential to keep it organized, and adding creative DIY bathroom shelves is a good initiative. It enhances its functionality and adds a personal touch to the space. And anything has the possibility to become something useful with a creative mind, from repurposed items to unique designs.

You don’t have to invest a lot of money in these ideas. On the other hand, these ideas offer a wide range of options to suit different styles and preferences. So choose any of these that enhance the look of your bathroom.

Thus, roll up your sleeves, get creative, and transform your bathroom into a well-organized and visually appealing oasis.

We have always been fascinated with the charm of the woods, be it from 1.5 billion years ago for survival or in the 21st century for being naturalists. Woods are not only durable but have a tranquilizing ability to remove NEGATIVE energies as well.

Embellishing the woods with your own creativity is a real art, and the most prominent way of doing it is by Stencil painting. This activity lets you fly your mind in the clouds of imagination and carve out an eye-pleasing wooden decor presenting your true self.

This blog will guide you on how to beautify your aura with stenciling on wood to use either as a tea coaster, a nameplate, a menu board, a holiday sign, or anything else you desire.

Materials You Need to Stencil on Wood

Wooden Surface Preparation

There’s no doubt that barn woods or reclaimed woods give a very rustic and vintage look, but at the same time, stenciling gets very hard because of its irregular platform and grain marks. The mishap occurs in the form of bleeding and smudged printing.

This is why it is very important to have crisp and clean wood and, if not, prepare it well.

1. Sand It Out

Sand It Out

Use sandpaper to remove all the grains from the wooden surface. Rubbing it vigorously will also smoothen the surface, just as a nail filer sharp the nails perfectly.

2. Clean and Clear

Clean and Clear

Use a brush to remove minute wooden particles and wipe the surface with wet paper towels. You can also use a hair dryer to remove tiny particles from the gaps.

3. Coat It Well (Optional)

Coat It Well (Optional)

It is recommended to apply a layer of paint all over the surface to avoid gaps. It provides better visibility to your stencil and makes the wood water-resistant.

Easy Steps to Affix the Stencil

Easy Steps to Affix the Stencil

Step 1: Stencil Stabilization

Before stenciling on wood, it is very important to make sure that the stencil will not move from its place and to seal the edges of the stencil and the surface so that the colors won’t seep into the edges and bleeding is avoided.

Step 2: Avoid Bleeding with Repositionable Adhesive Spray

Before placing your stencil, spray a small amount of spray adhesive over it. Make sure the spray is repositionable because we don’t want to stick the stencil permanently to it.

Step 3: Clean the Mess

The spray adhesive will create a mess for sure but wipe it off with a damp towel. It may take a little more effort to wipe excess adhesive, but it will go off easily by placing parchment paper beneath the stencil.

Step 4: Place the Stencil

Lastly, place the stencil on a marked point and avoid readjusting it. Once placed, you can secure it with painter’s tape.

Priming and Painting

Priming and Painting

The fun part begins now. Painting on stencils can be very tricky. A little error could easily drain all the efforts out. Here’s what you should do:

  1. Use acrylic paint for full coverage and a crisp finish. Take the desired amount of paint on the palette.
  2. Use a makeup wedge or a spouncer for painting. Avoid brushes as they do not give even strokes, and it’s hard to remove paint from them.
  3. The dry brushing technique is best suited for stenciling on wood. It involves offloading the paint by removing the excess on a rag or paper towel. This will prevent the excess paint from sweeping into the edges and messy blobs.
  4. Dab the sponge over the surface in a Tap-Tap motion. Do not use a side-to-side motion as it squishes the paint.
  5. If there’s a light shade color being used, DOUBLE coating is recommended.
  6. For a hand-painted look, you can dip a toothpick in the same color and fill up the in-between gaps.

Wiping Out The Finished Stencil Wood

Wiping Out The Finished Stencil Wood

  1. As the paint dries, it is time to remove the stencil. Make sure you are not removing it while the paint and the mod podge are wet, or else the last-moment bleeding could occur.
  2. Use a sharp cornered tool to lift the stencil from the corners to avoid paint smudging.
  3. Remove the stencil gently and clean the paint stain with a damp cloth or nail paint remover.
  4. Use a scraper to remove extra paint from the surface and from the stencil.

Final Finishing and Locking

Final Finishing and Locking

You must have felt immense pleasure while looking at the final result from the stenciling of the wood. Indeed, your hard work has given the prettiest results.

  1. Gap Errors: Fill out the gaps using thin brushes and overdo the bled areas.
  2. Double Coat: If the colors are not displaying well, double-coat the areas with thin brushes.
  3. Bled areas: if your stencil has swept the colors in and has caused bleeding, no worries. You can outline the areas with the same acrylic color, and no difference would be seen.
  4. Protection: Varnish the wood to lock moisture and preserve the color stain. Use transparent colored varnish or Mod Podge for the best result.
  5. Framing: Frame the wood with a wooden frame for a better look and attach hooks to hang them on the walls.

What Can You Create with Wood Stencils?

Our minds are trained to be very initiative, so why not use them with the full ‘muscle’ that they have? We sometimes lack ideas, and our imagination gets stuck, but that is okay. Here are some artful suggestions on things to create while stenciling on wood:

1. Door Signs

Door Signs.jpg

These are not only signs but are also attached to us emotional hubble-bubble. You must be pondering over with ‘How SO?’ Well, it is because it represents our home sweet home. What could be better than designing your door sign by yourself and giving it a look at your personality?

2. Floor Design

Floor Design

If you are a person who likes trying out new things, this one’s for you. You can design your wooden flooring with different kinds of initials, words, and whatnot. Give your creative mind a jump, and let others be amazed at your ideas.

3. Wall Hangings

Wall Hangings

Aesthetic wall hangings made of natural products like wood with pastel colors are so in trend. They not only are eye pleasing but can give out a great message to society. Do not miss the opportunity of decorating your home with such trendy decor.

Pro Tips and Savvy Hacks for Wood Stenciling

Following the proper instructions while stenciling wood may not give appropriate results, and that is because your creativity must sync with your experiences.

This is why we have tried to combine all the expert ideas for you to give out the best result every time you are stenciling on wood. These tips would ease your stenciling process and would make you Master it in no time.

  • Surface Cleaning: it is a must to clean the surface before applying paint for a bright finish. All the dirt particles either get mixed with the paint and turn the color into a muddy shade or will form a crooked texture throughout the surface.
  • Appropriate Stencil: always choose the stencil that completely fits your wooden platform. Choosing a smaller or larger one will not give it even space, and bleeding would be caused.
  • Locking the stencil: Always lock the stencil with adhesive spray or painter’s tape before applying the paint, as it would ensure the sticking of the stencil to a definite space and would avoid sliding off the stencil and creating a mess.
  • Do not use Brush: While painting, always avoid the usage of brushes even though they are flat. Flat brushes would not show even strokes while stenciling on wood and would create bleeding.
  • Dab-dab motion: It is recommended to avoid painting in a sliding swaying motion rather than doing it in a dabbing motion. Yes, just how the foundation is applied. It is because it lets an even distribution of colors throughout the surface and avoids the paint bleeding.
  • Layer-wise painting: light shaded colors that emit background shadows must be painted in layers. It means that one should not take large quantities to hide the background but should patent a layer, let it dry, and then double-coat it.
  • Stencil Removing: Stencils should be removed with a lot of care. They may be strongly stuck to the base and get torn. Remove them gently from the corners, and if they get stuck in between, use a sharp needle to scratch them out from the surface.
  • Stencil cleaning: it is very important to clean the stencils after use. The uncleaned stencil may release extra color while stenciling on wood the next time. Clean them with hot water and a damp cloth. You can also use rubbing alcohol or nail paint remover to clean.
  • Practice before performing: if you are a beginner, it is recommended to practice the whole process of stenciling on wood on a rough wooden plank to observe your mistakes and try new techniques on the actual ones.
  • Sealing is a Must: After completing your design, seal it to prevent smudging and remove the paints. Use varnishes or mod podges to apply a strong coating of lamination on the wood. Final finishes are the reason why wooden design could be used for a longer period of time.

Final Thoughts

To sum up, this detailed guide for stenciling wood is enough for a person to try out their creativity. The materials required, the process to follow, the precautions to take, and the tips to keep in mind, this blog gulps in all the important measures for stenciling on wood.

Also, to stay updated on the trends, it is recommended to bag in a few stencils online and keep them in your racks, as they are reusable and can make dull and dusty surfaces look new and chic.

We aim to provide you best and only the best. The recommendations made are highly curated and are a hit on the Bull’s eye when it comes to meeting your needs in the most affordable ways.

Try these creative koo-hoos and flaunt them in your circles like never before!

Frequently Asked Questions

What Type of Paint Is Recommended for Stenciling on Wood?

The most recommended paint for stenciling on wood is Acrylic paint, which is cheap and gives a rubbery finish. Other than that, craft paint, stencil creme, and chalk paints are also fine.

How to Prevent Paint from Bleeding Beneath the Stencil?

To avoid bleeding, make sure that the wooden surface is even. The stencils are taped to the surface, spray adhesive has stuck the stencil and the wood finely, and finally, avoid using excessive paint.

What Mistakes Should Be Avoided While Stenciling Wood?

You can simply avoid using too much paint or avoid loose placement of stencils. Also, try and avoid sliding motion while painting on the stencils and clean the stencils and the surface before use for sure.

You never know what’s behind those cabinet doors. Yes, it’s always a mystery. Also, we all are well aware that cabinets are the big parts of the kitchen and any other place in your house. If you do not have cabinets, then it is clear that you are lacking an important part. Cabinet doors can be messed up after prolonged use, and sometimes changing the entire cabinet or the doors can cost an arm and leg these days.

However, there is always an alternative or option, which is to create something on your own that is too within budget. If you have the right skills, then you can always make your own DIY cabinet doors to revamp the look of your kitchen or any space. However, this is going to take a lot of your time and patience, but it is all worth it once you are done.

However, we have 15 easy DIY cabinet door ideas that will not harm your pocket and also give you satisfactory results.

Ideas for DIY Cabinet Doors

Fortunately, there are numerous budget-friendly DIY cabinet door options available that can give your cabinets a fresh and stylish look without breaking the bank. However, we have shortlisted 15 easy DIY cabinet door ideas that can transform your space on a budget:

1. Stenciled Door

Stenciled Door

Suppose your cabinet has lost its previous charm and needs some glam up. Then you should try these DIY cabinet doors ideas, which is painting them with beautiful patterns. At first, you can paint the background of the cabinet and then let the color dry out completely. Further, you can stick a stencil in place on the door. If you feel like your cabinet doors have a recessed panel, then you need to resize the stencil to fit the doors. Further, use a stencil paint brush to paint the areas where the stencil is not pasted in a tapping motion. Then just peel off the stencil to get your painted pattern.

2. DIY Herringbone Design

DIY Herringbone Design

This is an interesting DIY cabinet door idea. Herringbone design is a set of amusing patterns that gives an amazing new look to your cabinets. You can start by dividing the door into four vertical parts, where you can mark the lines with your pencil. Further, you can purchase edge banding in various sizes and species of wood and melamine. It is easily available in most craft and hardware stores, and mostly they offer iron-on varieties and peel-and-stick options. Now you need to cut the banding into strips at a 45-degree angle.

This is done so that it can easily stick between the drawn lines. Also, you need to keep in mind that every other section of banding will be going in the opposite direction, so you need to arrange the sections of banding in such a way. Additionally, make sure that the colors are also different from one another and the species of the wood in your design. After all the pieces are attached, seal the cabinet with a polyurethane wood finish for that polished look.

3. Choose a Quirky Wallpaper

Choose a Quirky Wallpaper

Wallpapers are affordable DIY cabinet doors used to add a new look. However, you can choose any wallpaper design as there are so many options available in the market. However, you need to paint the cabinet door with semigloss interior latex paint. Later on, when the paint is dry, you have to spray adhesive and stick the piece of scrap wallpaper on the required space of the cabinet. Further, to seal the surface, use a paintbrush to coat a thin layer of decoupage medium over the wallpaper and the entire DIY cabinet doors.

4. Add a Sheet Metal

Add a Sheet Metal

This is a quite common DIY cabinet door revamp idea. However, it adds a vintage vibe while maintaining the modern look of your place where they are fixed. You need to remove the inner door panel with a jigsaw and then paint the cabinet door and let it dry. To construct a frame for the mesh insert, apply black paint to wooden strips and affix them to the rear of the door frame, ensuring they are partially visible from the front. Using tin snips, cut the sheet metal to match the frame’s dimensions, then attach it to the wooden strips using wood glue.

5. Chalkboard Painted Kitchen Cabinets

Chalkboard Painted Kitchen Cabinets

This is among one the fun and useful DIY cabinet doors ideas. Adding chalkboard-painted kitchen cabinets can help you a lot in making a list when you find some things that are about to finish from your grocery. Also, kids would love this installation as they can easily play while you are cooking something delicious for them. However, in order to have one, all you need to do is use a quick-release painter’s tape to cover the door frame. This is because only the inner panel will be shown, which will be painted with chalkboard paint. Thus, later you can remove the tape once it is dried out.

6. Drilled Pattern

Drilled Pattern

This is also a unique and fun DIY cabinet door idea that will add a touch of whimsy to your kitchen by incorporating a charming bird transfer and a unique twig handle. To create the bird’s outline, use a drill to make evenly spaced holes. Opt for two coats of glossy paint for kitchen or bathroom cabinets to ensure a moisture-resistant and easy-to-clean finish. If you prefer a flat or eggshell finish, enhance its durability by applying varnish or a clear coat over the paint. This way, you can enjoy a delightful and functional cabinet upgrade that suits your personal style.

7. Add Rollouts in Unexpected Places

 Add Rollouts in Unexpected Places

Another budget-friendly DIY cabinet door idea to enhance your kitchen space is by adding rollouts. Rollouts are a convenient and practical solution for maximizing storage space and making it easier to access items in your cabinets. You can purchase rollout kits from home improvement stores or online, or you can even make your own using plywood and drawer slides. Simply attach the rollouts to the inside of your cabinet doors, and you’ll have a clever organizational solution that won’t break the bank. Whether you use them for storing pots and pans, spice jars, or cleaning supplies, rollouts are a simple yet effective addition to transform your cabinet doors and improve the functionality of your kitchen or storage area.

8. Glass Inserts

Glass Inserts

Glass inserts have also made a space in our list of 15 DIY cabinet doors ideas to upgrade the look of the place where they are attached. Moreover, glass inserts not only add a touch of elegance and sophistication to your cabinets but also provide a glimpse into the contents inside. You can purchase pre-cut glass panels or have them custom-made to fit your cabinet doors. To install the glass inserts, carefully remove the center section of the cabinet door and replace it with the glass panel, securing it in place with glass adhesive or clips. This simple yet effective DIY project instantly transforms the look of your cabinets, making them appear more open and visually appealing.

9. Barn Door Style

Barn Door Style

If you’re looking to infuse a rustic and farmhouse-inspired charm into your cabinet doors, the barn door style is a fantastic option that won’t break the bank. This DIY cabinet door idea involves attaching narrow planks of wood horizontally to your cabinet doors, creating a distinct barn door aesthetic. You can easily find affordable wood planks at your local home improvement store or repurpose old wooden boards for a more eco-friendly approach. Once you’ve cut the planks to fit the dimensions of your cabinet doors, attach them using strong adhesive or nails. Furthermore, you can enhance the look by staining or painting the wood to match your desired color scheme.

10. Two-Tone Design

Two-Tone Design

If you want to create a long-lasting impact on your guest, then you can surely use this DIY cabinet door idea. This budget-friendly DIY idea allows you to play with contrasting colors or finishes to create a striking visual impact. Choose two colors that complement each other and your overall kitchen or storage area aesthetic. Paint the upper and lower halves of the cabinet doors in the respective colors, or use different finishes like matte and glossy for added dimension. The two-tone design instantly adds depth and style to your cabinets, giving them a fresh and contemporary look without breaking the bank.

11. Repurposed Shutters

Repurposed Shutters

This is an eco-friendly and sustainable DIY Cabinet door idea to give a new look to your space. Mostly because it is made by giving new life to discarded materials. However, the first step you need to do is sand down the shutters to remove any roughness or old paint and stains. Now, attach the repurposed shutters to your cabinet doors, either by using hinges or directly securing them with screws. This upcycling project instantly adds a rustic and vintage touch to your kitchen or storage area, making your cabinets stand out. Whether you opt for weathered shutters for a worn look or a fresh coat of paint for a pop of color, repurposed shutters provide a unique and budget-friendly solution to elevate your cabinet doors.

12. Chicken Wire Cabinet Door

Chicken Wire Cabinet Door

These DIY Cabinet doors will add a farmhouse look to the space where the cabinets are placed. Moreover, this budget-friendly solution will add texture and a touch of charm to your cabinets. Before you begin, just measure the dimensions of your cabinet doors and then cut the chicken wire accordingly but leave a little extra to fold over the edges. Secure the chicken wire to the back of the cabinet doors using a staple gun or small nails, ensuring it is taut and secure. The chicken wire allows you to display decorative items or create a rustic spice rack, adding both functionality and visual appeal to your kitchen or storage area.

13. Frosted Glass

Frosted Glass

Frosted Glass is great DIY cabinet doors options for maintaining the privacy and hiding the contents of your cabinets. However, they are easily available in the market as you can either ask for frosted glass sheets or use frosted glass spray paint to achieve the desired effect. Carefully measure the dimensions of your cabinet doors and cut the frosted glass accordingly. Attach the frosted glass panels to the doors using glass adhesive or clips. The frosted glass creates a subtle and refined look, allowing light to pass through while adding a sense of depth to your cabinets.

14. Fabric Panel

Fabric Panel

If you want to add a touch of texture while being on a budget, then you can surely use this DIY cabinet doors options. You can start by measuring the size of your cabinet doors and then cut the fabric accordingly. Just leave a little extra fabric for folding over the edges. Now attach the fabric to the doors using a strong adhesive or a glue gun. The fabric panels instantly bring visual interest and softness to your cabinets, transforming them into unique pieces. Choose a fabric that complements your kitchen or storage area, whether it’s a bold pattern, a subtle texture, or a vibrant color.

15. Geometric Patterns

Geometric Patterns

You might not like geometry during your school days, but you will surely like these geometric patterns on your cabinet doors. This DIY cabinet door option allows you to unleash your creativity and customize the look of your cabinets. Begin by choosing your desired geometric design and use painter’s tape to create clean lines on the cabinet doors. Select different colors of paint to achieve a unique and eye-catching design. Apply the paint carefully within the taped-off areas and allow it to dry. Once dry, carefully remove the painter’s tape to reveal your stunning geometric pattern. This budget-friendly project instantly adds visual interest and a contemporary vibe to your cabinets, making them a standout feature in your kitchen or storage area.

Conclusion

It is essential to change the look of the space you spend most of your time in so that you get that free space to get creative. The kitchen is the place you get creative with your spices to fulfill your hunger, so with these 15 creative DIY cabinet door designs, you can brighten up your kitchen space. Plus, the stand-out feature of these ideas is that they are so pocket-friendly that you can easily do it without thinking much.

From simple paint updates to more intricate designs, there are options to suit every style and preference. Embrace your creativity, roll up your sleeves, and give your cabinets a fresh and stylish makeover. Take this as a fun family activity and involve all the members to do the tiny part.

Enjoy this little artistic activity at home!

What if we tell you, you are already living in a lavish bedroom, and you just cannot see it? Sounds crazy? It’s not!

Being human, we all have certain desires and dreams, and living in a lavish modern home with a master suite for a bedroom is definitely something that most of us desire. However, buying a house like that isn’t affordable at all. Therefore, we say you create what you can’t have. How? Transforming your current bedroom into a master suite using some fun and crafty master bedroom ideas.

In this article, we are going to give you some of the best master bedroom ideas to help you achieve the perfect dreamy master suite.

Below is a list of the best master bedroom ideas to give you a comprehensive yet quick guide to a master suite.

Master Bedroom Ideas: From Boring to a Master Suite

The bedroom is that private area where one spends their most treasured, intimate moments and relaxed hours, and having a lively leisure space truly adds to one’s mind and heart’s well-being. Bedrooms are the most intimate corners of our house, and therefore when it comes to redecorating that space, a little personal touch is a must.

A bedroom that gives out the vibes of a master suite will surely leave you feeling like a king (Or Queen), for that matter. When we say master suite, or master bedroom, even by the sound of it, it appears to be the most important part of a home. And it’s definitely not just another plain bedroom.

The master suite holds many rich aspects to it that give it such a kind of value in a house. It is spacious, well-organized, and designed using fine details and an understanding of aesthetics, modern furniture, etc. If you are determined to give your bedroom a makeover, below are a few master bedroom ideas that you should definitely try out. Let’s dive in.

1. The Not-So-Basic Bed (and Headboard)

The Not-So-Basic Bed (and Headboard)

Irrespective of the type of room, furniture is a basic component that is required to make the space livable. Especially when we are talking about the master bedroom, it has to be perfectly assembled with the right kind of furniture. In this case, the primary furniture item in a bedroom is a bed, and our first in the many master bedroom ideas in this blog.

Choosing the right bed and headrest pair enhances your bedroom with a modern vibe. And for that, you need to make sure what kind of bed suits you, whether you want a cozy corner bed, a queen-sized bed, or even a king-sized bed, all for yourself. Whatever your preference, go and get it. Now while you are in the process of finding the perfect bed that suits your master suite, get started with the headboard as well. Headboard is the supporting structure that comes with the bed to offer proper resting support to your head and neck while sitting upright. Headrests come in different shapes, sizes, patterns, and materials and can even be customized as per your needs.

2. From Head to Toe, i.e., Ceiling to Floor

From Head to Toe, i.e., Ceiling to Floor

Can you imagine a room without walls or ceiling? No right! So, while planning your bedroom makeover, do not forget them. There are plenty of options for ceilings, such as decorative plaster craft, designer false ceilings, ceilings with in-built lighting fixtures, and much more.

Similarly, for walls, you can pick good quality emulsion paints or stain-proof paints or go for easy-to-change wallpapers to give your bedroom a modish look, along with wooden or marble flooring per your climate and convenience considerations.

This was about what to use; now, let’s discuss shades. So ideally, an elegant modern master bedroom should use a contemporary, minimalist color palette while going creative on the furniture and ornamentations. This creates a clean and sleek look for your bedroom and offers you the liberty to be creative the next time you wish to redecorate your bedroom.

For instance, many times, people choose darker shades on walls, so when it comes to changing the room’s decor to a lighter tone, the dark undertone ruins the whole look. Thus, choosing the right paint shade is crucial

3. Smart Fixtures for Modern Mood

Smart Fixtures for Modern Mood

Master suites are often wrongly imagined to have old palaces like architecture and design, but it’s the 21st century, where technology is omnipresent, and that means even in our bedrooms. And who doesn’t like a fun movie or game night with friends and family, right? So if technology is anyway going to be a part of your most personal space, why not use it to give your bedroom the much-needed oomph?

When it comes to master suites, one of the ways you can incorporate smart technology in your decor is by using appliances and innovative gadgets such as Built-in remote-controlled cupboards and TV wall cabinets. Have you ever seen those cupboards which have sensors or cabinets which open and close or even come out of wall space? Imagine them being a part of your modern master bedroom. Sleek right?

Along with these smart fixtures, lightning can easily make or break any room’s ambiance. So it’s crucial to pick the right ones. But first comes understanding your aesthetic. Are you looking for a breezy and light interior, a warm and cozy one, or maybe a bright, vibrant vibe for your master suite, whichever it is? Always make sure to choose your light types and colors accordingly. Lights come in different shapes and sizes for different parts of your bedroom, such as curtain lights, ceiling lamps, corner nightstands, and many others. So choose mindfully.

4. Walking Into a Décor Wonder (Walk-In Closet)

Walking Into a Décor Wonder (Walk-In Closet)

In-room closets, or closet spaces, are one such part of master bedroom ideas that makes all the luxury living enthusiasts go weak on their knees. Although, by the looks of it, it may seem to be something that can only be professionally crafted. It’s not! You can design your very own walk-in closet by following three simple steps. FYI, the size of the bedroom doesn’t matter.

First, choose a well-lit section of your bedroom where you can set up your wardrobe and vanity mirror. Second, make sure the color and patterns of your wardrobe and vanity cupboard match or complement the colors of your overall bedroom (master suite). And finally, after you have set up your furniture and decorations, create a partition. The partition can be a glass frame, a wooden divider, or anything that goes as per your master suite theme.

5. A Good Décor Includes Appropriate Divisions

A Good Décor Includes Appropriate Divisions

Do you ever wonder how sometimes even a small bedroom has different spaces, such as a balcony sitting area, study/workstation, etc.? The answer is Design Planning. When it comes to home/room décor, finalizing a good setup is a must to make the work easy, fun, and quick. To do that, what you can do is pinpoint which specific space additions you want in your bedroom and then bring in the appropriate furniture as per your décor theme.

Now comes the real deal, setting up. So if it is a balcony corner, the planning becomes easy for that. But if you wish to have a workstation, yoga corner, or maybe even a mini-drawing room within your room. There are different ways to do that. Either you can coordinate your furniture in terms of size to leave space for extra addition.

Or you can create spaces for these within other spaces. For example, have you seen those wardrobes which open up and give out an ironing table? Or the bed that folds up and turns into a sofa or workstation. Those can be some good ideas to incorporate as well.

6. People or Seating Options, More the Merrier

 People or Seating Options, More the Merrier

Yes, If you want to have a master bedroom that not only serves as an elegant comfy suite but also has all the potential frills to it. Having the capacity to hold more than a couple of people without looking crowded is one such trait that can do the deed for you.

To bring this unique quality to your master bedroom design, one thing you gotta make a habit of is always being on the lookout for any vacant corner or surface that can be turned into a seat with a few cushions or basic DIY.

For instance, window sills or storage boxes can be turned into Mini couches for your master suite.

7. Bling It up With Drapes & Décor

Bling It up With Drapes & Décor

Once you are done choosing the right fixtures, furniture, flooring, partitions, and wall colors, your bedroom makeover is almost done. Now comes the last but the most creative and fun part of bedroom re-décor. The ornamentations. This is the stage when you will add your personal touch to the room with drapes, carpets, mirrors, etc.

Now that we have mentioned mirrors, let me tell you a secret. Mirrors create an illusion of a large room. This means they will make it appear brighter and more spacious even if you have a small bedroom. So, make a note to use mirrors properly in your décor plan.

Believe it or not, the right shade and pattern of drapes and carpets can make or break the overall aesthetic of your bedroom. And what complements the drapes are the additional décor items such as mirrors, wall art, paintings, artifacts, statues, and even small chandeliers.

Conclusion

Summing it up, turning your basic bedroom into a marvelous master bedroom doesn’t require you to be a pro at design and decor. Just a few minor, mindful tweaks here and there, and you have your royal personal space.

In this blog, we have shared with you some of the best master bedroom ideas, from ceiling to carpets, to turn your bedroom into a dreamy master suite. So, after reading this creatively put-together article (as we say in the language of design and décor), are you prompted to put your newfound ideas into action?

We hope it helped you get that creative boost and a starting point to begin with your bedroom transformation. Good luck decorating!

In today’s day and age, having sufficient storage space is almost a luxury. What’s even rarer is people building their storage shelves. The era of building your storage area or shed is rapidly declining. Crafting something on your own can be immensely satisfying, giving you a rather proud feeling of accomplishment. If you’re looking to increase your storage space while adding a touch of functionality and aesthetics to your home, you’ve come to the right place. Here, we explore 15 fantastic ideas for building your storage shelves using readily available materials like 2x4s and plywood. These simple yet versatile materials are affordable and provide excellent durability for your storage needs.

Whether you’re an expert DIY enthusiast or a beginner looking to experiment with your first project, these ideas will inspire you to create functional and stylish storage solutions for any room in your home. From the garage to the kitchen, bedroom, or even the living room, there’s a DIY storage shelf idea here to suit every space and organizational requirement.

So, grab your tools, use your imagination, and transform your cluttered spaces into organized and visually appealing areas that reflect your style.

1. Simple Wall-Mounted Shelves

Simple Wall-Mounted Shelves

Looking to add functional storage to your space? A simple wall-mounted shelf is the easiest and most practical solution! With just a few materials like plywood and 2x4s, you can create a simple yet functional storage solution. Cut the plywood to your desired size, attach sturdy 2×4 pieces to the wall, and safely mount the plywood shelf on top. This DIY project is not only pocket-friendly but also customizable to fit any room. Whether you need extra storage in the kitchen, living room, or office, these wall-mounted shelves provide a convenient and accessible option.

This is a great starting point for beginners as it does not require any advanced skills. A simple wall-mounted storage shelf does the work of every other shelf but looks simple and costs less.

2. Floating Shelves

Floating Shelves

Floating shelves, although simple by design, add a lot of elegance and sophistication to your room. These stylish shelves create a clean and minimalist look, appearing as if they are “floating” on the wall without any visible brackets or supports. With the use of mounted 2x4s, you can easily construct your floating shelves. Cut the plywood into desired lengths, attach 2×4 supports to the wall, and then secure the plywood on top.

Floating shelves are a modern space-saving storage solution, perfect for displaying decorative items, books, or everyday essentials. If you’re renovating your living room, bedroom, or home office, floating shelves are an excellent DIY project that combines functionality and aesthetics seamlessly.

3. Built-In Shelves

Built-In Shelves

Built-in shelves are a fantastic way to optimize space and add a customized feel to your home. These shelves are designed to seamlessly blend with the existing architecture, creating a cohesive and efficient look. You can create built-in shelves that perfectly fit your specific needs and space in almost any kind of home. Start by measuring the area and planning the layout. Then, construct a sturdy framework using 2x4s, ensuring proper support for the shelves.

Built-in shelves are a great way to optimize space, especially if there is less of it. They provide a streamlined and integrated storage solution that enhances both the aesthetic appeal and functionality of your space.

4. Hexagonal Shelves

Hexagonal Shelves

Hexagonal shelves are a trendy and versatile storage solution that can elevate the aesthetics of any room. By arranging your planks creatively, you can easily craft stunning hexagonal storage shelves that become a captivating focal point on your wall. These shelves provide both functionality and a touch of modernity. Arrange them in various patterns to suit your style and needs.

Hexagonal shelves offer an opportunity to display cherished items, books, or plants in a unique and visually appealing way. Whether you’re looking to enhance your living room, bedroom, or home office, these hexagonal shelves provide a chic storage solution that combines form and function seamlessly.

5. Pallet Shelves

Pallet Shelves

Pallet shelves are an innovative way to repurpose wooden pallets and create rustic and functional storage solutions. With a few pallets and basic tools, you can create a village-inspired aesthetic. Sanding down the wood is a great way to give the wood a smooth finish. Cut the pallet boards to the desired lengths and attach them to the wall or create a freestanding unit. Pallet shelves offer a charming and eco-friendly option for displaying books, decorative items, or even plants.

Their natural texture adds a unique character to any space, making them an excellent choice for those seeking budget-friendly and simple storage shelves. Get creative and let the rustic charm of pallet shelves enhance the ambiance of your home.

6. Rope-Hanging Shelves

Rope-Hanging Shelves

These ingenious shelves are a unique and simple storage solution that adds character to any space. Using plywood and sturdy ropes, you can easily create these charming shelves. Cut the plywood into your shape of choice, drill holes in the corners, and thread the ropes through, securing them with knots. You can hang the ropes from hooks or ceiling anchors, adjusting the height as desired. Rope hanging shelves go best with flowering plants or jars.

With their suspended design, they maximize storage while adding an intriguing visual element. Whether in the living room, bedroom, or bathroom, rope-hanging shelves offer a creative storage solution with a bohemian touch.

7. Children’s Bookshelves

Children’s Bookshelves

A bookshelf is a wonderful addition to any child’s room. It promotes a love for reading and knowledge by keeping books organized and accessible. Creating a DIY children’s bookshelf is a fun and practical project. By carefully following safety practices, you can also make it a fun family activity.

Paint the bookshelf in vibrant colors or add playful designs to make it visually appealing for kids. This custom-made storage shelf provides a dedicated space for children to display and easily access their favorite books, fostering a lifelong love for reading and stories.

8. Bathroom Storage Unit

Bathroom Storage Unit

A bathroom storage unit is an essential component for keeping your bathroom organized and clutter-free. By creating a DIY bathroom storage unit, you can customize it to fit your space perfectly. You can map the dimensions of your bathroom to figure out where the unit can be built. Attach the plywood shelves to the frame, creating compartments for storing towels, toiletries, and other bathroom essentials.

You can also consider adding doors to your storage shelves, depending on your preferences. A DIY bathroom storage unit offers a practical and stylish solution for maximizing storage space and keeping your bathroom tidy and organized.

9. Shoe Rack

Shoe Rack

A shoe rack is an essential storage unit for keeping your footwear organized and easily accessible. Creating a DIY shoe rack using plywood and 2x4s is a practical and straightforward project. Start by measuring the available space and the number of shoes you want to accommodate. Assemble the frame using the 2x4s, and place them evenly, giving enough space for shoes.

Consider adding additional features like shoe dividers or a top shelf for extra storage. You can also beautify it by adding plants on top. A DIY shoe rack is a great storage shelf that ensures your shoes are neatly organized and ready to grab and go.

10. Vertical Shelves

Vertical Shelves

A vertical storage shelf is a versatile storage solution that maximizes space utilization while adding a stylish touch to any room. It also takes up less horizontal space. Creating a DIY vertical shelf can be a fun and engaging project. Begin by measuring the desired height and width of the shelf, considering the available space. Attach the plywood shelves to the vertical supports, creating multiple levels of storage.

A vertical shelf is perfect for organizing books, displaying decor items, or storing everyday essentials. It is great for displaying theirs vertically and adds sophistication to any room.

11. Criss-Cross Shelves

Criss-Cross Shelves

A criss-cross storage shelf is an extravagant and visually appealing storage solution that adds a lot of creativity to any room. It can be the focal point of your room while also serving as a functional display unit. Use the 2x4s to build a sturdy frame, incorporating criss-cross patterns for added structural integrity and aesthetic appeal. Attach the shelves to the frame in a criss-cross arrangement, creating a visually striking storage space.

A criss-cross shelf provides an excellent opportunity to showcase decorative items, books, or personal collections while making a stylish statement in your home. It is also a great way to showcase your unique personality and out-of-the-box thinking.

12. Lead Pipe Shelves

Lead Pipe Shelves

Lead pipe storage shelves are a unique and industry-inspired storage solution that can add a weathered and edgy touch to any space. Constructing these shelves involves using lead pipes and wooden boards to create a sturdy and stylish shelving unit. Make sure that the lead pipes are clean and corrosion free. Assemble them using fittings to create the desired shape and design. Place the wooden boards on top of the lead pipes to create the shelves.

Lead pipe shelves offer a distinctive and unconventional way to display books, plants, or decor items, creating a one-of-a-kind storage solution with an industrial charm.

13. Repurposed Crate Shelves

Repurposed Crate Shelves

If you are building your store shelf, you don’t even need to go out and buy wooden planks. By repurposing old wooden crates, you can create unique and customizable shelving units. Clean and sand them to remove any rough edges or splinters. Arrange the crates in your desired configuration, either vertically or horizontally. Secure them together using screws or brackets. Mount the crate shelves on the wall or stack them on the floor to create a freestanding unit.

These shelves provide versatile storage options for books, toys, or decorative items while adding a vintage and recycled aesthetic to your home. Embrace sustainability and creativity by transforming old crates into functional and stylish storage shelves.

14. Triangular Shelves

Triangular Shelves

Much like their hexagonal variants, triangular shelves are a unique and eye-catching storage solution that can add a modern and geometric element to any room. By using triangular shelves using, plywood, and 2x4s, you can create stylish and functional display units. Begin by cutting the plywood into triangular shapes for the shelves. Use 2x4s to build a sturdy frame, ensuring proper support and stability. Attach the plywood shelves to the frame, forming a triangular pattern.

With the help of these storage shelves, you can showcase small plants, books, or decorative items in a visually appealing way. They look best when built into the walls. These geometric shelves provide a contemporary storage solution that combines form and function effortlessly.

15. Media Console Shelves

Media Console Shelves

Media console shelves are functional units used to display electronic devices and media equipment. Constructing a DIY media console shelf allows you to create a customized unit that perfectly fits your needs and space. Start by measuring the dimensions required to accommodate your media devices, such as a television, game consoles, or stereo equipment. Attach the shelves at appropriate heights to accommodate different components. You can consider adding some buffer areas for cable management.

A DIY media console storage shelf provides an organized space for your media equipment, creating a sleek and clutter-free entertainment area in your home.

Conclusion

All in all, you must have realized that DIY storage shelves offer a cost-effective and fun solution to get rid of clutter and optimize storage space in your home. By utilizing readily available materials such as 2x4s and plywood, you can build sturdy and practical storage shelves that cater to your specific needs. The ideas we explored will provide a good starting point for your DIY journey, but the possibilities are truly endless.

Planning the task out is of utmost importance when it comes to building storage units. Measure your available space, gather the necessary tools and materials, and follow proper safety guidelines throughout the entire process. By embarking on this DIY project, you not only save money but also gain a sense of accomplishment and pride in creating something practical and aesthetically pleasing. So, roll up your sleeves, get your hands in action, and start building your DIY storage shelves today.

With a little effort and imagination, you’ll soon enjoy a clutter-free and organized home that reflects your unique personality.