Nowadays, having a lovely home is not enough to maintain a higher standard of living. You need to elevate your garden or courtyard to the next level with creative and innovative ideas. A pea gravel patio serves the same purpose. It’s one of the most popular ideas for maintaining a classy yet natural space in your courtyard. Do you wish to give your garden this makeover but are unsure where to begin? Or are you confused about why a garden patio is the right choice?
Be at ease since our guide compiles everything you need to know to build a DIY pea gravel patio. We have also mentioned this patio’s leverage over other types and some of the best creative ideas to experiment with or incorporate in your outdoors.
Read on to find out!
What is a Pea Gravel Patio?
Pea gravel is small smooth pebbles around the size of a pea. Hence the name. Making a pea gravel patio is the process of spreading these small stones across a surface to create a designated area.
It’s an inexpensive way of constructing a charming garden that elevates its essence. Once your project is completed, you can use the patio for any purpose.
For instance, you can create a seating area, set chairs for evening tea, or create a place of calm and relaxation amid your flowers and plants. Learn how to undertake a DIY project to build a patio of pea gravel in a few easy steps.
Nine Simple Steps to Build a Pea Gravel Patio
1. Select a Location
Selecting the right location for your patio is one of the most crucial aspects of the entire project. Since the average size of pea gravel is only 6 – 10 mm, it can pose hurdles if you don’t choose the correct spot.
The ground must be even wherever you select to install the patio. Otherwise, the gravel will slide down the slope. Also, heavy foot traffic can displace the stones easily due to their size. You can achieve the result by raking.
2. Mark the Perimeter
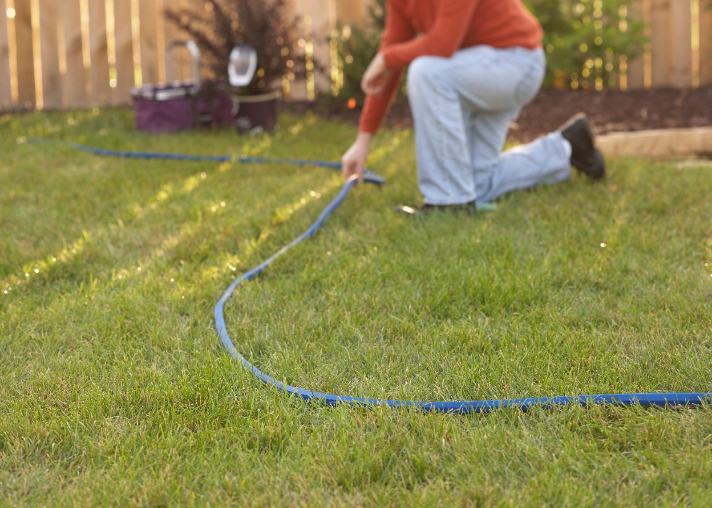
The next step is to mark the perimeter. The building process becomes easier once you demarcate the area where you want to build the patio. You can use any marking tools like chalk powder, spray paint, or plant stakes.
One crucial point to take into consideration is the cost. Pea gravel must be installed up to 3 inches deep in the ground. Consider the total cost of your project before you decide how big it must be.
3. Clear the Grass
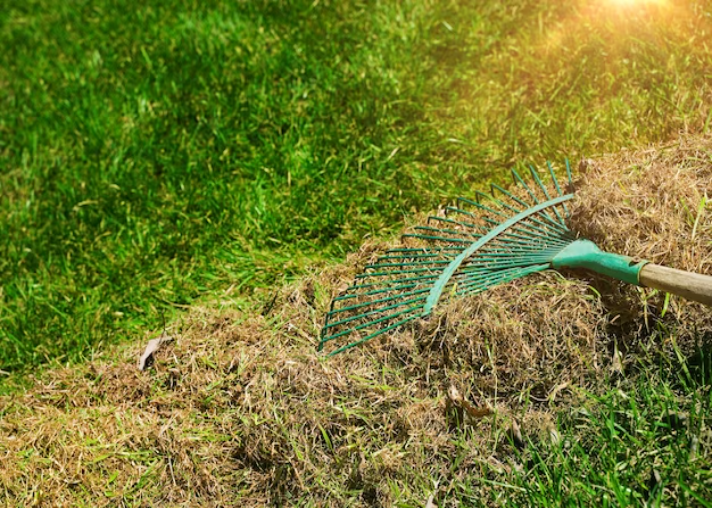
To start any gardening project, the first piece of advice is to always begin with a clean slate. You can use a straight edges shovel to remove the unnecessary grass in your desired location.
It helps you create an even ground level, maintain weed growth, make the edging process much easier, and give your patio a clean look. Once you clear away all the grass, you’ll have the assurance that it won’t grow through the rocks once it’s completed.
4. Dig the Ground
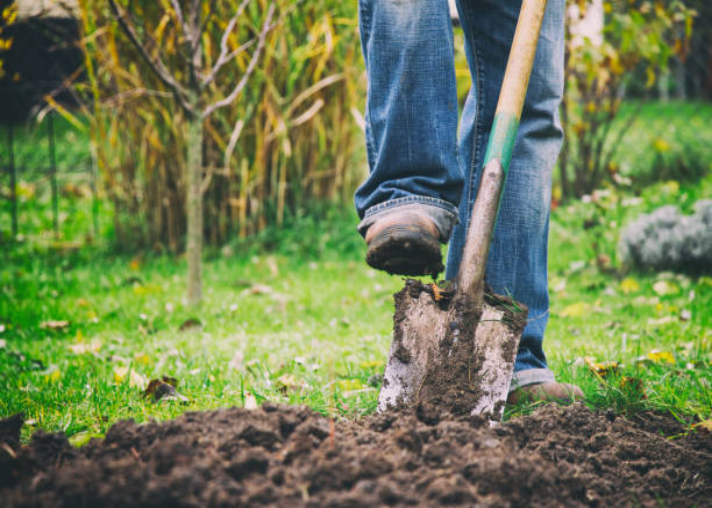
We advise a depth of approximately 3 inches for a classy and sleek patio look. If you dig less than that, the pebbles might mix with the soil, and you won’t achieve the desired look.
If it’s too deep, not only will you need more pea gravel than necessary, but the patio will also be too hard to walk on. It is also the optimum depth for proper water drainage, to increase stability, and to prevent puddling.
5. Install the Edging
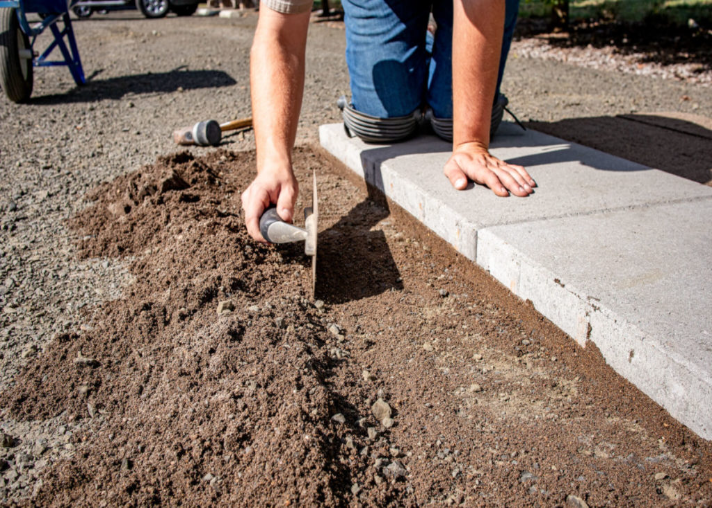
Are you planning to construct your patio in a garden amid grass? Then patio edging is our most important recommendation to you. It helps separate the pea gravel and keeps it restricted to the patio area.
You can use concrete pavers, pressure-treated lumbar, or even plastic paver edging. Use a chisel and hammer to cut them into shape and secure them in the proper place. Ensure the pavers are level with the ground to avoid tripping accidents.
6. Landscape Fabric
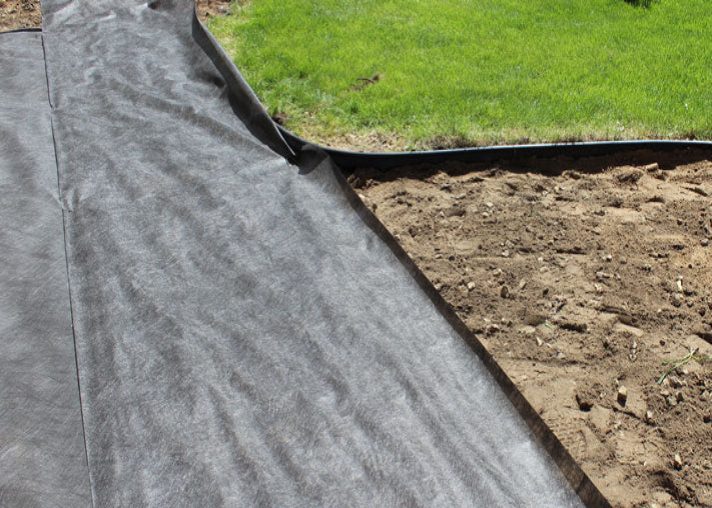
What is one of the biggest problems to solve while maintaining a pea gravel patio? When it rains, the pebbles could mix with the mud and create a mess that is quite difficult to clean.
Even if you clear the grass and weeds beforehand, there’s a chance that they could grow through the patio and disturb the look. How to fix these issues? Landscape fabric. Once you’ve dug the ground, roll out landscape fabric and secure it with stakes.
7. Fill the Pea Gravel
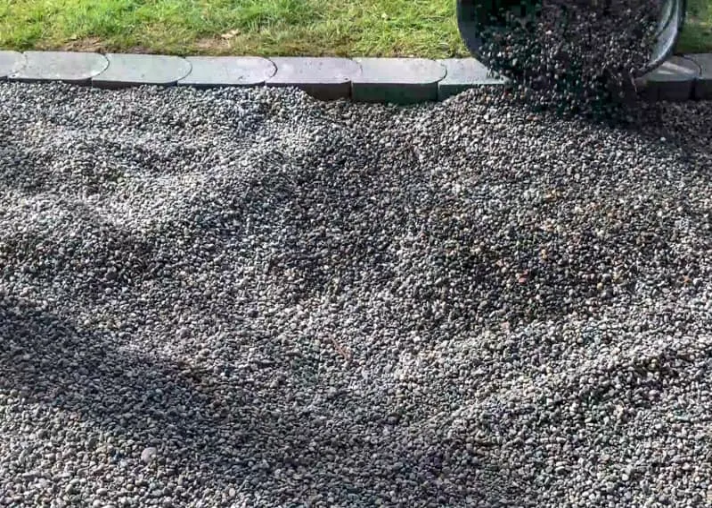
As you near the completion of your project, you might anticipate the next step. Order the pea gravel you chose for your patio and fill it in the created pit. You can use a wheelbarrow or dump cart to make your job easier.
Next, spread the rocks over the surface with a rake and even them out so that your pea gravel patio is evenly leveled. Lastly, use a tamper to stabilize and compact the gravel to increase its stability.
8. Innovate
Although we have compiled the guide to a basic pea gravel patio, this is merely the installation process. Feel free to innovate as much as you want and design it creatively.
To help you with the patio look, we have suggested some of the best pea gravel patio ideas that will give your courtyard the ultimate look it needs. You can use ours or incorporate them with any theme of yours.
9. Do I Need a Professional
Since a pea gravel patio is a very doable DIY project, you don’t necessarily need to call in a professional. You’re good to go as long as you’re willing to undertake the toiling work. But we have your answers if you’re still wondering when to call a professional.
You can hire an expert designer to analyze your garden and pick the most appropriate location to beautify your garden. Or you can hire assistants to manage the heavy loads of pea gravel.
Creative Pea Gravel Patio Ideas to Get You Started
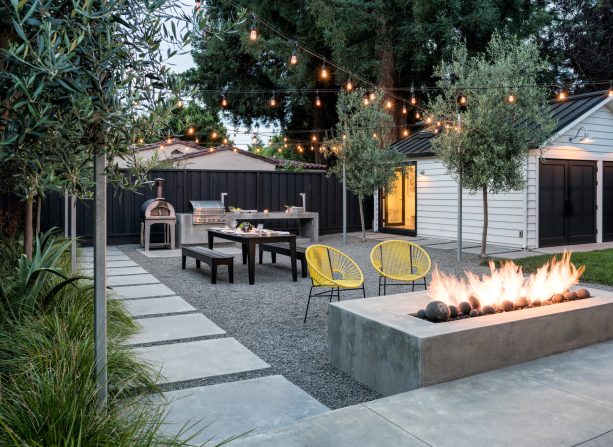
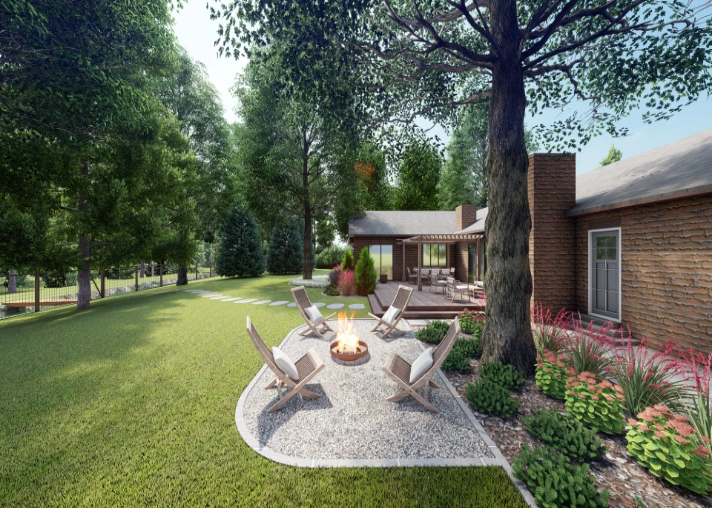
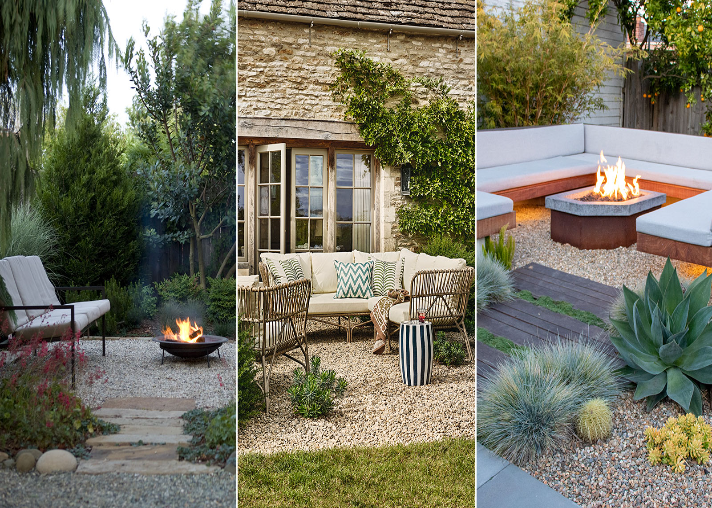
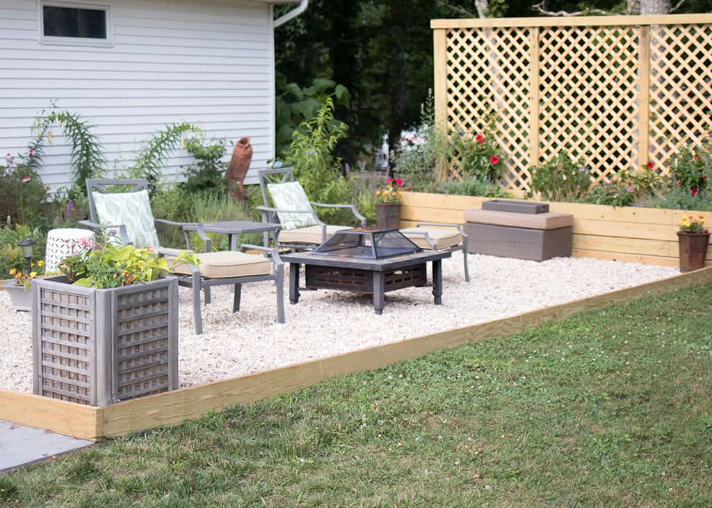
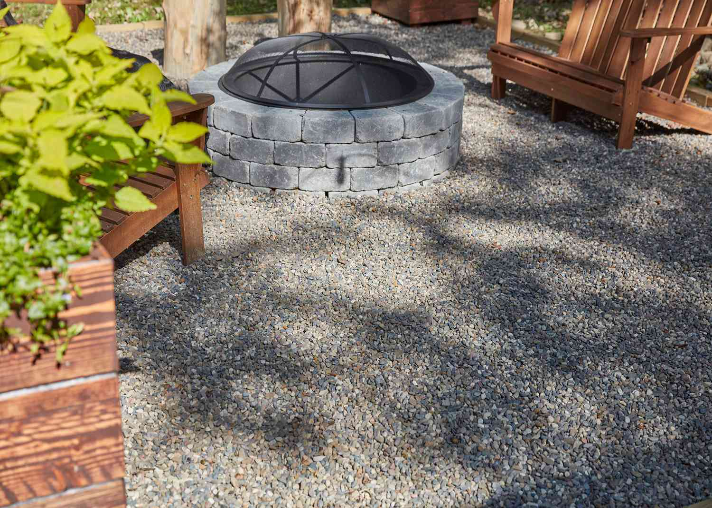
1. Firepit
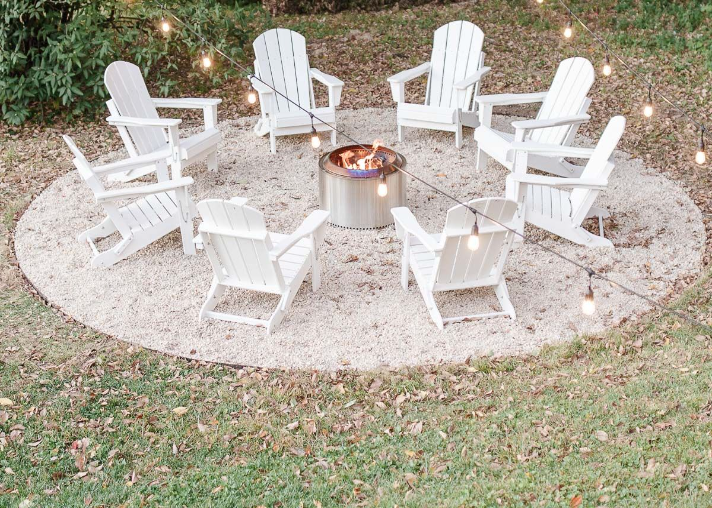
A firepit adds elegance and sophistication to your patio. Since pea gravel can typically sustain high temperatures, it is naturally safe to create a firepit. If you live in an area where winters are not too harsh and enjoy sitting outside at night, admiring the stars, installing a firepit over your patio is the best decision you can make. It also provides your outdoors with a warm, cozy, and comfortable vibe.
2. Benches
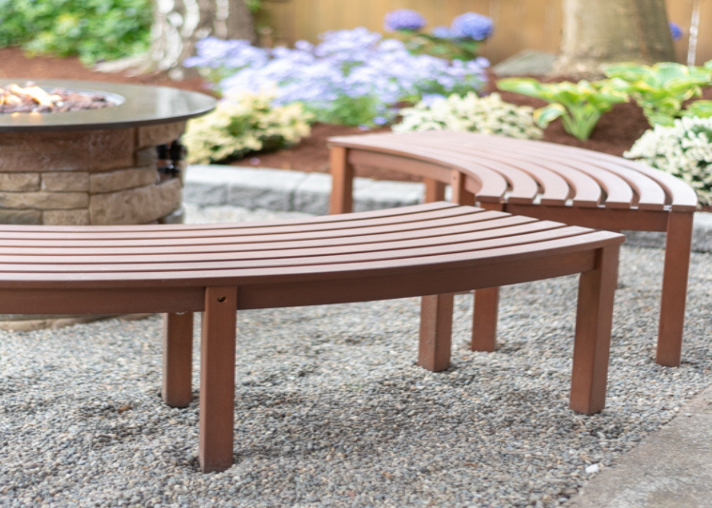
Once installed, people usually use a pea gravel patio for a seating area. Since the texture of the pea gravel is naturally appealing, it elevates your outdoor seating to the next level. Since it facilitates excellent drainage, you wouldn’t have to worry about rainwater accumulating in monsoons. However, it doesn’t necessarily have to be benched. You can install rocking chairs, coffee tables, or metal furniture. Try to be as creative as you can!
3. Outdoor Dining
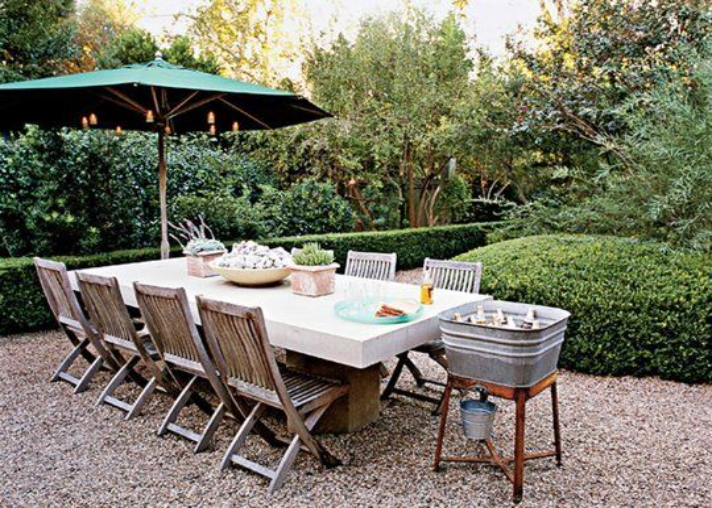
Many people thoroughly enjoy an outdoor dining and snacking experience. Not only is it fun, but it also includes a change from the monotone. It provides an opportunity to connect with nature and have your meals in a pleasing and aesthetic setting. If you’re someone who likes that, you can certainly design outdoor dining. However, it will go over the budget since you’ll have to install more furniture like a dining table, chairs, and further setup.
4. Alfresco Kitchen
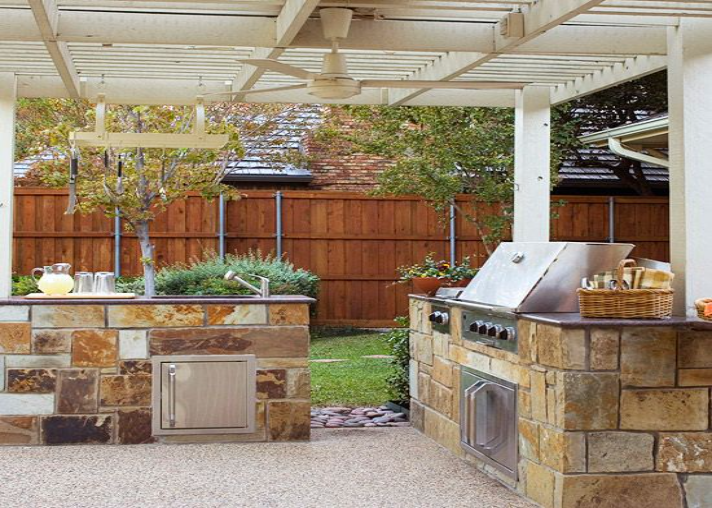
If you’ve designed outdoor dining, an alfresco kitchen is the ultimate next upgrade. A courtyard kitchen is the perfect choice to turn outdoor dining into a complete cooking experience. However, installing a kitchen will be expensive. Furthermore, you might have to upgrade to a shed for coverage to protect your setup from weather conditions. However, if you deeply enjoy cooking, an alfresco kitchen is well-suited for you and might be worth the splurge.
5. Transition Zone
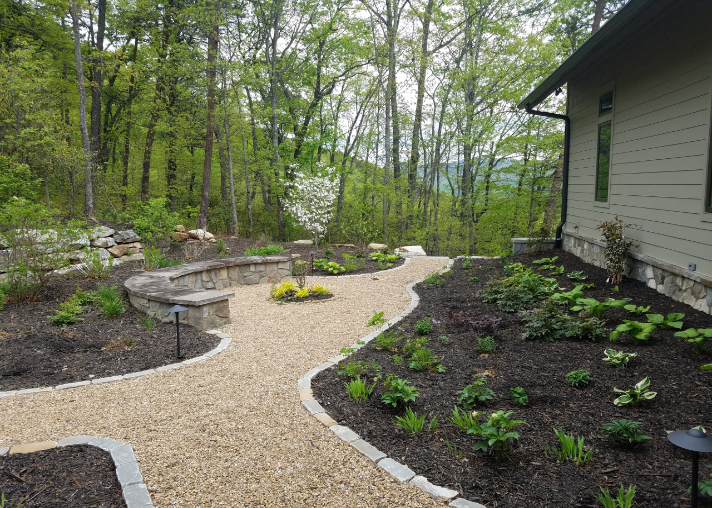
Several times, we constructed different sections in our courtyard designated for specific purposes. For instance, a seating area, a dining area, an outdoor kitchen, flower beds, or a garden path. It might become difficult to connect all these sections and create a common theme for your outdoors. A pea gravel patio can help you out with that. You can fill the connecting space with pea gravel and construct transition zones that will give a flow to your courtyard.
What to Consider Before Building a Pea Gravel Patio?
We begin our guide to making a patio by discussing the costs, materials, and equipment first since these are some of the crucial aspects you need to consider before starting a project.
1. Costs
One of the best advantages a pea gravel patio has over other types is its cost. They’re incredibly cheap to make, especially a DIY one, since it’s simple and durable as well. It will cost you between $7 and $20 per square foot for installation. It means that if your project is roughly 100 square feet, it would cost you an average of $1,350. As for a DIY project, you can expect to shell out $800 to $1,000 from start to end.
2. Equipment

Choosing the right equipment can bring about a significant difference in the pace of your project. The tools that you select affect the time and effort you input. A list of all the necessary equipment is compiled below.
- Measuring tape
- Shovel (preferably straight edge)
- Bow rake
- Wheelbarrow
- Hand sledge
- Drilling machine
- Border pavers
- Landscaping fabric
- Tamper
- Pea gravel
- Timber
Conclusion
A pea gravel patio is the perfect DIY project to enhance your outdoors over a weekend. The entire process can be simplified in easy steps to help you build a beautiful patio. First, select an even ground and mark the perimeter. Clear out any weeds or grass in the area to ensure they won’t grow through the rocks. Dig the ground 3 inches deep and even it out before you install the edging. Next, fill in the pea gravel and spread it evenly over the surface. Design it with any creative ideas you may have, and voila! Your perfect patio is ready!
While undertaking a patio project, you must take into consideration the costs and the maintenance. If your theme takes up plenty of space in the garden, the material costs will go up, and it will also take a higher budget to design and decorate it. What is your favorite patio design? Let us know in the comments section!
Frequently Asked Questions
Can You Use Pea Gravel for a Patio?
We can use pea gravel for constructing a patio. Pea gravel is smaller than other types of gravel, and it has several features that make it a worthy material for a patio. It is also easier to install and much more economical than other types.
Are There Any Disadvantages to a Pea Gravel Patio?
A pea gravel patio is quite inexpensive to install and simple to maintain over time. However, it has a few drawbacks as well. For instance, weeds or grass could grow through the rocks if installed improperly. If the ground isn’t dug deep enough and the pebbles aren’t scattered evenly, your furniture could sink into the gravel.
How Deep Should a Patio Made of Pea Gravel Be?
Ideally, a patio constructed from pea gravel should be two to three inches deep. If it’s deeper than that, it will be difficult to walk on it. On the other hand, if it is not deep enough, the patio won’t be stable to hold your furniture, and the rocks might scatter out of the designated area.
Should I Put Sand Under Pea Gravel?
Typically, landscape fabric is good enough to put under the pea gravel. However, you can use other alternatives like crushed rock, sand, or a combination of both. It increases the stability of the patio and separates the pea gravel from the soil, lest it creates a muddy mess during rain.