Decoupage originates from the French word ‘decouper,’ which means cutting out from something. The art of decoupage originated in East Siberia, where it was used to decorate tombs.
It became popular all over Europe during the 18th century, and the art form was revived in the United States during the 1960s. Using the decoupage technique, boxes, wastebins, lampshades, chests, and trays were decorated in olden times.
If you have wanted to learn the art form of decoupage all along, this overview will give you everything you need to nail this art form and design your furniture by yourself. One advantage of Decoupage is that you can easily rectify your mistakes. It is one of the easiest techniques to add a personal touch to any piece of wood or furniture.
Steps to Decoupage Wood Furniture
Well, the steps to decoupage different kinds of surfaces might vary slightly; however, here, we will enumerate the steps for wood furniture.
1. Prep the Wood Surface and Open All Hardware
First and foremost, you have to clean the furniture or wood piece that you have chosen for decoupaging. Clean the dirt with a cloth. Followed by this, spray some water and dry it out.
For old wood furniture, you can skip the water part and just use a good cleansing agent, as water might damage the wood.
The next essential step is to remove all the hardware with the help of a screwdriver and a pry bar. Make sure you remove the nails and screws carefully without hurting yourself or damaging the dated furniture.
You can remove the drawer pull with a screwdriver and set aside the screws for fitting them after decoupaging.
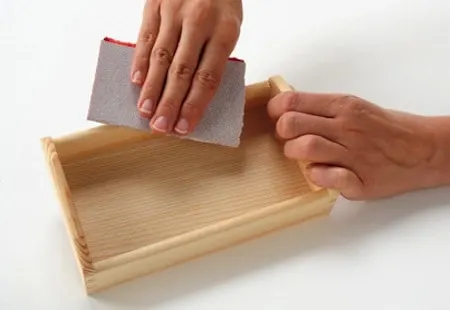
2. Sand the Surface
Next, use light or medium grit sandpaper to smooth the wood surface. You can use a damp or dry cloth to wipe off the sand dust from the wooden surface. Keep in mind that you only need to sand the surface slightly to make it smooth and remove air bubbles.
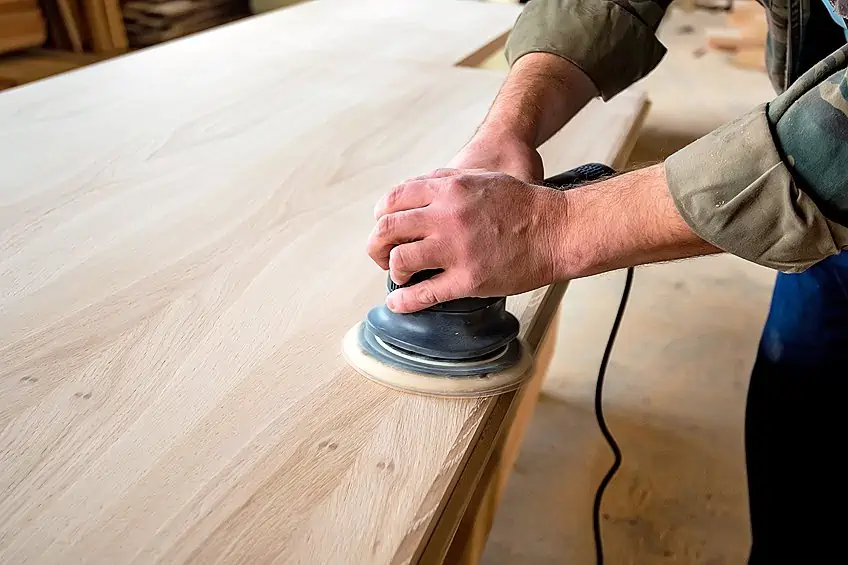
But if you have to sand a large piece of furniture, you may need to use a palm grip electric sander or orbital sander to remove the old paint and finish from all corners. This is an essential step, as without it, the decoupage design will chip off over time.
3. Fill the Gaps
When you sand old pieces, you may get some dents, gaps, and holes that you have to deal with first before moving ahead with the subsequent steps. This step is essential to get an even surface for your furniture.
You can use a wood filler like Dixie Belle Mud, available in black, brown, and white colors. A wood filler will help you smoothen out the surface by filling surface imperfections, holes, and dents.
4. Applying Primer
Although priming is not mandatory, priming the surface makes it smooth and aids in better adhesion of the paint and decoupaging material. Primer also reduces the amount of paint that you need to apply to the furniture. Priming also helps to cover darker colors. Primers usually offer a flat finish, but if you want your final finish to be glossy, then you have to look for a primer offering a glossy finish.
You can use an all-purpose gesso or something like a boss primer. Another option that you have is to use Rust-Oleum Quartz Universal Bonding Primer. You can get gesso in white or black, and if you are going with Boss Primer, then you will get them in white, grey, and clear composition. If you plan to use dark paint, go with a darker primer color, and if you want to apply a light-colored primer, then use a white primer. After the application of primer, you can let it air dry for a few hours.
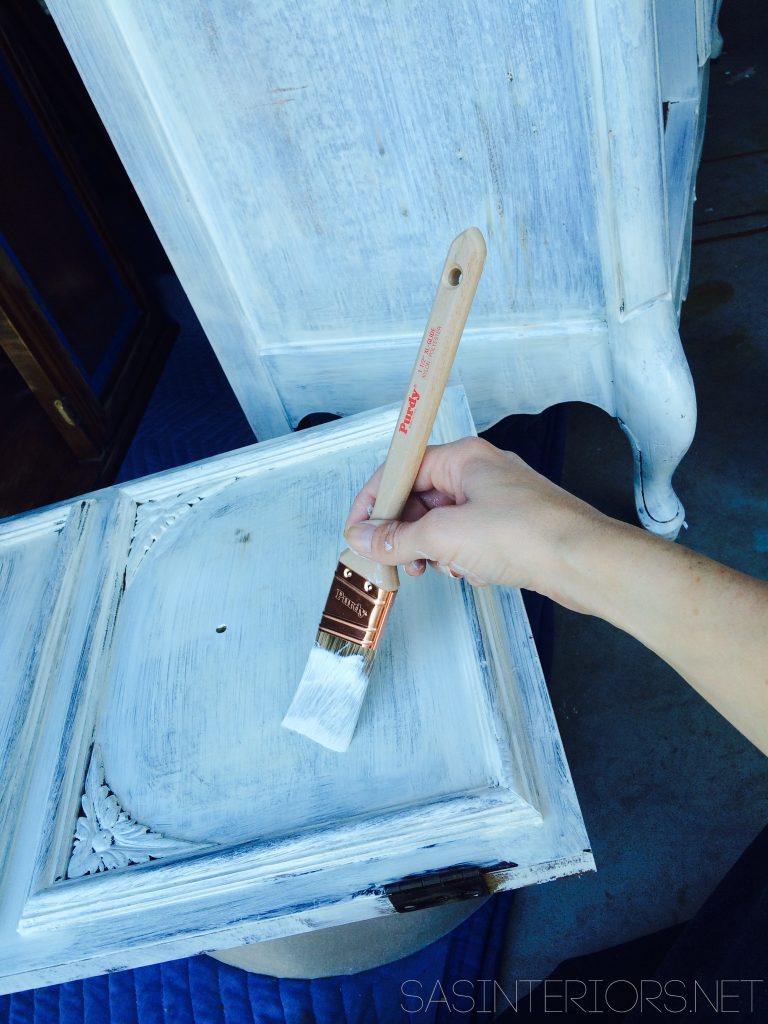
5. Paint the Surface
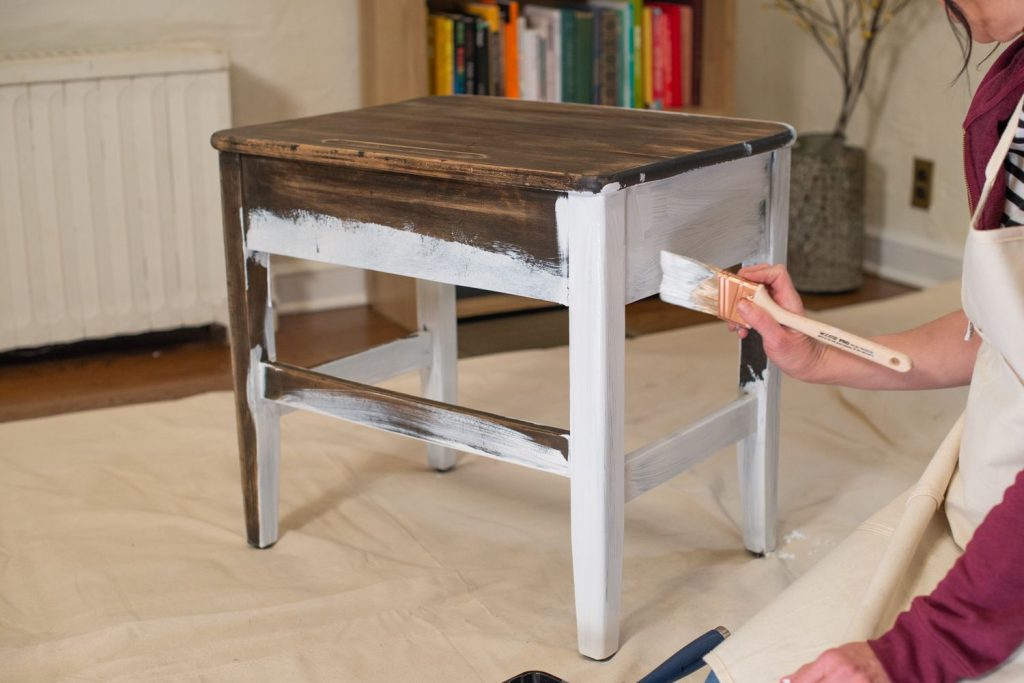
Painting is the next step. We wouldn’t recommend using latex paint because it doesn’t do well with decoupaging material. Latex paints have resulted in bubbling, blistering, and chipping off of decoupaging material.
Acrylics are widely preferred for decoupaging wood furniture; however, you also use a range of other options, like chalk paint, spray paint, and even water-based stains. Once you have painted the piece of furniture, you can allow it to dry for 24 hours before initiating decoupaging.
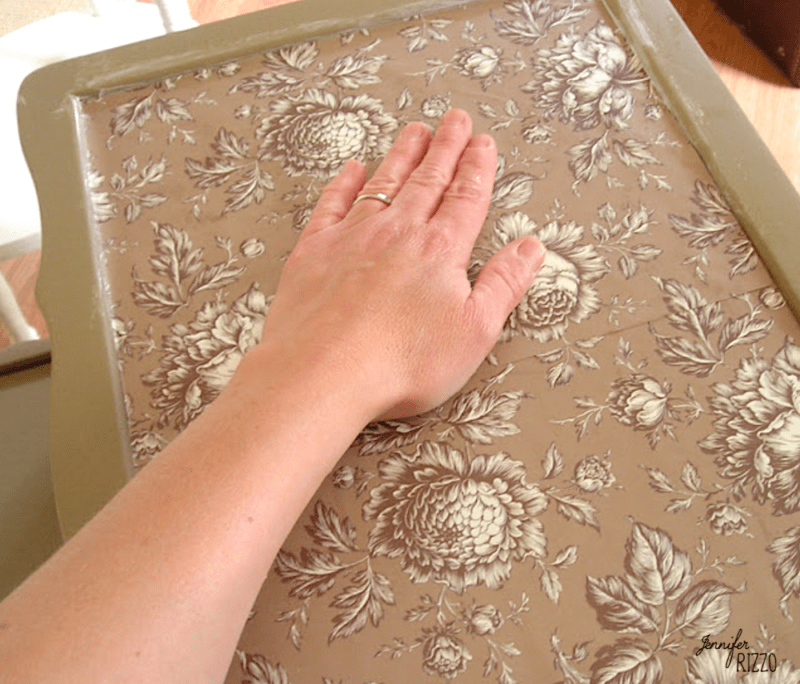
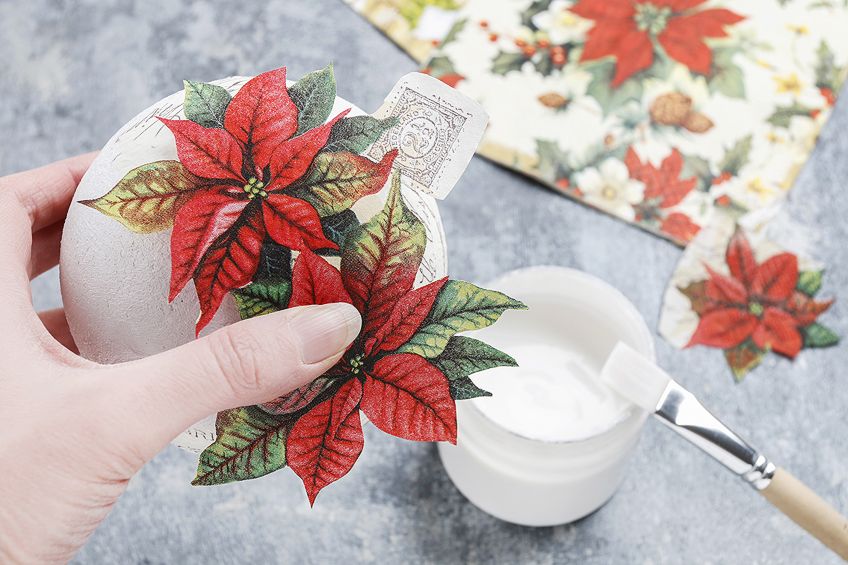
6. Decoupage Furniture
As mentioned above, decoupaging can be done with a range of materials. But if you are a beginner, you can stick to using specialized decoupage paper. Ricepaper is specially designed to adhere to the wood furniture surface over a long period.
- You need to cut out the decoupage designs according to the proper sizes and shapes.
- Then, using a brush, apply Mod Podge on the part of the furniture where you want to stick the design.
- Now paste the design on the exact position and even it out to remove creases and bubbles.
- Once the design is in place, you can apply another layer of Mod Podge over it and leave it to dry. You can repeat this process up to three times, waiting 15-20 minutes each time between applying consecutive layers.
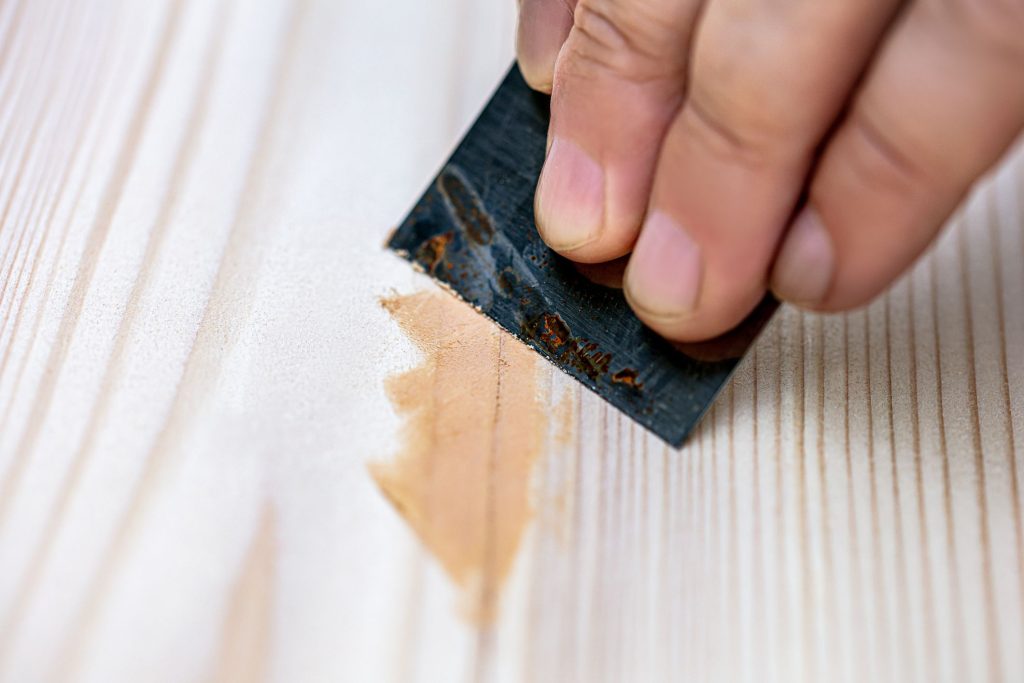
- Ultimately, you can use fine-grit sandpaper to smooth out the surface.
7. Protect the Topcoat
Last, but not least, use a clear or transparent topcoat sealer above the pasted designs on the furniture. You can apply one coat first, let it dry, and then apply another coat.
Protecting the topcoat is essential to retain the design for ages. There are different kinds of topcoat sealants available. You can go with a transparent sealant like Silicone Clear Sealant.
Though not mandatory, you can replace the old hardware of the furniture, like knobs and pulls, at this stage to match the new design.
Types of Finish You Desire on Wood
Your choice of decoupage glue will vary according to the type of finish you desire on the wood furniture.
- Matte – Flat finish is great for wood when your decoupaging medium is napkins or scrapbook paper.
- Hard coat – If you need a strong and durable finish, the hard coating will be the best option to go for, and it is ideal for furniture and extensively used objects.
- Satin – This is another great choice for wood furniture projects and is similar to a matt finish but is smoother and softer.
- Glossy – If you are using photos as decoupaging material, you can go for a glossy finish.
- Outdoor – This is ideal for those objects that will be kept outside and will be exposed to heat, dust, and rain.
- Dishwasher safe – If you are decoupaging porcelain plates and cups, you want to keep them dishwasher safe.
Now for most of the above finishes, Mod Podge will be the ideal decoupage glue as it is quite a versatile material.
Pros and Cons of Decoupage
Some benefits and drawbacks of decoupaging wood furniture are listed below.
Advantages of Decoupaging
- Beautifies a piece of furniture and converts ordinary objects into remarkable pieces.
- Decoupaging is quite cheap as the materials needed for it are available in abundance and are inexpensive.
- With the advancement in technology, you can use three-dimensional images and make your furniture pieces unique.
- When it comes to gifting something special to your loved ones, you can make a gift for them using the decoupage technique.
- You can open a small-scale business of your own and create a channel of passive income if you love doing this form of art always.
- Decoupaging increases the value of furniture should you ever decide to sell them.
- One of the cheapest ways to refurbish old furniture is to decoupage them to make them aesthetically pleasing and bring them back to life.
- If you are looking to take up a new hobby, you can take up decoupaging, as it will boost your creativity and engage you completely.
- You will never run out of designs, as there are plenty of options available.
Disadvantages of Decoupaging
- Decoupaging requires a significant amount of time and patience that you have to spend to create one masterpiece.
- You need to learn the art form properly to design furniture pieces flawlessly, especially if you are planning to use the art form for professional gains.
- Requires delicate handling to maintain the piece of furniture over a long period.
Conclusion
So, here we will round up on the decoupage technique. Our blog has already taken you through the detailed steps needed to decoupage furniture and even smaller items like mason jars.
Decoupage is a fun form of decorating and embellishing your otherwise plain furniture. Decoupage is not limited to wood alone but can also be done on glass, clay items, and plastic. Decoupage can transform dull furniture and smaller objects like boxes, chests, and lampshades into glamorous pieces.
It is fairly easy for beginners and can be done with things readily available around you. It is a great way of recycling older items and refurbishing old furniture. You can use a range of items to get the ultimate finish as per your desire.
Do drop in your suggestions and share your thoughts on decoupaging wood furniture in the comments section, and do not forget to subscribe to our blog to learn about more interesting home decor DIY tutorials.
Frequently Asked Questions
What Do You Need to Decoupage Wood?
You can use fabric, old book pages, newspapers, magazines, laser-printed photos, napkins, and specially designed decoupage paper to decoupage wood furniture. Wooden tissue box, acrylic paint, clear acrylic sealer, sandpaper, mod podge, and plastic wrap are other things you will need to decoupage wood.
Can Decoupage Be Done on Wood?
Yes, decoupage is an age-old art form that can be done on wood furniture, glass, and other materials. There are detailed steps laid down in the above blog that will help you decoupage your wood furniture easily all by yourself.
Who Invented Decoupage?
Decoupage has a long history and is thought to have originated in Siberia or the Eastern part of the world, which was later carried to Europe. Italy was the first center where decoupage art flourished in Europe, followed by France and the rest of Europe. This art form was rekindled in the United States during the 1960s.