A great deal of time is spent in the kitchen preparing delicious food for your family. But if you have been experiencing pain in your shoulders, neck, arms, or legs after a long episode of cooking, one reason might be your posture.
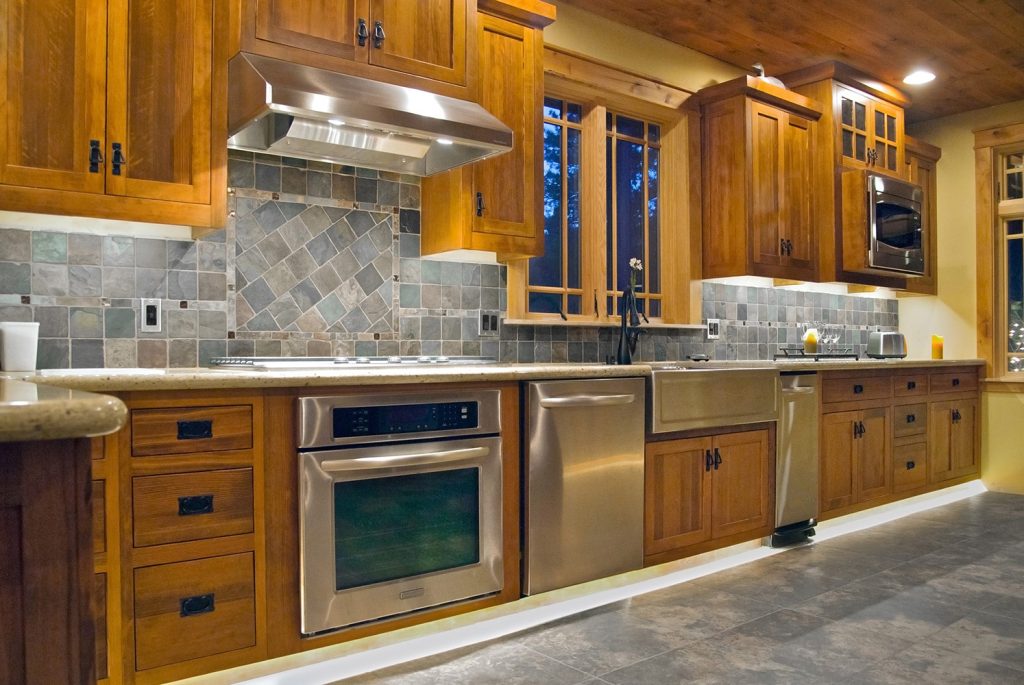
If there is no space at the bottom of the kitchen cabinet to rest your feet, bad posture is unavoidable, as you have to bend or hunch over the cabinet as you work.
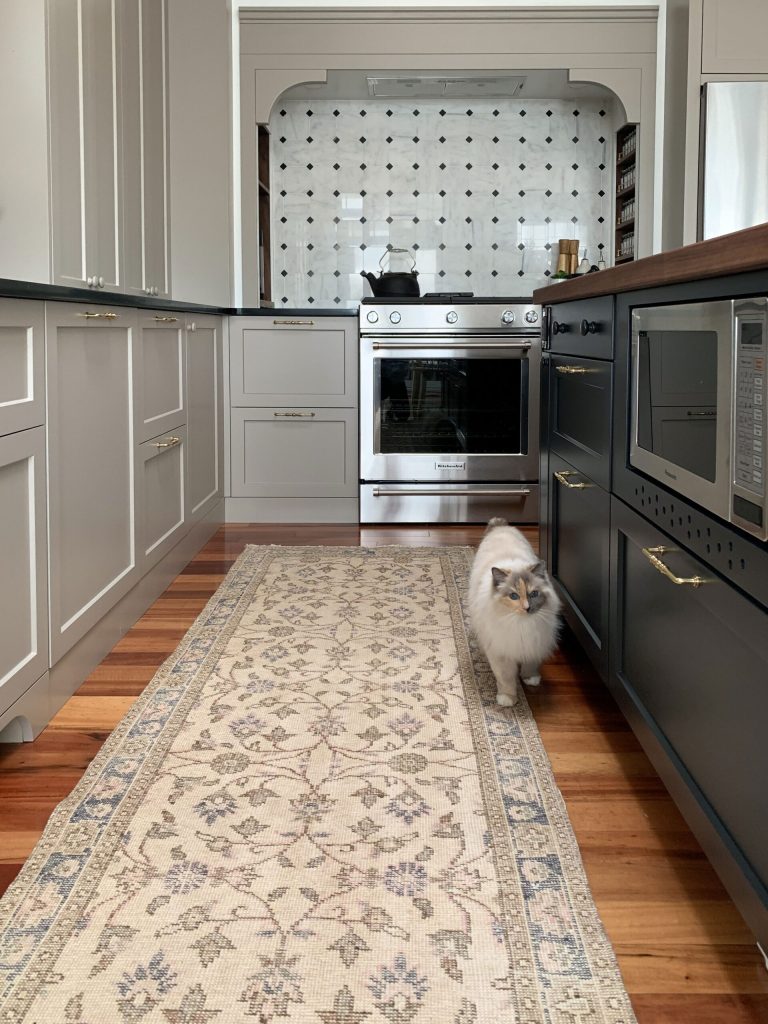
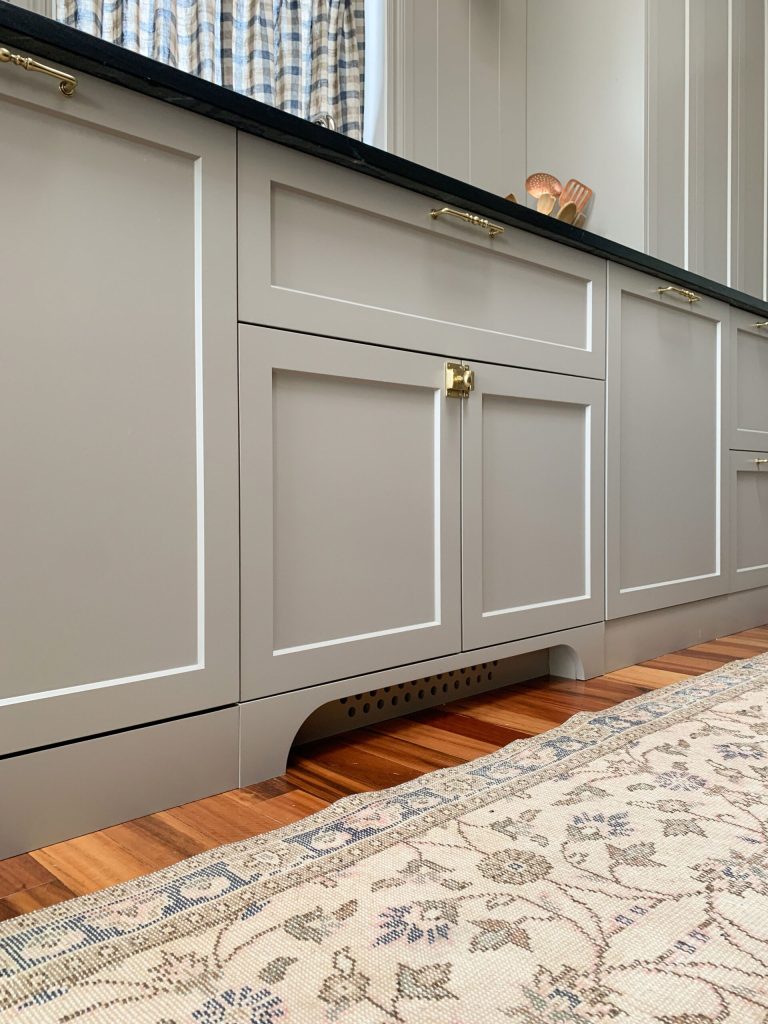
A cabinet toe kick offers space at the bottom of your cabinets for you to keep your feet and stand comfortably when you cook/clean. This valuable addition to your kitchen will enhance the looks of your cabinets and helps you maintain a good posture.
In this simple beginner’s guide, different dimensions and choices are mentioned so you can easily install cabinet toe kicks.
Why Do You Need Toe Kicks?
Without toe kicks, you cannot stand as close to the counter, and this will make you lean or bend over the cabinets. This puts strain on your neck, arms, legs, etc., and is not ideal in the long run. This is especially so if you have to stand there for long periods of time. Installing a toe kick leaves space for your feet so that you can stand closer and do the work.
In addition, it can be used as a storage space, heater, or can have ambient lighting. This simple idea produces huge benefits. Although there are no legal rules or measurements to have cabinet toe kicks, its dimensions are something that interior designers have reached a consensus on.
What Are the Possible Dimensions of a Cabinet Toe Kick Can Have?
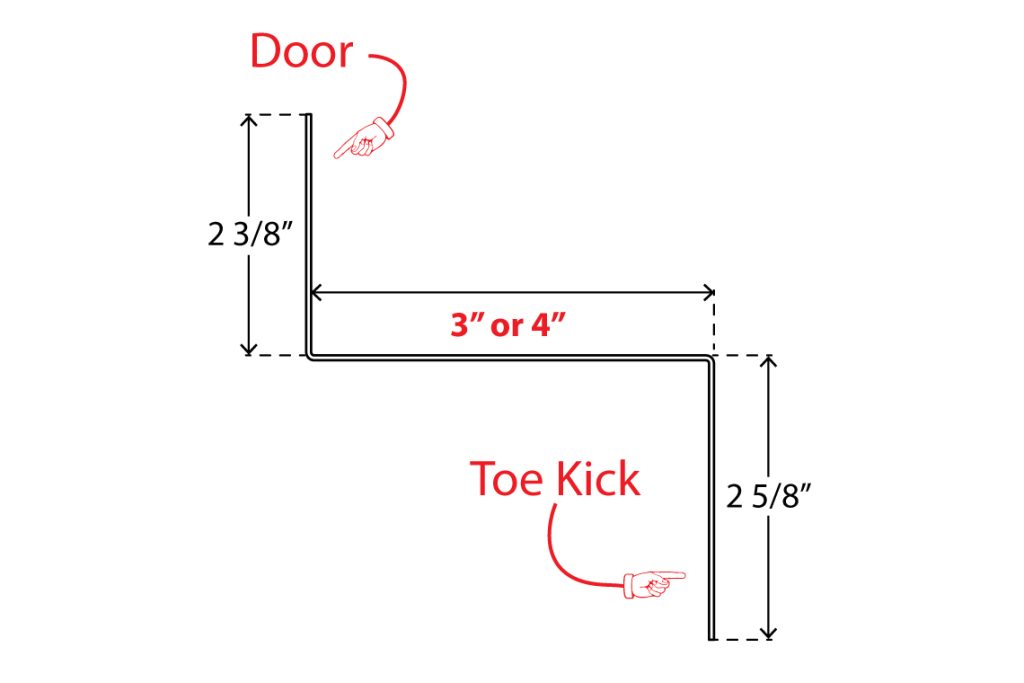
There are standard dimensions that are commonly used across the world. These standard dimensions are 4 inches in height and about 3 inches in depth. These are ideal measurements that have proven to be effective as they offer adequate space for your toes and also don’t reduce the storage space in your cabinet. If toe kicks are lesser than the height and depth mentioned, they will not be ergonomic. However, some toe kicks may vary slightly in height and depth, and there might be specific reasons behind this design choice.
Now, Where to Have Toe Kicks?
If you don’t want toe kicks throughout the kitchen, having them in some locations or cabinets is also a good choice. The thumb rule is to install cabinet toe kicks wherever a person would be required to stand for a long time, for example, under the sink, near the stove, on the counter where cooking preparations would be made, etc.
There aren’t any drawbacks to installing toe kicks, so you can also have them throughout the kitchen. This may affect the aesthetics of your kitchen depending on the style of toe kicks you choose.
Types of Cabinet Toe Kick
A couple of different styles of toe kicks serve different purposes (e.g., decorative). The most common ones are listed below.
1. Flush
They don’t have a lot of space for the feet and usually are installed to improve the looks of the cabinets. This may be the most difficult to clean as there is very little space, and it is quite difficult to install also. However, it looks more cohesive and modern, and that is one reason why this style is still preferred.
2. Arched Valence
There is a space for the feet as the toe kick is arched. This type may be better suited for bedroom cabinets as they look stylish. However, they may not be ideal for kitchen use because the arch may not be that big. This might also be difficult to install.
3. Furniture Feet
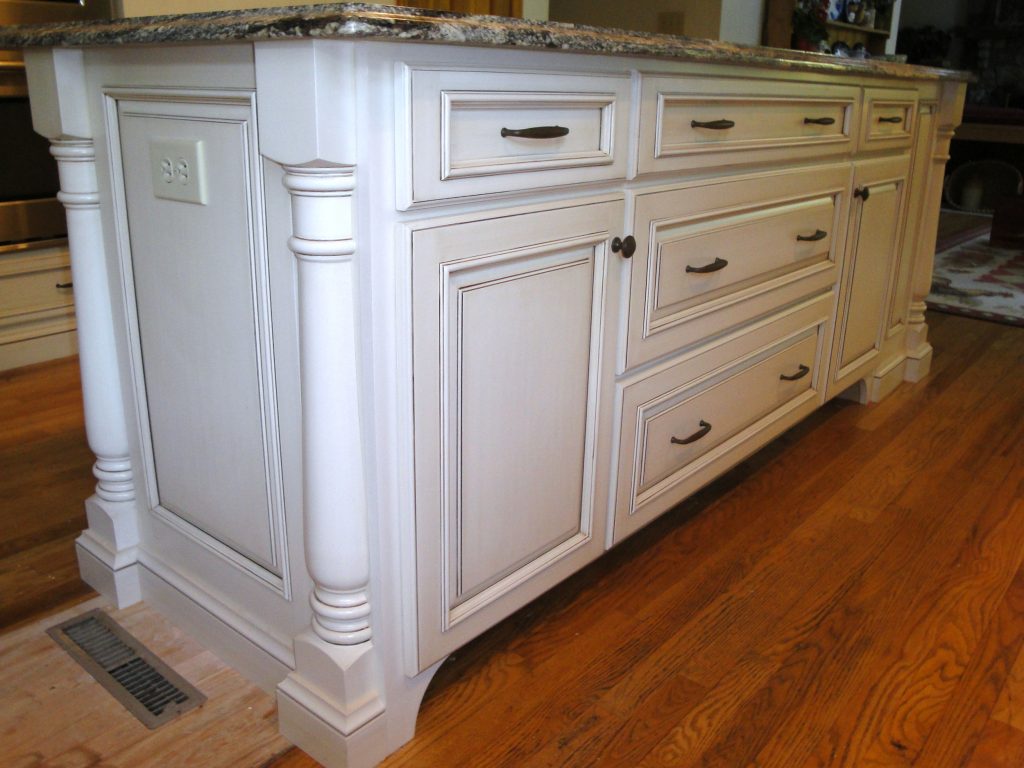
These are small structures that are added in the corners and provide space for feet as well. This type of toe kick makes your cabinets look like they are floating. They look more vintage and elegant but may not be as durable as the other types because four legs carry the entire weight of the cabinet.
Materials for Making a Cabinet Toe Kick
The most commonly used materials are paint grade 3/4th of an inch plywood or laminate wood. They may also be covered with plastic, metal, or another strip of wood so that the toe kick covers the area underneath the cabinet. This ensures that dust, small cutlery, food bits, pet hair, etc., doesn’t get collected underneath the cabinet as well.
This is also an advantage of adding cabinet toe kicks. You can alternatively use the same material as the cabinet for your toe kick also. Regardless of the material, you can paint it so that it is coherent and goes well with the rest of the cabinets.
How to Install a Cabinet Toe Kick?
Although it is a simple process, installing cabinet toe kicks require some expertise and knowledge. You will need materials such as construction adhesive, measuring tape, a nail gun, a hammer, etc.
Step 1
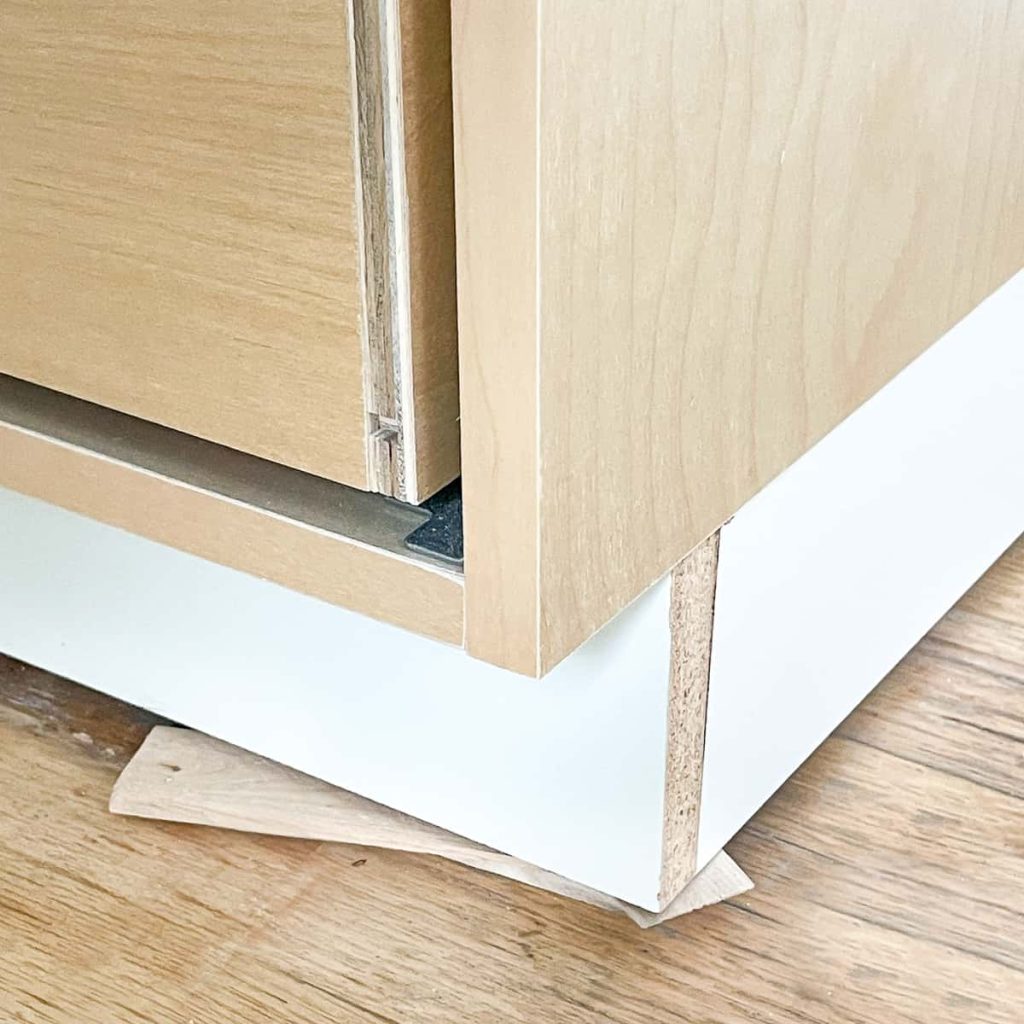
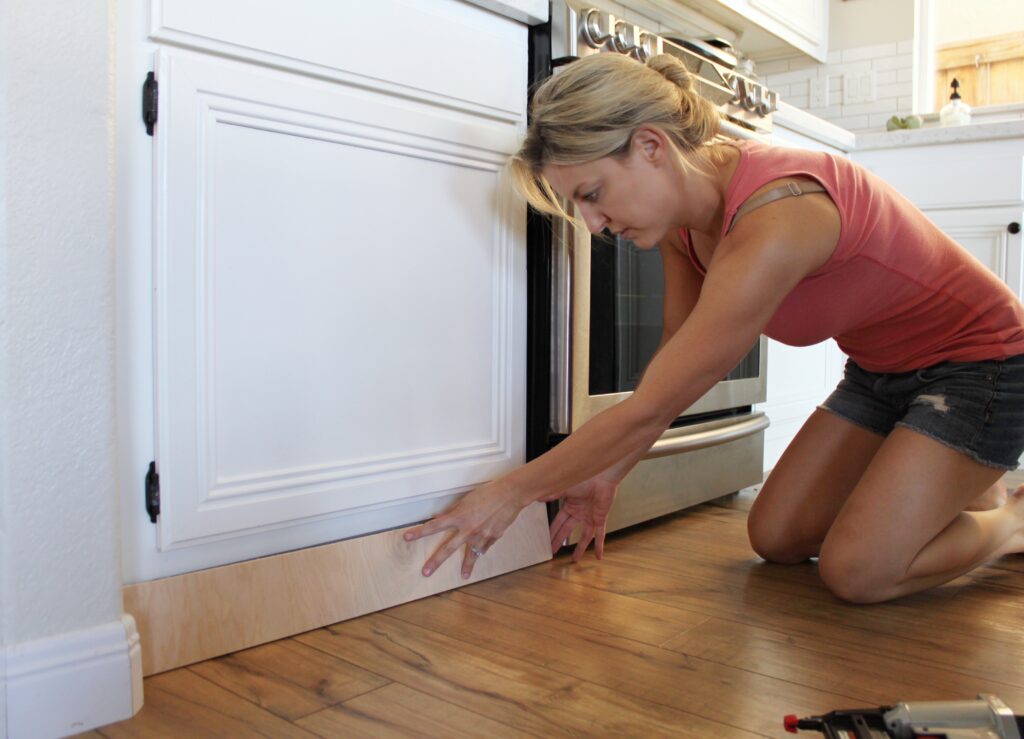
Measure the height and depth of the toe kick required. While purchasing, make sure to choose a toe kickboard that is of the correct height because if it is too tall, it has to be trimmed, and if it is small, it will leave an empty space. Make sure to buy some extra boards so that if you make a mistake, you can make up for it.
Step 2
Paint the toe kickboards to match the color of your cabinets.
Step 3
Cut the toe kickboard according to the required sizes. Measure the longest base cabinet length and mark this on the back of the toe kickboard. You can use a saw to cut the required pieces. If you are cutting all the toe kick boards at once, you need to be organized about it. You can use sticky notes to write which toe kick board goes where or simply keep the boards on top of the cabinet where they are meant to be attached. Do a rough fit check and make the adjustments if required.
Step 4
You now need to attach the measured toe kickboard to the cabinet. There are different ways to do this, such as using a nail gun, a hammer to attach the nails, or an adhesive, and you can choose a method based on your preference. You can use finishing nails if you don’t want the nails to show. If the hole is still there, use putty (sealing material) that matches the color of your cabinet. Or you can apply adhesive on top of the toe kickboard and attach this also. If, in some places, the toe kicks don’t fit well. You can trim the wood at the top of the board.
Step 5
Repeat the attaching process to every cabinet, and you’re done!
Cabinet Toe Kick Ideas and Options
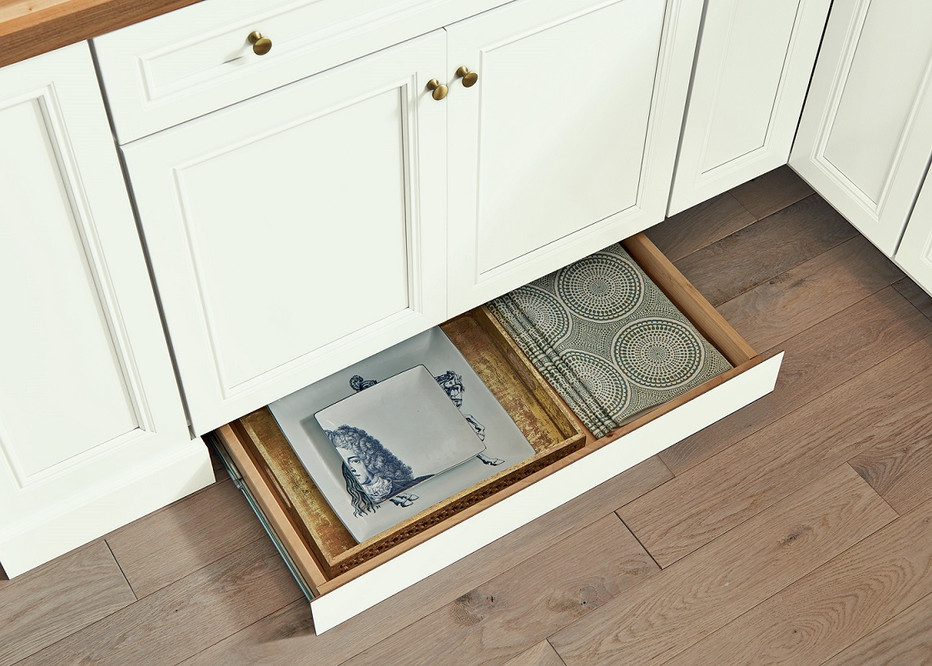
Instead of leaving the inside of the toe kick empty, you can think of innovative ways to use this space. Some of the most popular ideas are mentioned for you to consider.
- Heaters – The heating vent can be connected to a hole in the toe kick, and this can be covered with a plate. If no duct connects the two, the entire cabinet may get heated up, which is why the duct is needed.
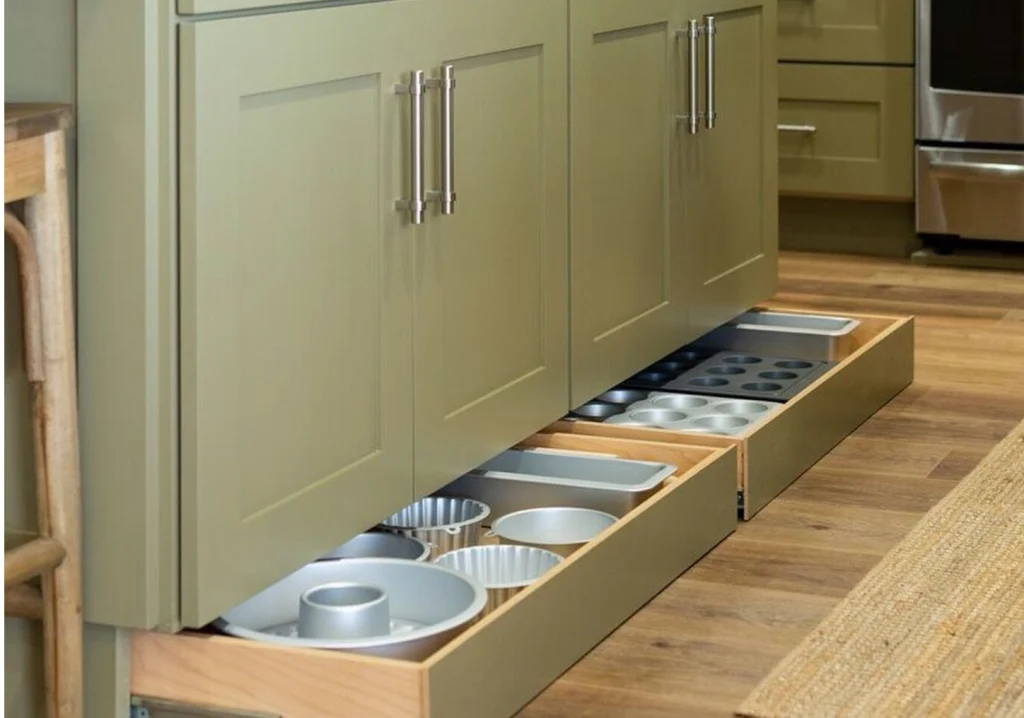
- Drawers – Especially for small kitchens, this is a good idea. You can install small drawers for that extra storage space.
- Toe kick lighting – A subtle light that lines the toe kick just below the cabinet will brighten up the kitchen in a second! This will improve the ambiance of the space, be it a kitchen or bedroom.
Final Thoughts
Cabinet toe kicks are a useful addition to your kitchen and rooms because they leave space at the base for you to place your feet. This allows you to work comfortably without leaning over for long periods. In addition, it prevents dust and other materials from being collected underneath the cabinets.
These are both functional and aesthetic. You can choose to install toe kicks only in spaces where you will stand and work, such as near the sink, stove, etc. There are different materials used to make toe kicks, but wood is primarily used.
Although installing toe kicks can be challenging, with a few steps, you can improve the quality of time you spend in the kitchen.
Frequently Asked Questions
What is a Cabinet Toe Kick, and is It Compulsory to Have It?
Toe kicks are attached at the bottom of the cabinets, and they act as a space for you to keep your feet close to the cabinet as you work. It is not necessary to add toe kicks; however, if you don’t add them, then you might experience strain on your neck, arms, and legs as you will be leaning over uncomfortably for a long time.
How to Choose the Best Cabinet Toe Kick?
It depends on your purpose. In a kitchen, you will have cabinets under the sink, stove, etc., since you will need to stand there for a long time to do dishes or cook. Ideally, you need to have a standard (recessed) toe kick. This will help you move easily. If you choose to have an arched valence-style toe kick, you cannot move about easily. However, this and the furniture feet-toe kicks look gorgeous for bedroom cabinets!
How to Install a Cabinet Toe Kick?
Measure the length of the cabinet and cut the toe kickboards accordingly. Make sure to mark which board fits which cabinet. Do a rough check to see if they fit the cabinet, and if they don’t fit, trim accordingly. Paint the boards so that they look similar to the cabinet. You can attach the boards using nails or adhesive. Then fill in the remaining space with colored putty. You can follow the same steps for the remaining cabinets.