Several years ago when crows kept stealing the vegetable seedlings from our gardens before they even had a chance to grow, I asked my husband for a simple, no-kill solution. His remedy was centuries old, but just as effective as ever – a scarecrow. 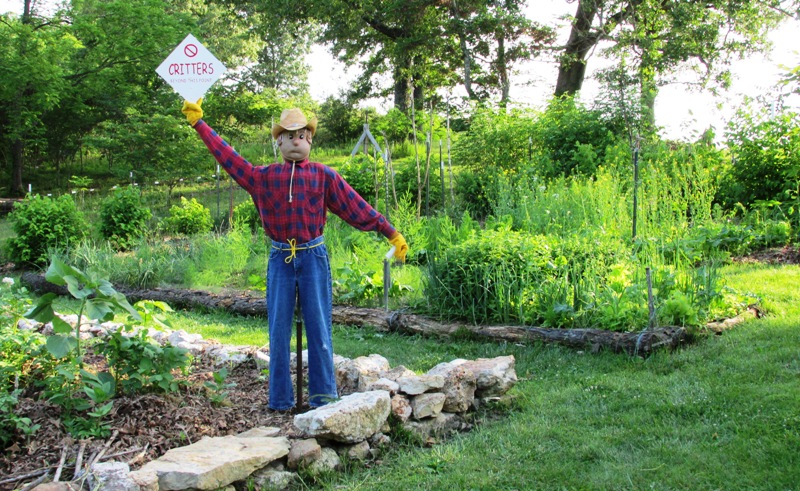
When I heard the racket coming from his shop, however, I knew this bird-scarer would not be a couple of 2x4s hammered together. In no time, he came out smiling with a man-sized, lifelike mannequin that would frighten the daylights out of any critter contemplating sprouts for dinner. Now, that is how to make a scarecrow.
 Clothed and with his pantyhose head in place, our scarecrow took on a personality, which of course, warranted a name. We called him “Woody.” For years he kept the squirrels, rabbits, deer and crows at bay. If you have never built one, you will be surprised at the fun of making a scarecrow and how effective they are at keeping aboveground pests from pilfering your produce.
My inventive husband, always looking for ways to improve perfection, decided to remake Woody recently, adding more motion and sound. We now have “Woody the Action Scarecrow,” who swivels like a weather vane and swings wind chimes to startle the stealthiest crop robbers.
A scarecrow that moves and makes noise
 Not only does Woody stand guard day and night looking ominous, he turns in the wind with a warning sign as a sail. Since we do actually adore and appreciate the furry and feathered creatures that surround us, the sign instructs them to simply stay outside of our garden area. For the critters that cannot read, owl eyes on the sign backside illustrate the message clearly. Dangling from Woody’s other hand, chimes made of electrical conduit ring like old school bells in the slightest breeze.
My husband used scrap PVC pipe and fittings, woven wire, plywood and metal pipe to fashion this new action scarecrow. Meanwhile, I assembled Woody’s head of pantyhose, pillow innards, buttons and three-tone yarn. Of course, a scarecrow can be made of any materials on hand, even something as simple as a plastic bag tied to a stick will work – for a while. My husband’s version, though, has proven to last and be effective for years. It is also lightweight and easy to move around the garden to keep animals on alert. Plus it’s an awfully cute addition to the backyard.
How to make a scarecrow body
 Roll a piece of 2” x 4” x 3’ woven wire around a 3” piece of PVC pipe to form a leg. Mark and cut the woven wire long enough to leave wire tabs to tie the leg seam. Also cut the leg bottom wire strand off to create tabs. These tabs will be used later for binding the legs and torso together. Tie the edges together with the tabs and wire ties. Slide out the PVC pipe. Make the second leg the same way.
Cut one piece of woven wire to roll for the body. Ours has a 36” waist so the wire was cut about 38”. Tie the edge together in back. Compress the middle to form a body shape.
Set the torso bottom on a piece of 1/2” plywood and trace around it. Cut it out. This forms the bum bottom. Drill four holes in the bum near the edge to later tie the torso to the bum with wire.
Set one leg on the underside of the bum to mark where to drill holes for all the wire tabs 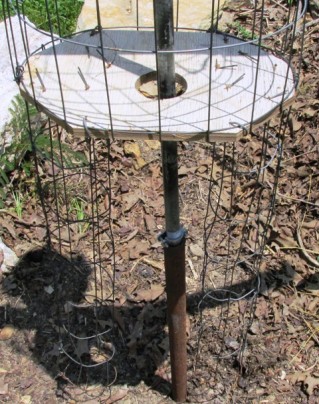 except two. These two tabs will be bent over the edge of the torso later. Do the same for the other leg. Do not attach yet.
On both sides of the torso top, cut the top strand so the shoulders can be rolled over. Bind with wire ties.
Cut one piece of 2” schedule 80 PVC pipe 17” for the shoulder pipe. Drill a 1” hole into the center (not through both sides) of the shoulder pipe. Place the shoulder pipe through the torso, evenly spaced on both ends and with the drilled hole pointing down.
Measure the distance from drilled hole to the back of the torso. Drill a 2” hole in the bum the same distance as the shoulder pipe hole and evenly spaced from each hip.
Push the plywood bum into the torso bottom and bend over the tabs. Thread tie wire through the four drilled holes to secure it. Turn the torso upside down and insert the leg tabs into the drilled holes in the bum. Bend over the tabs in the drilled holes. Bend over the two remaining tabs on the outside edges by hooking them around the torso wire.
Cut two 20” pieces of 2” PVC pipe for the arms. Attach to the shoulder pipe with 2” (22-degree) PVC elbows. Cut two 6” stubs of 1 1/2” PVC to form wrists to slide into the arms. Drill a hole through the arm bottom and wrist to insert a screw. Slide a 1 1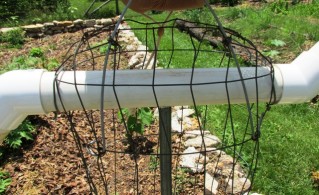 /2” (22-degree) elbow onto each wrist to form hands (later hidden by gloves). To attach a sign, cut another short piece of 1 1/2” PVC pipe to slide into the hand joint so the sign can be removed in high wind.
Cut a 40” piece of 12-gauge wire to form the neck and attach it to the back of the torso with tie wire. Attach the head to the neck by tying the pantyhose ends (explained below) to the inverted U-shaped wire. Secure with additional wire ties. Bend over the bottom of the neck wire to attach to the torso.
 Cut a 4’ piece of 1/2” rigid pipe for the center rod (backbone). Insert a plug of dowel rod into the top of this rod to allow the torso to spin freely. Cut a 4’ piece of 1” rigid pipe to create a telescoping rod. This pipe is pounded into the soil 2’. Attach a U-bolt to adjust the height. Set the body on the rod.
How to make a scarecrow head
Cut off three pantyhose legs. Insert the second and third legs into the first to form a triple thickness. Tie a knot at least 6” from the toe end. Do not cut off the tail. Stuff with polyester or cotton filler material. I used stuffing from an old pillow. Make the head larger and about 6” longer than an actual head. The face will compress when eyes are added and the high forehead holds a hat in place. After filling, tie off the bottom of the head, leaving the long tail for tying onto the body.
 With permanent marker or paint, draw a nose, remembering to keep a high forehead. Attach two 1” shiny buttons for the eyes by sewing all the way through the head with upholstery thread or fishing line and a long needle, pulling tight. At the back of the head, tie off the thread to a large washer or curtain ring. Draw or stitch a mouth. To stitch, pull the thread tightly through the head. Draw on ears. To make 3D ears or a nose, cut out 3” circles of pantyhose. Hand baste around the edge of the circles to form a drawstring. Stuff lightly and pull the thread tight, forming a pouch. Glue or stitch to the head.
Cut yarn hair and attach to the top of the head by using the top pantyhose tail to tie around the bundle of yarn strands. Attach the head to the body as explained above.
Install your scarecrow
Insert the center pipe into the larger pipe driven into the soil. Be sure to allow enough space for your scarecrow to spin without hitting any plants or other obstacles. Dress your scarecrow as desired. To put on a shirt, temporarily remove one arm. A belt or suspenders may be necessary to keep pants up, especially in rain.
Finally, stand back and admire your new friend. Be prepared to laugh yourself silly as you welcome your action scarecrow to the family and occasionally startle yourself in the garden.
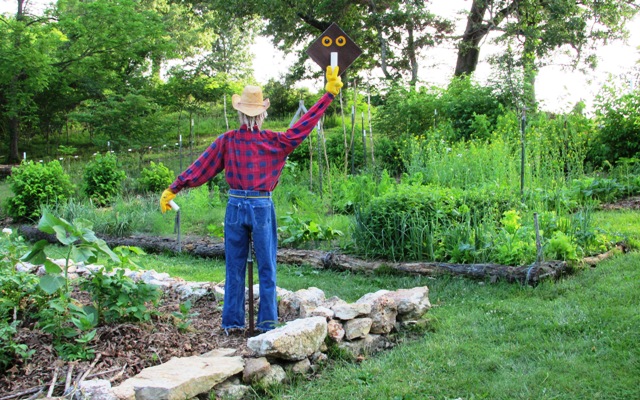
Check back soon (after the first breezy day here) for a video of Woody the Action Scarecrow turning in the wind and rattling his musical chimes!
For more fun scarecrow ideas, check out this Mother Earth News scarecrow contest slideshow from 1989 or this spinning scarecrow from 1980.
If you’d like to learn how to get water from your drilled well without electricity, please see this blog.
©2014 Well WaterBoy Products LLC ♦ WaterBuck Pump™ ♦ Pedal Powered PTO™