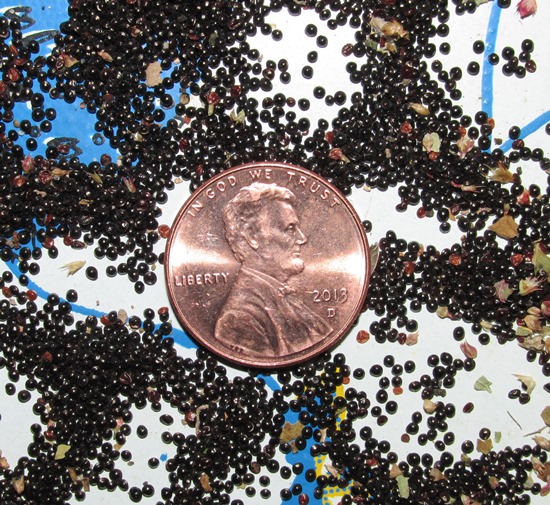
Sowing tiny seeds like turnips, rutabagas, onions, leeks and herbs can be difficult. For instance, the seeds usually come out of the packet too quickly without enough space between the seeds. Also, heavy rains can wash the seeds into a pile before they’ve sprouted. And, tiny sprouts dry out quickly.
Fortunately, there is a simple, quick technique for ensuring your veggies are properly spaced in the garden.
The next time you’re at a store that sells seedlings, ask if you can have a few of the empty plastic seedling trays. They are discarded by the millions each season. The trays with openings about 3 inches square (or round) work well for this project. Smaller openings don’t hold enough soil and larger openings use up a lot of potting mix.
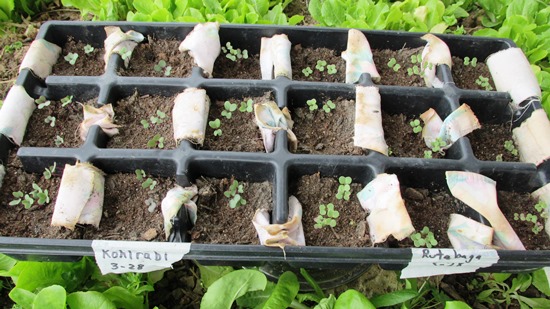
To begin, cut or tear 2 inch strips of fabric long enough to reach the bottom of the tray opening, yet leaving about a 1 inch tab on each side (the same as those plastic tabs for getting batteries out of clock radios easily). This fabric strip will be used to lift out the soil and seedlings in one block like a piece of cake, only better for you.
Next, fill the compartment with moist potting soil. Root crops can be planted in the multi-block or cluster method, allowing more plants to be grown in a small space. The fruits will not get as large as if grown singly to maturity, but they can be enjoyed as babies or eaten gradually to thin them.
Planting in clusters works well with bulb, root and stem-type vegetables. Depending on the size of your tray compartments and the vegetable you’re planting, place about 3-5 seeds in each cell. Remember that beet, Swiss chard and New Zealand spinach seeds are already a cluster of seeds per pod. One or two seeds per cell are sufficient. Leafy crops can also be started in trays, but should be thinned when transplanted. Cover the seeds with soil as usual. Label your trays with good tape or sticks and permanent marker, not pencil. (Trust me. You won’t remember what you planted if you don’t label them immediately.)
Water lightly and place in a warm, sunlit area. Some seeds will sprout in just a few days.
When the seedlings have one or two true leaves, begin hardening them off by exposing them to outside conditions for gradually extended periods daily. After about a week of this, they’re ready to move to the garden. This step can be eliminated in warm climates. If planting spinach, transplant it in the garden soon after sprouting. Spinach doesn’t like to have its roots disturbed.
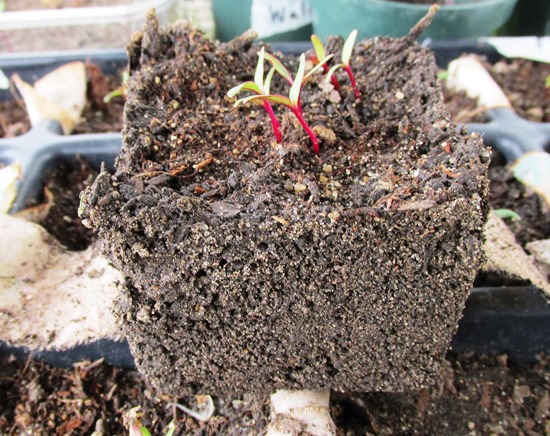
Test the condition of your soil by gently lifting the fabric tabs on one cell. The entire cube, or cylinder, should come out easily and retain all or most of the soil. If necessary, allow the soil to dry out a bit. Or, lightly water it. This step will depend on the potting mix you used.
Ideally, you will want to transplant your seedlings in the evening with rain sprinkles in the forecast. Plant your crop one compartment at a time. Make a hole just large enough for the root ball. The seedlings should be planted at the same depth they grew in the tray. Do not touch the plant stems, and do not plant them too deep, which can allow diseases to develop.
The fabric strip can be peeled off of the soil blocks and saved. Or, if they’re made of a natural material, simply compost the strips. It doesn’t hurt to just leave the fabric attached to the soil cube, either, if it’s biodegradable.
©2014 Well WaterBoy Products LLC ♦ WaterBuck Pump™ ♦ Pedal Powered PTO™ 
